This post may contain affiliate links. See my disclosure policy.
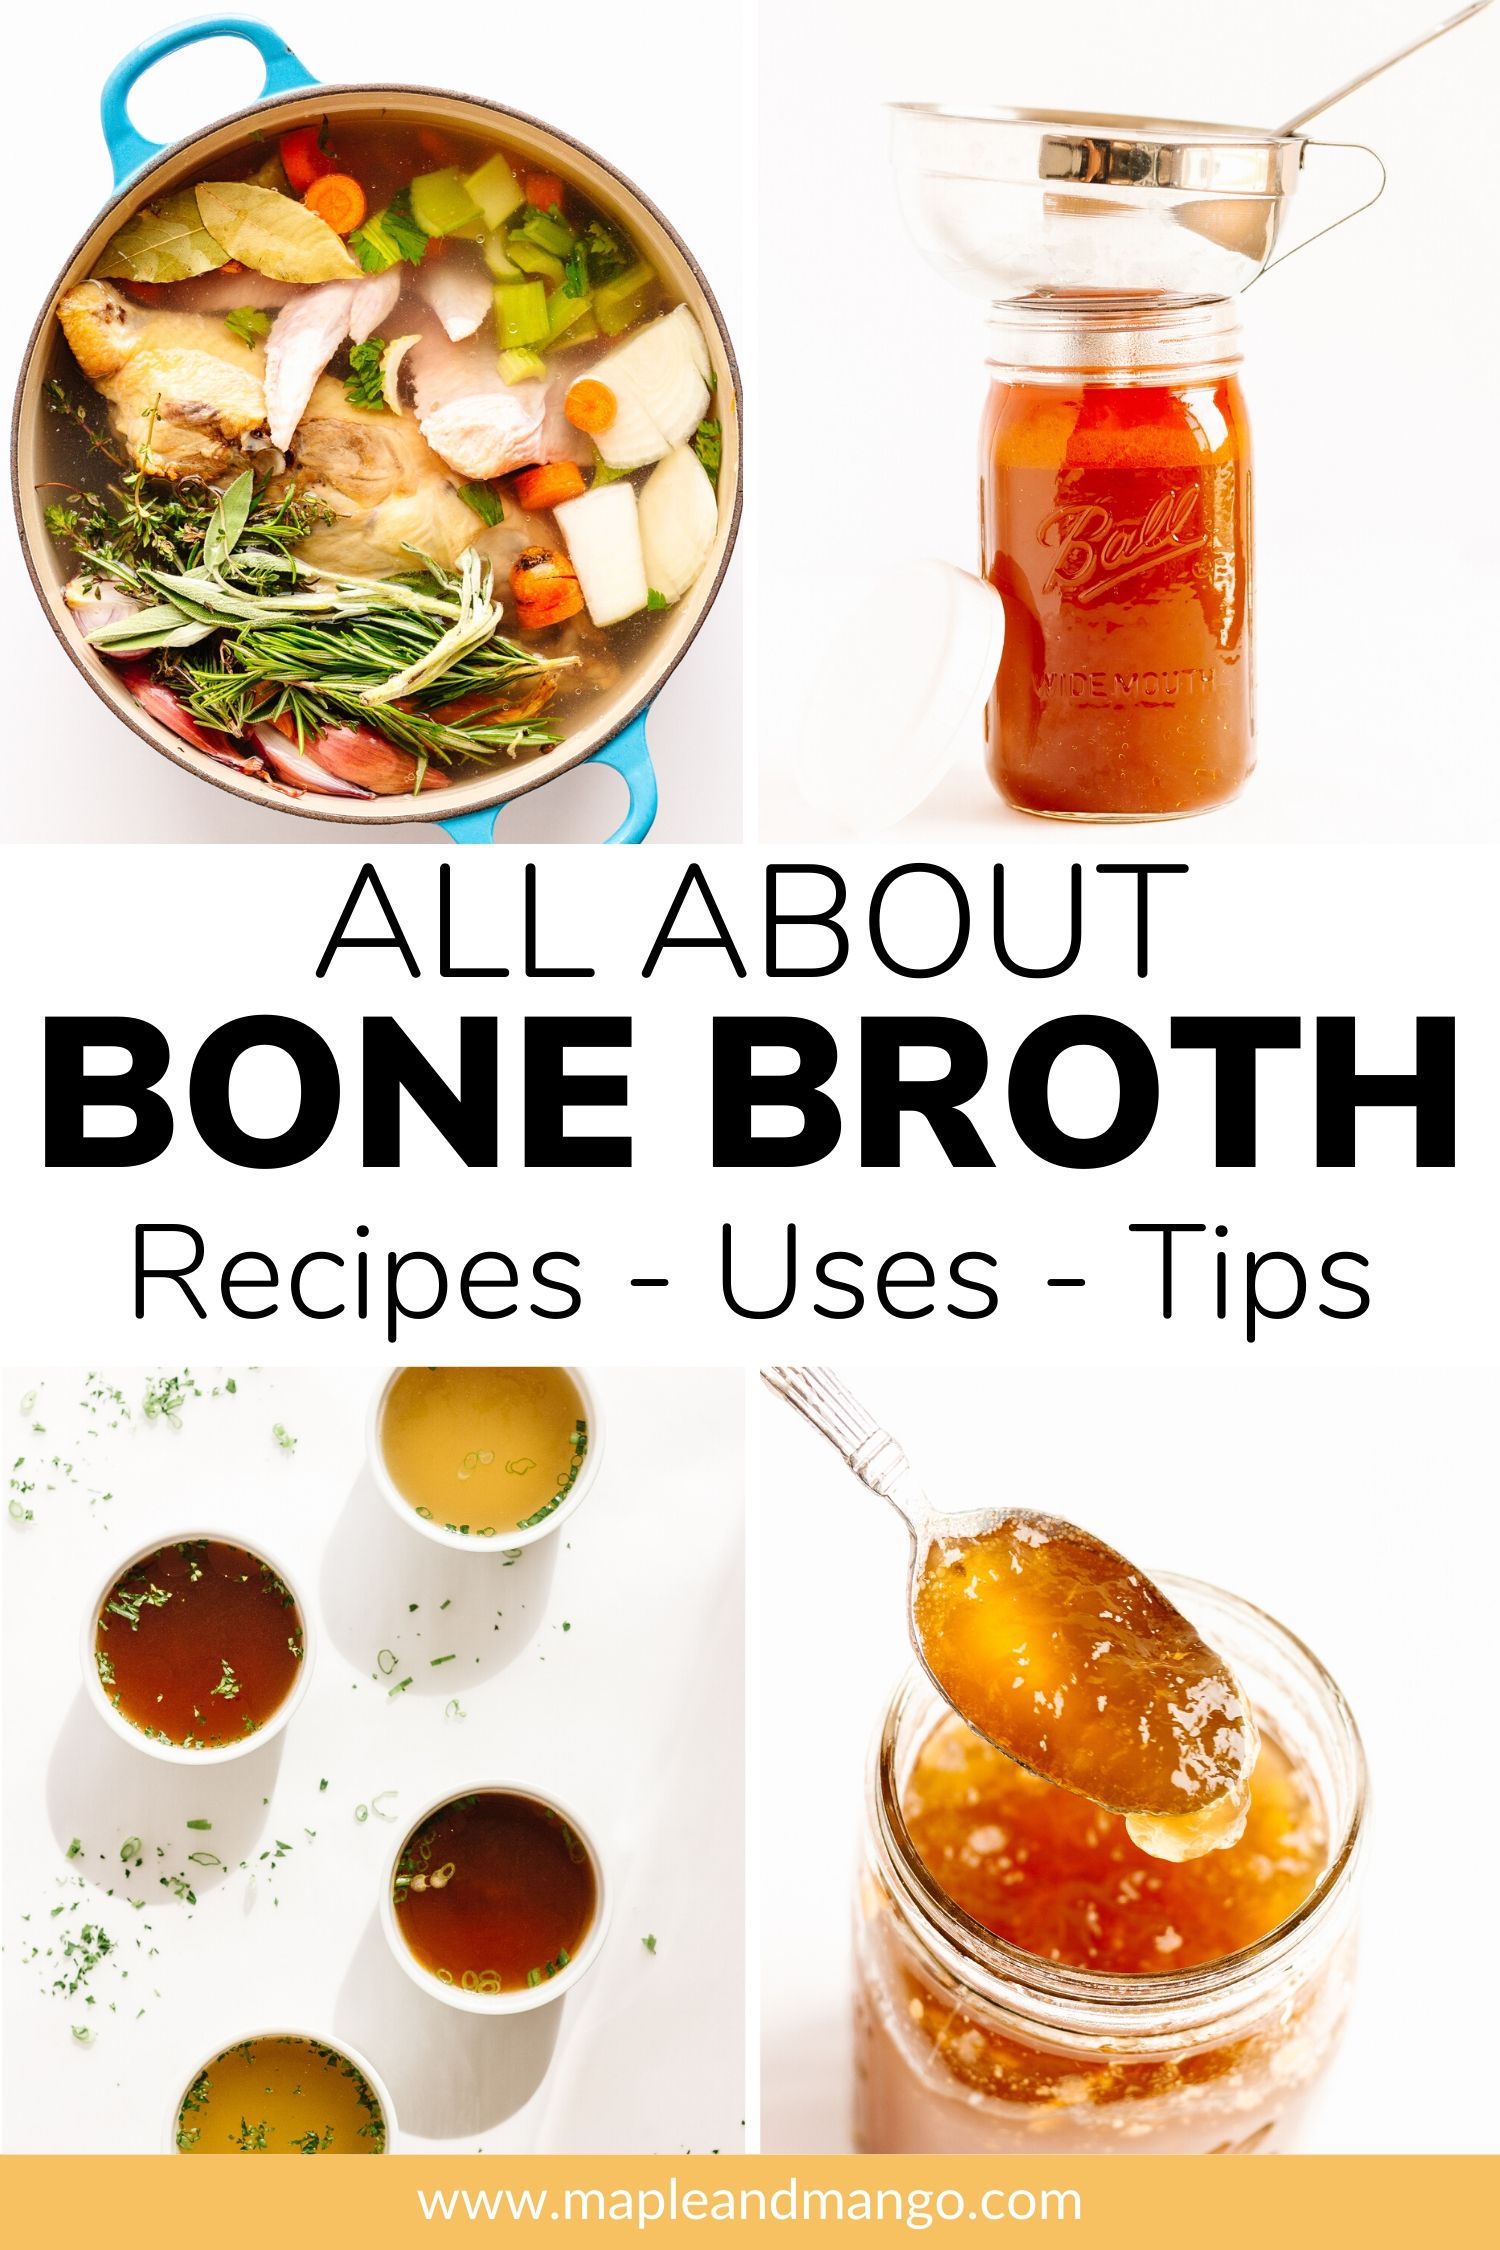
Curious about bone broth? Bone broth is delicious, rich in nutrients and an incredibly versatile staple to have on hand. Learn all about it: how to make it (Instant Pot, slow cooker and stovetop instructions), helpful tips, benefits, uses and much much more!
I am willing to bet that most of you have heard the term “bone broth” before. It has become somewhat trendy but it definitely is not a new food. This nutrient rich, versatile liquid is as old as time seeing as many cultures have been making versions of it for centuries.
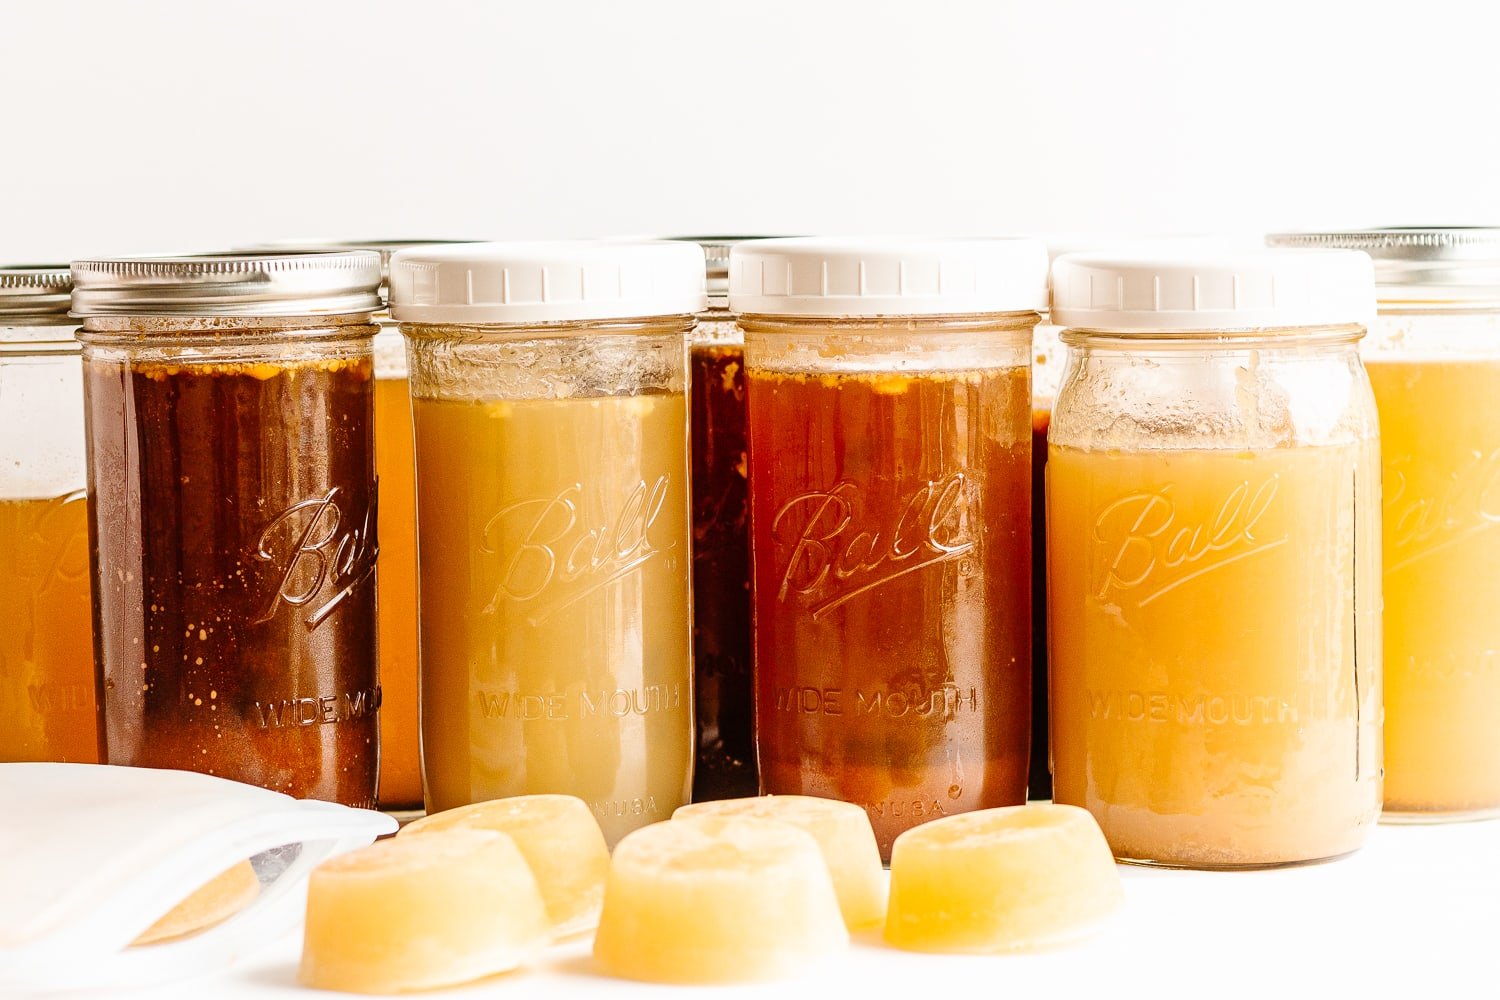
My freezer usually contains a number of frozen pucks and jars of this “liquid gold”. Bone broth is an amazing staple to keep on hand since it adds flavour and nutrition to a variety of dishes.
Homemade bone broth rocks! You get to control the quality and it tends to be cheaper and taste so much better than most store bought broths and stocks. Not to mention that it is easy to make! You can use an Instant Pot, slow cooker or your stovetop. The choice is yours!
Are you ready to dive into all things bone broth? Learn how to make it, lots of tips and tricks, benefits, uses and much much more! Let’s get started…
What Is Bone Broth?
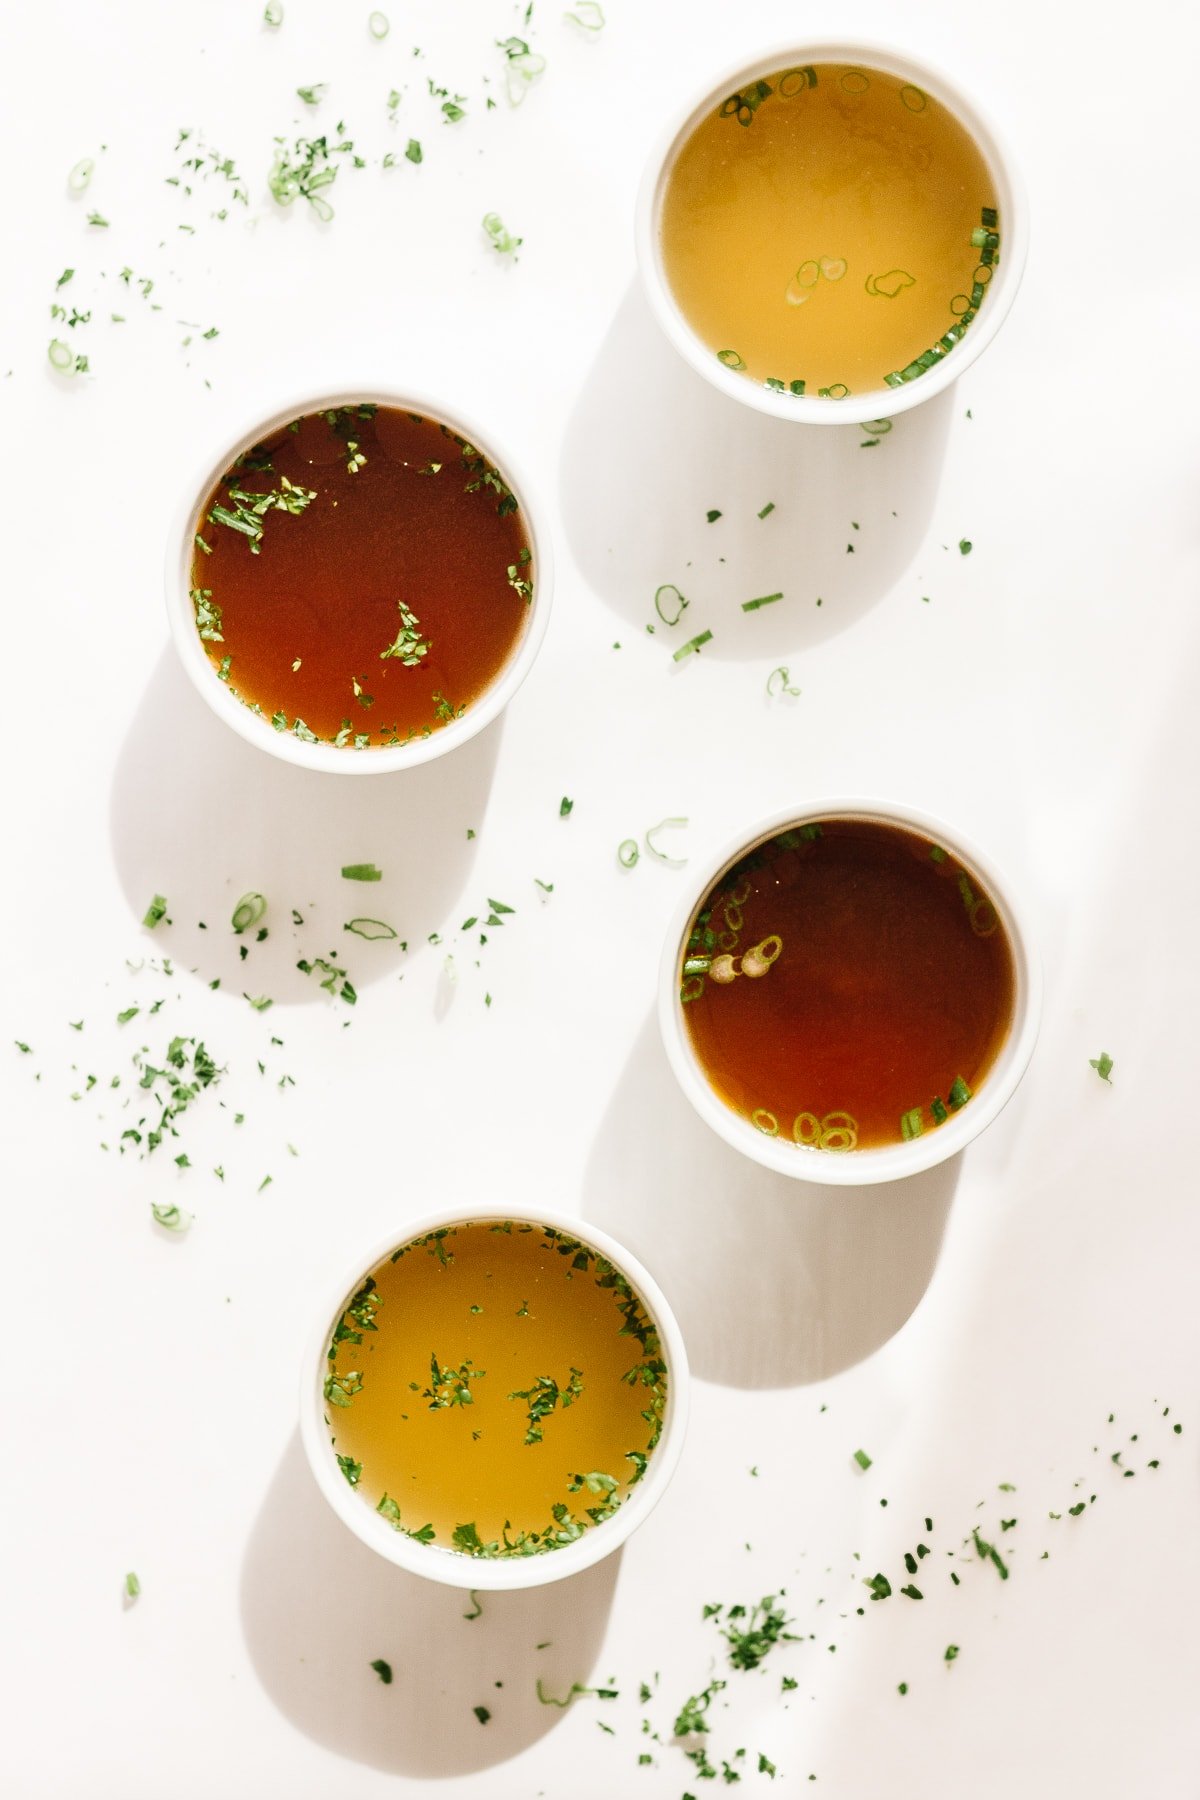
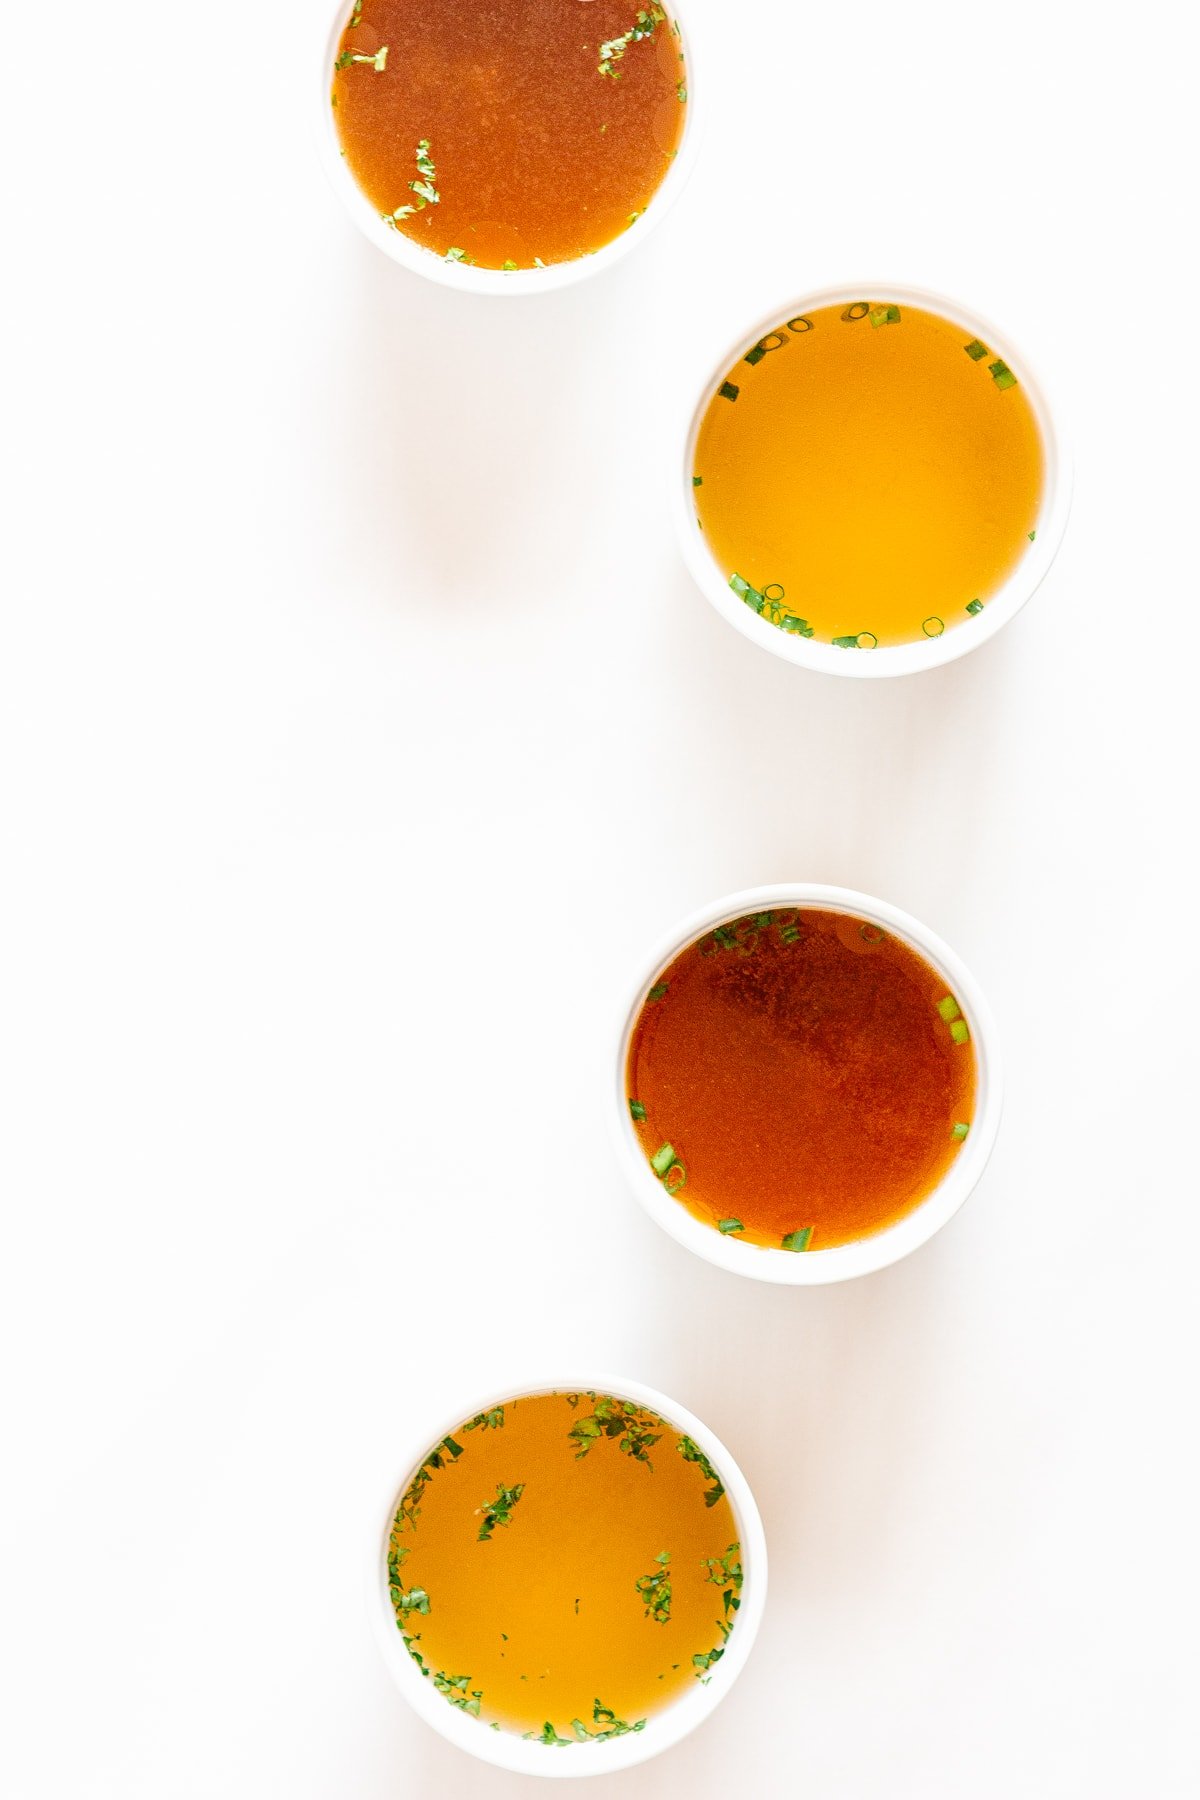
Bone broth is a flavorful, nutrient rich liquid similar to stock. It is made by simmering animal bones in water usually along with some vegetables, aromatics and a touch of something acidic like apple cider vinegar (this helps to extract minerals and collagen from the bones and connective tissue).
Broth vs Stock vs Bone Broth
So what’s the difference between broth, stock and bone broth? It can get a little confusing since these terms are often used interchangeably. Here’s a quick overview of the differences:
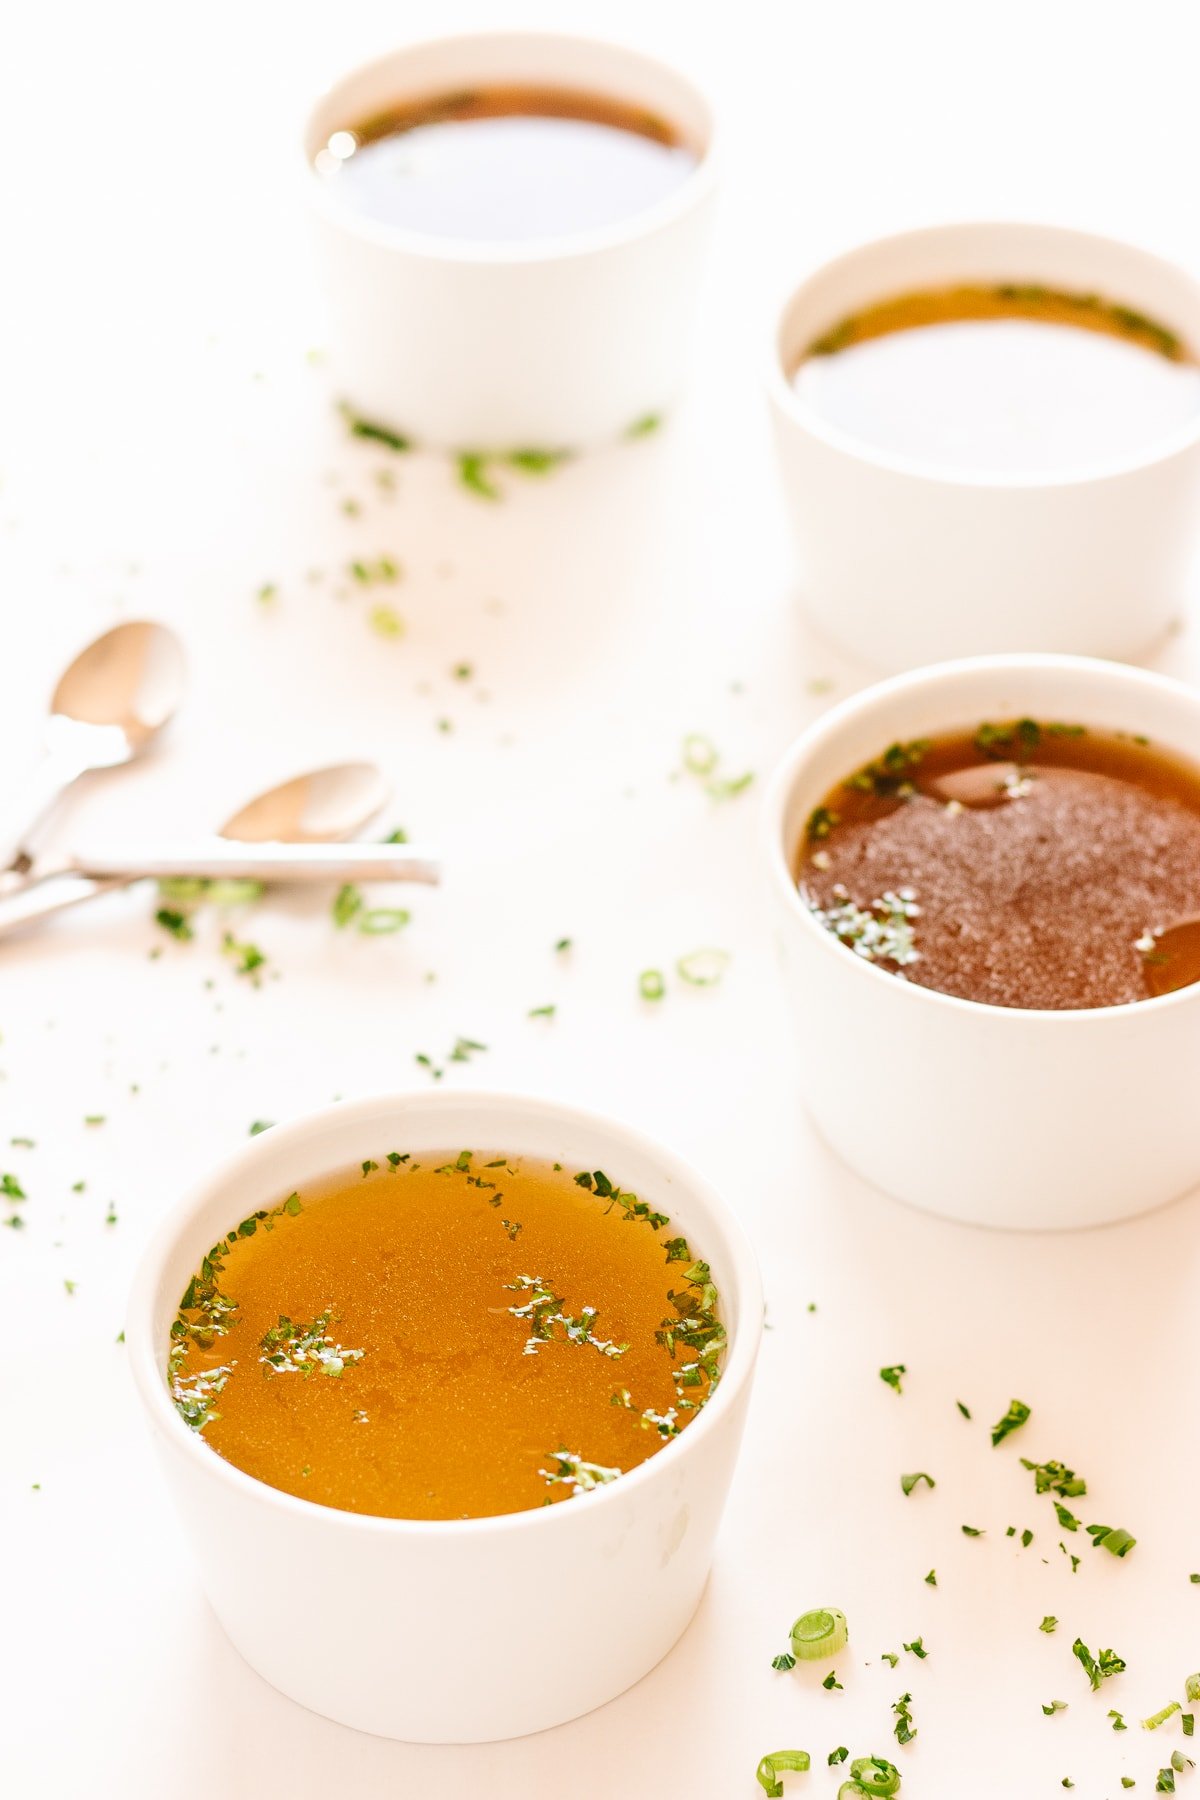
- Broth: Made from simmering meat for a short period of time. Typically more clear in color and a mellow flavor.
- Stock: Made from simmering bones that have a small amount of meat attached to them for a longer period of time. Typically rich in color and flavor.
- Bone Broth: Made from simmering bones that have a small amount of meat attached to them for a long time. Using a pressure cooker like the Instant Pot can greatly reduce the cook time though. Bone broth is slightly different from stock, in that it is cooked longer with a little acidity to help extract trace minerals and collagen from the bones and connective tissue.
Why To Make Your Own
Wait a second – can’t I just buy it? You most definitely can but here are a few reasons why homemade bone broth rocks!
- Less Expensive: You can purchase good quality bone broths and stocks these days but they come with a hefty price tag. It is so easy and affordable to make your own.
- More Flavorful: Most store bought stocks and broths tend to be bland whereas the homemade version is rich, flavorful and can be adjusted to suit your tastes.
- Complete Control: You are in control of the ingredients and the quality. No need to worry about additives like artificial enhancers or excess salt.
- Low Waste: There is no packaging and you could potentially make it entirely from things that you would normally throw away (i.e. saved bones from meat that was eaten and veggie scraps).
Benefits Of Bone Broth
Is bone broth good for you? Not only is it delicious and comforting but it may also offer a number of other benefits:
- Rich in nutrients
- Boosts the immune system
- Supports joint and bone health
- Promotes healthy skin, hair and nails
- Simple to digest and promotes gut and digestive health
Here are a few articles to check out if you are interested in learning about the benefits of bone broth in more detail: The Bountiful Benefits of Bone Broth: A Comprehensive Guide by Chris Kresser and The Top 6 Bone Broth Benefits by Medical News Today.
How To Make Bone Broth
Learn how to make homemade bone broth in the Instant Pot (pressure cooker), slow cooker or on your stovetop. My preferred method is the Instant Pot since it is easy and much faster than the other methods.
What You Will Need
You will need the following ingredients:
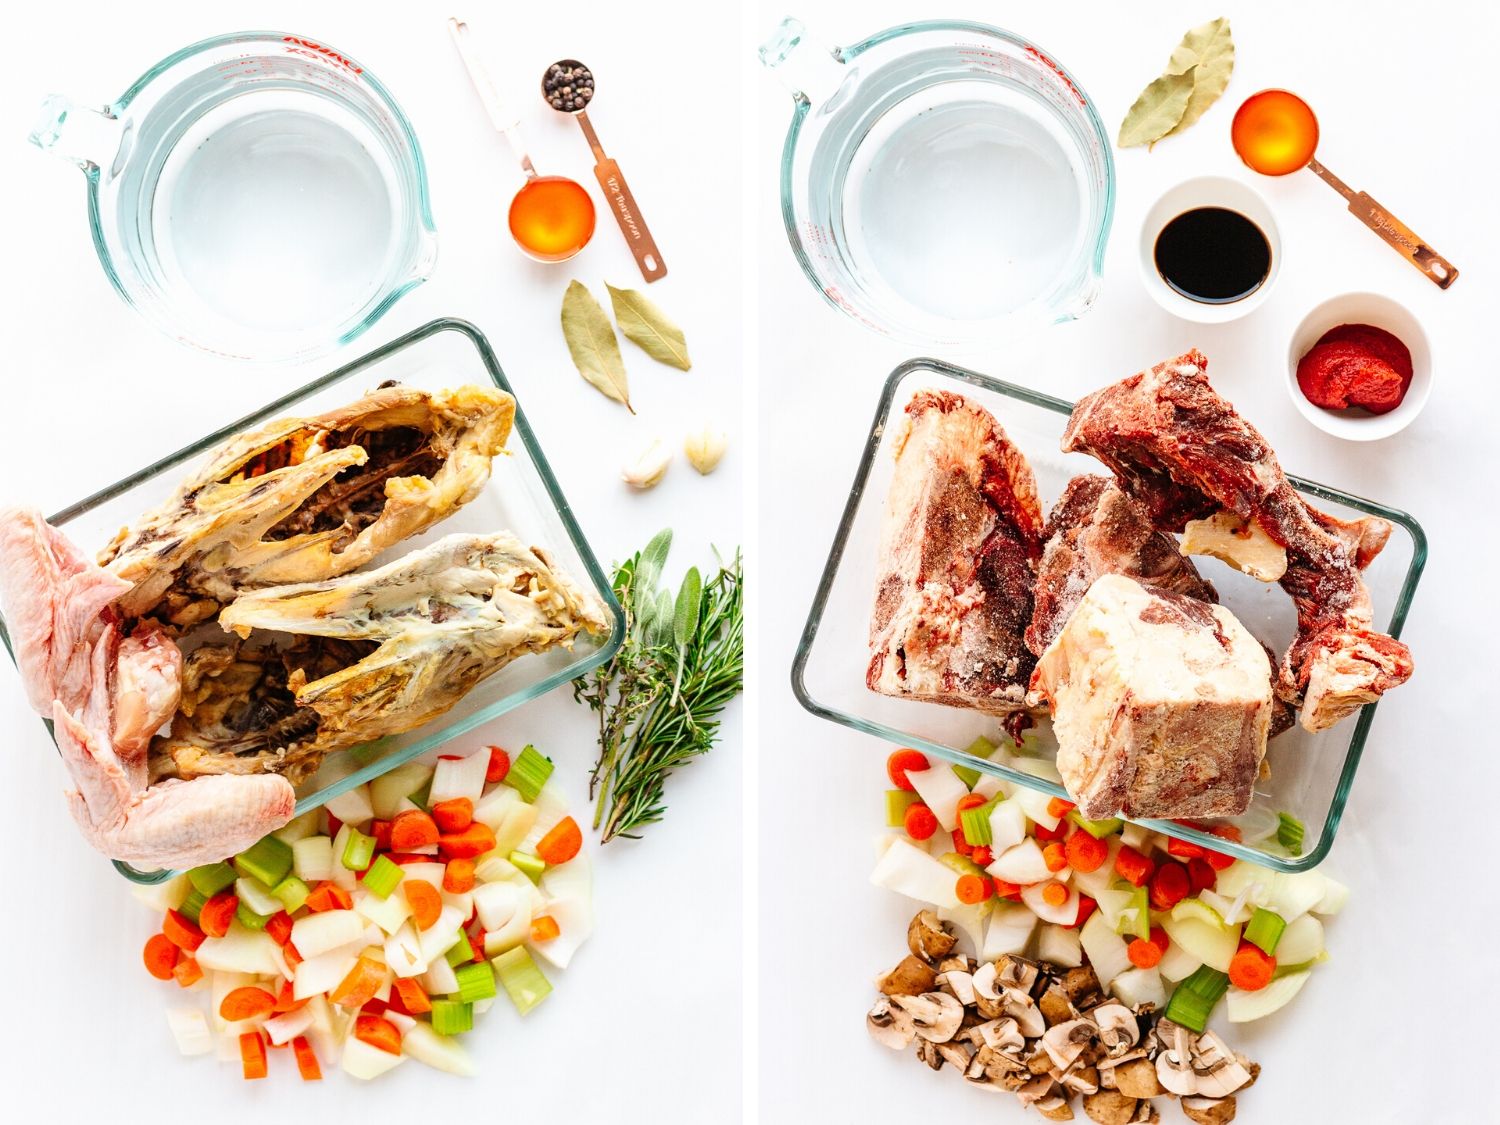
- Bones: You can use chicken, turkey, beef or other bones. Save bones from meals (i.e. leftover roast chicken carcass, bone-in roasts) or purchase them. Use a variety of bones including some meaty bones and some joints or bones with connective tissue.
- Vegetables + Aromatics: These build flavor and add some extra nutrition. Have fun playing here! I tend to add in chopped onions, carrot, celery, garlic, peppercorns, bay leaves and fresh herbs when making chicken bone broth. For beef bone broth, I typically add chopped onions, carrot, celery, mushrooms, tomato paste, bay leaves and a splash of tamari. Note: Add garlic or fresh herbs in the last hour if using the stovetop or slow cooker methods. Otherwise, it can be overpowering.
- Apple Cider Vinegar: This helps to pull the nutrients and collagen out of the bones and connective tissue. I promise that your broth won’t taste sour – just a touch is added. This is the brand that I like to use.
- Water: Everything gets covered in cold, filtered water.
You will also need the following equipment:
- Cooking Vessel: Depending on your chosen cooking method, you will either need an Instant Pot (or other electric pressure cooker), slow cooker or a stock pot.
- Fine Mesh Sieve: A fine mesh sieve or strainer is used to strain the broth.
- Large Bowl Pitcher or Pot: You need a large vessel of some sort to strain your broth into.
Step By Step Instructions
Let’s make some homemade bone broth…
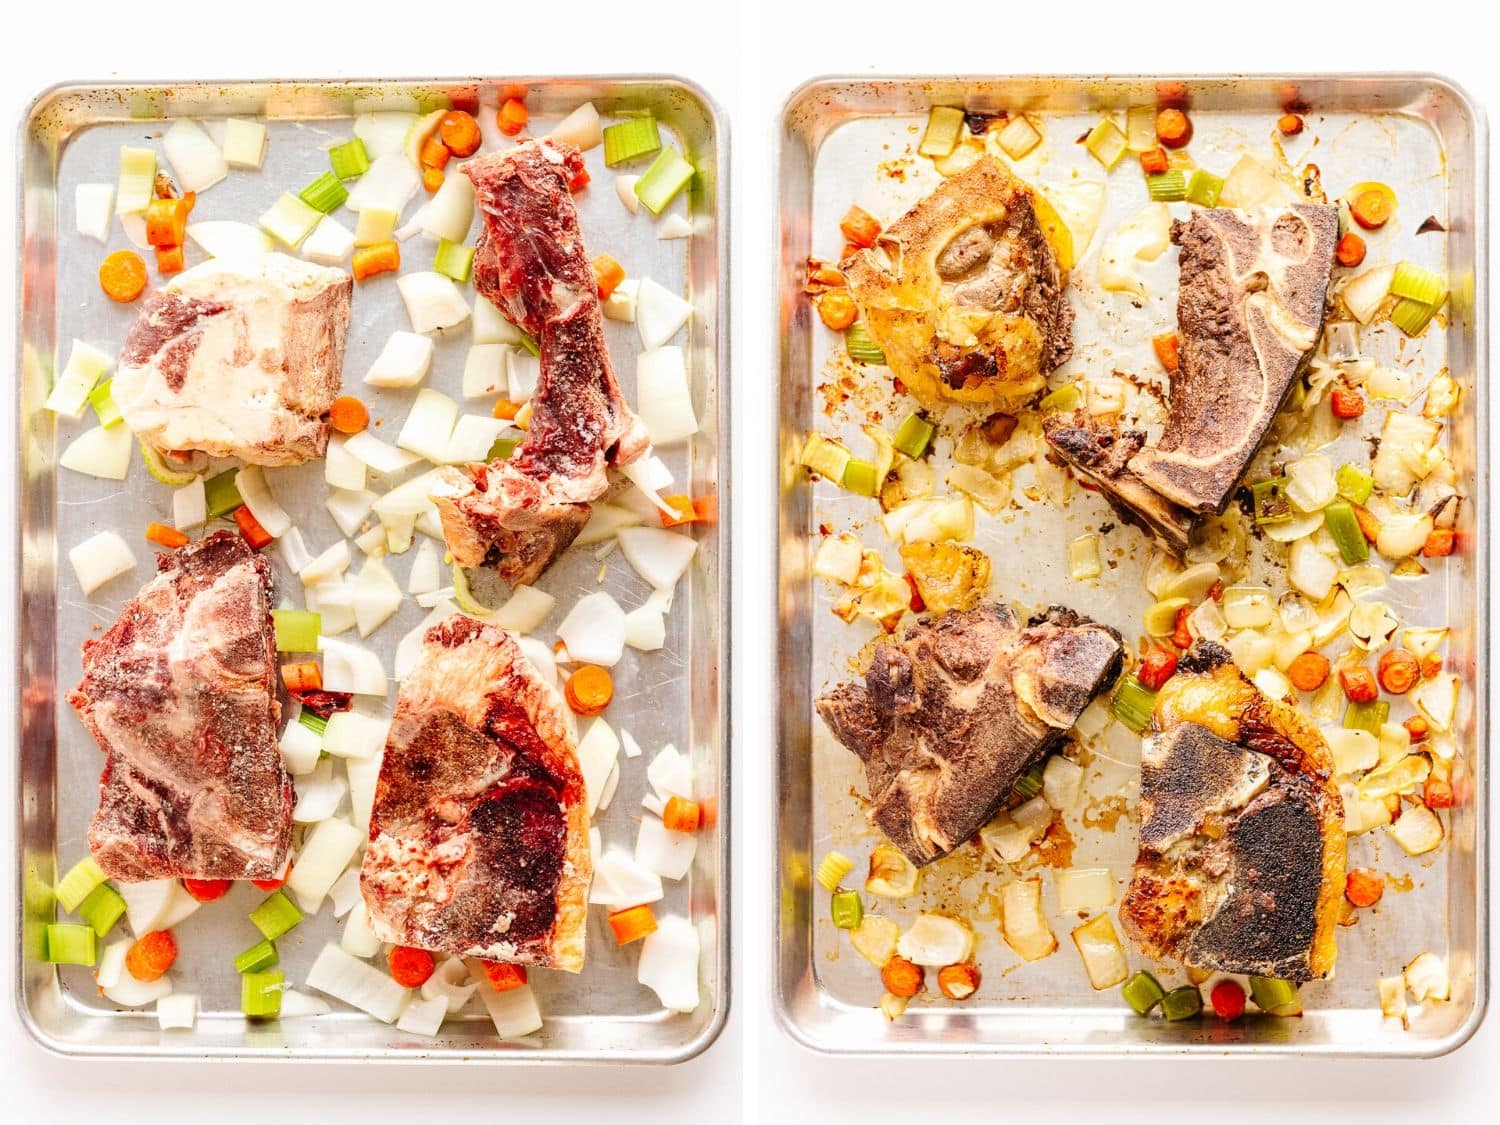
- Roast Bones: If you are using bones leftover from a cooked chicken or roast then you can skip this step. However, if you are using raw bones, roasting them first will give your bone broth great flavor, color and richness. Roast in a 400F oven for 30-40 minutes (flipping halfway through) or until golden brown. You can even roast some of the veggies along with the bones if you like (just watch that nothing burns).
- Everything In: Place all the ingredients into your Instant Pot, slow cooker or large pot and fill with water until it just covers the bones. If using the Instant Pot, make sure that the water stays 1 inch below the Max Fill Line – it’s ok if the bones are not fully covered.


- Get Cooking: Time to start cooking your bone broth using your chosen method…
- Stovetop: Bring to a boil and then immediately reduce heat to low so that it is at a very gentle simmer. Cover with a lid (leave it slightly ajar) and cook for 12-24 hours for poultry and 24-48 hours for beef or other meats.
- Slow Cooker: Set to high for the first hour and then set to cook on low for the remaining time (same time frame as stovetop method).
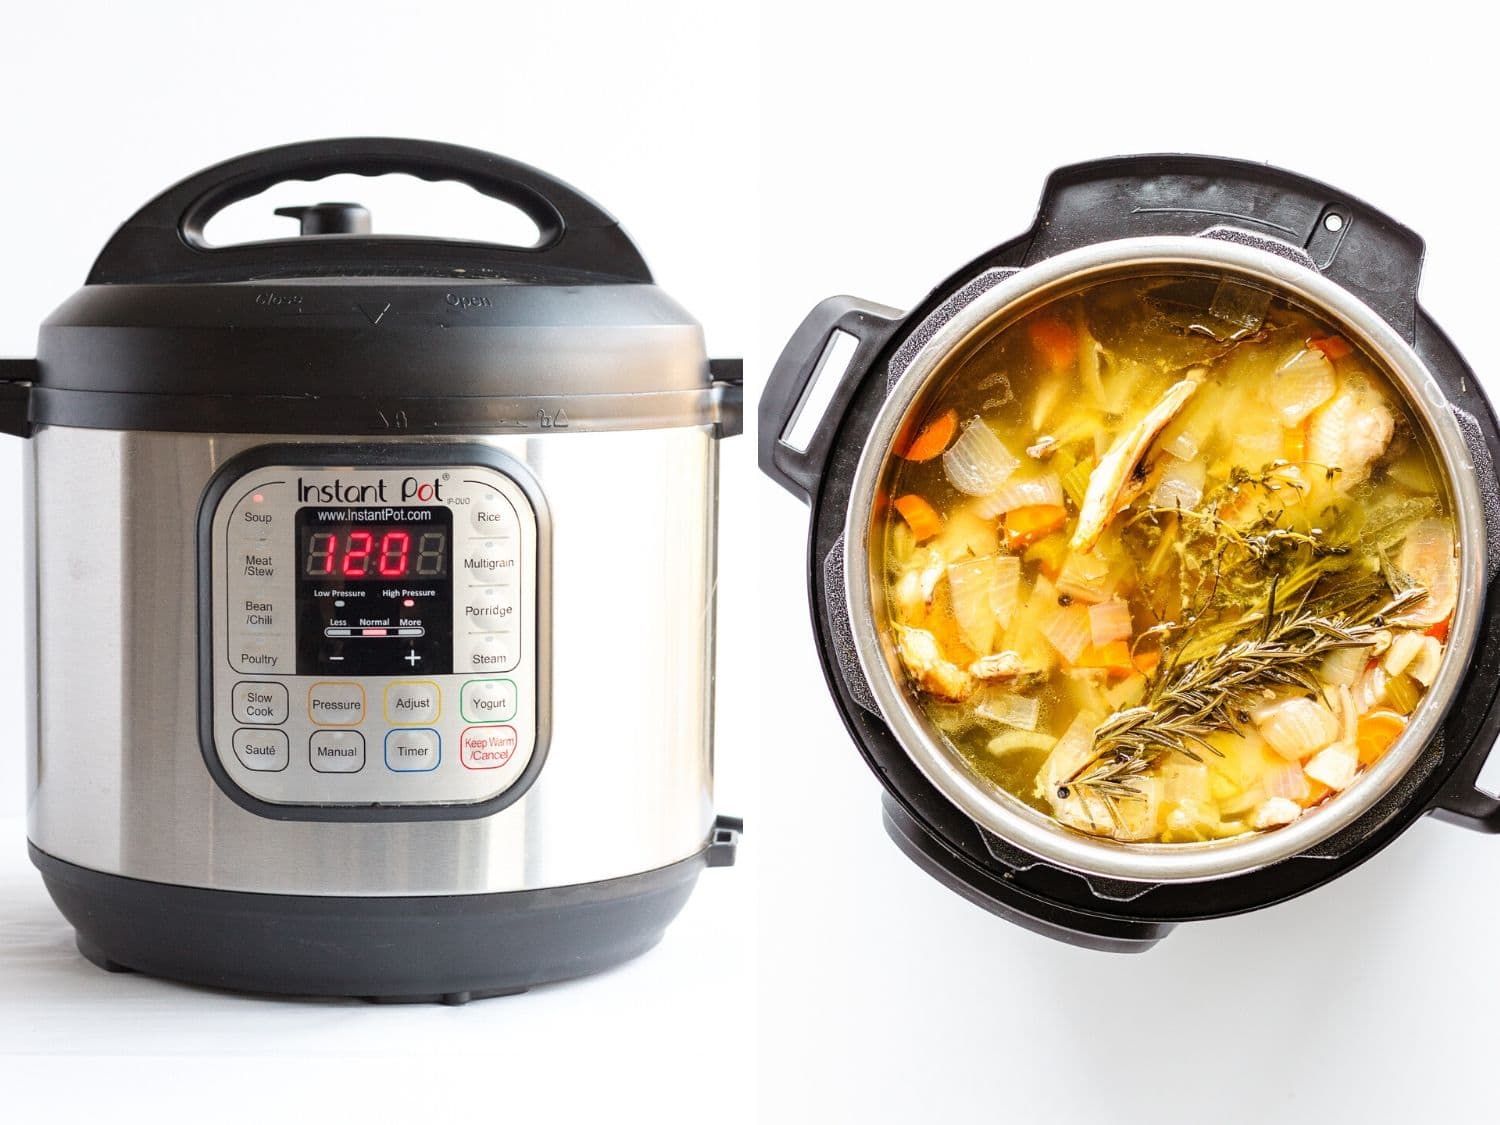
- Instant Pot: My favorite method! Press the “Soup” button (or Manual/Pressure Cook button) and set to cook for 120 minutes (high pressure) followed by a natural release.
New to the Instant Pot? Check out these 10 Instant Pot Tips For Beginners.
- Strain It: Using tongs, pull all the large pieces out first. Then pour the rest through a fine mesh sieve into a large bowl, pitcher or pot.

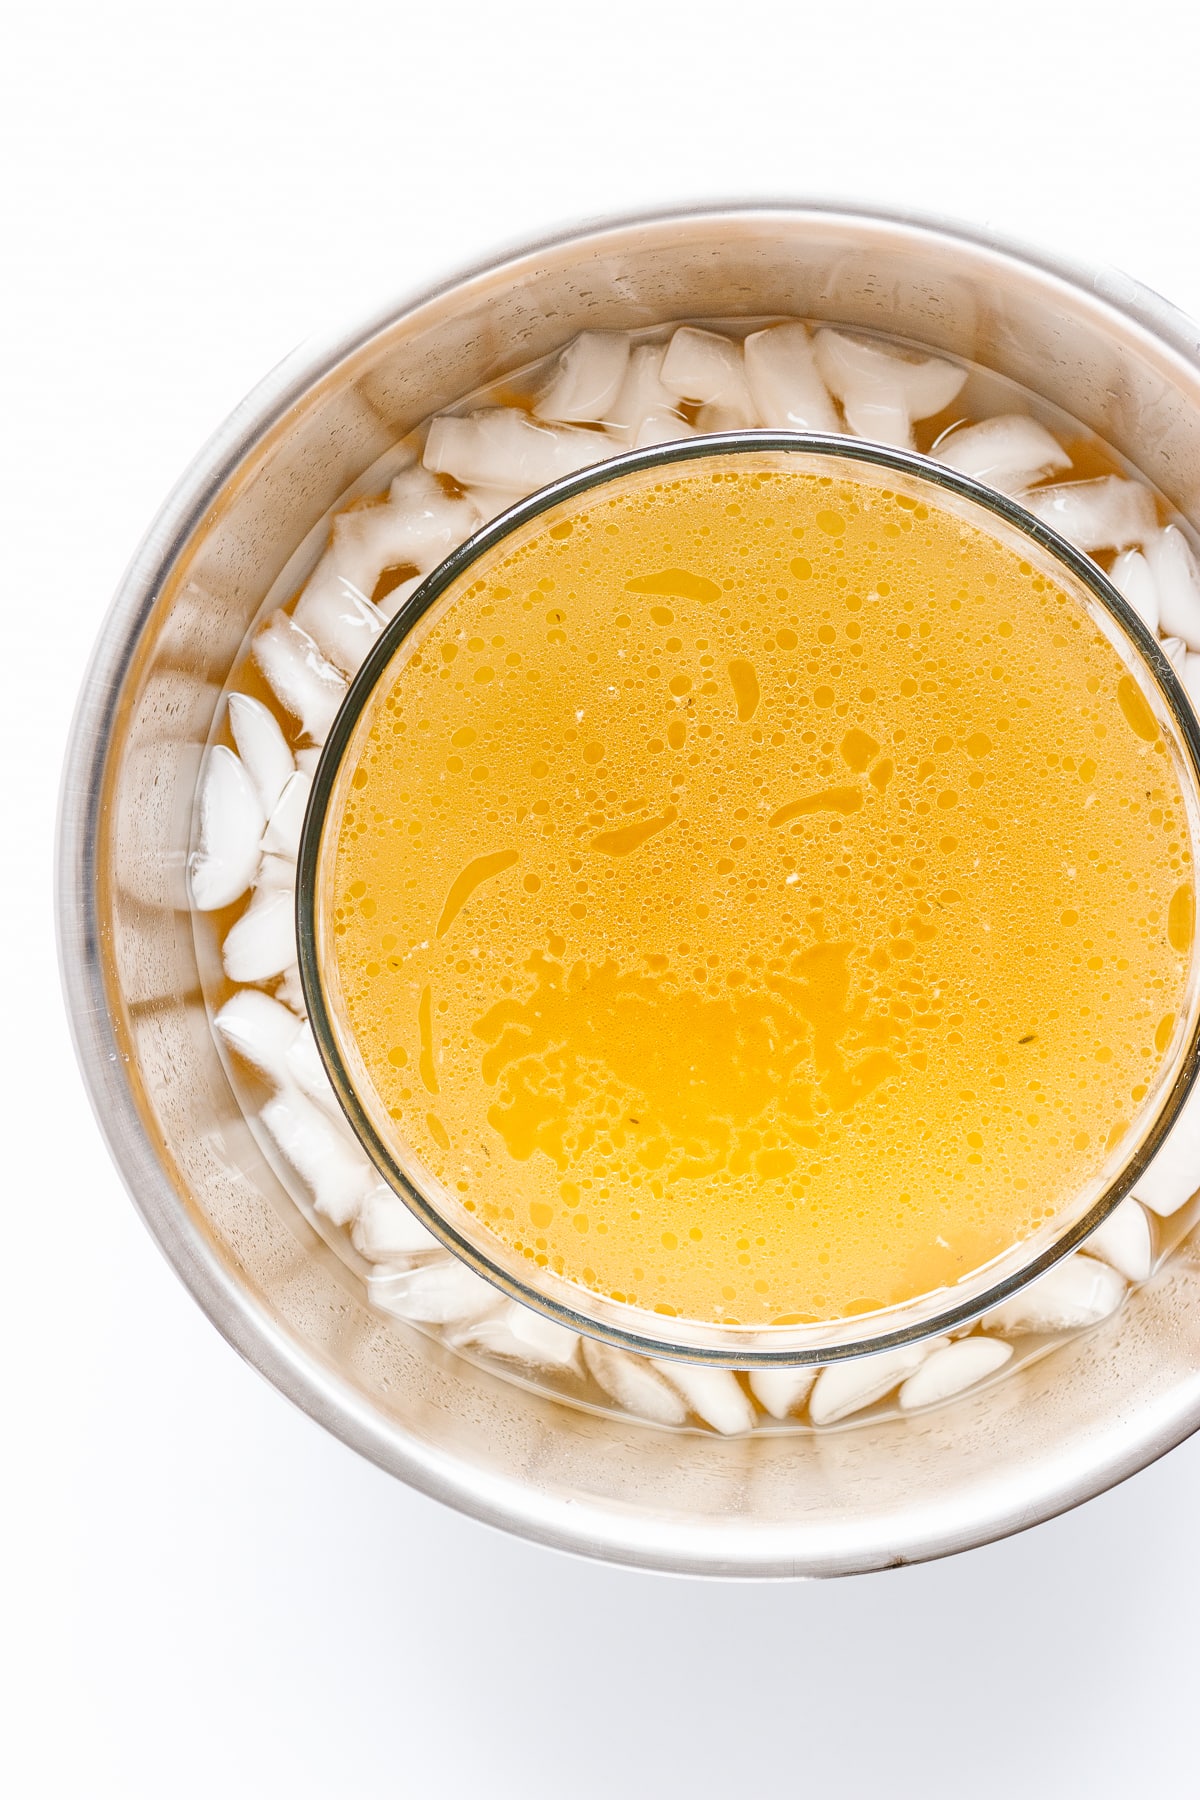
- Quick Chill: Cool down the strained bone broth quickly by using an ice bath. Simply fill a sink or large bowl with ice water and place your bowl or vessel containing the strained bone broth into it. Alternatively, you could also add a few ice cubes directly into the broth. Quick chilling prevents bacteria from growing and your fridge from heating up.
- Store It: Pour into storage containers and store in the fridge for up to a week or freezer for up to 6 months.
Detailed ingredient list and directions located in the recipe card below.
Storage Tips
Now that you have made some delicious and nourishing bone broth, you need to store it right? Let’s talk all things storage including some of my favorite ways to store it.
How long can you store it?
Homemade broths and stocks can be stored in the fridge for 5-7 days or in the freezer for up to 6 months.
Can you freeze bone broth?
You sure can! Freeze it in any freezer safe storage container for up to 6 months. I like to freeze my broths and stocks in a variety of sizes so that I can easily pull out what I need. My favorite storage options are mason jars and silicone molds.
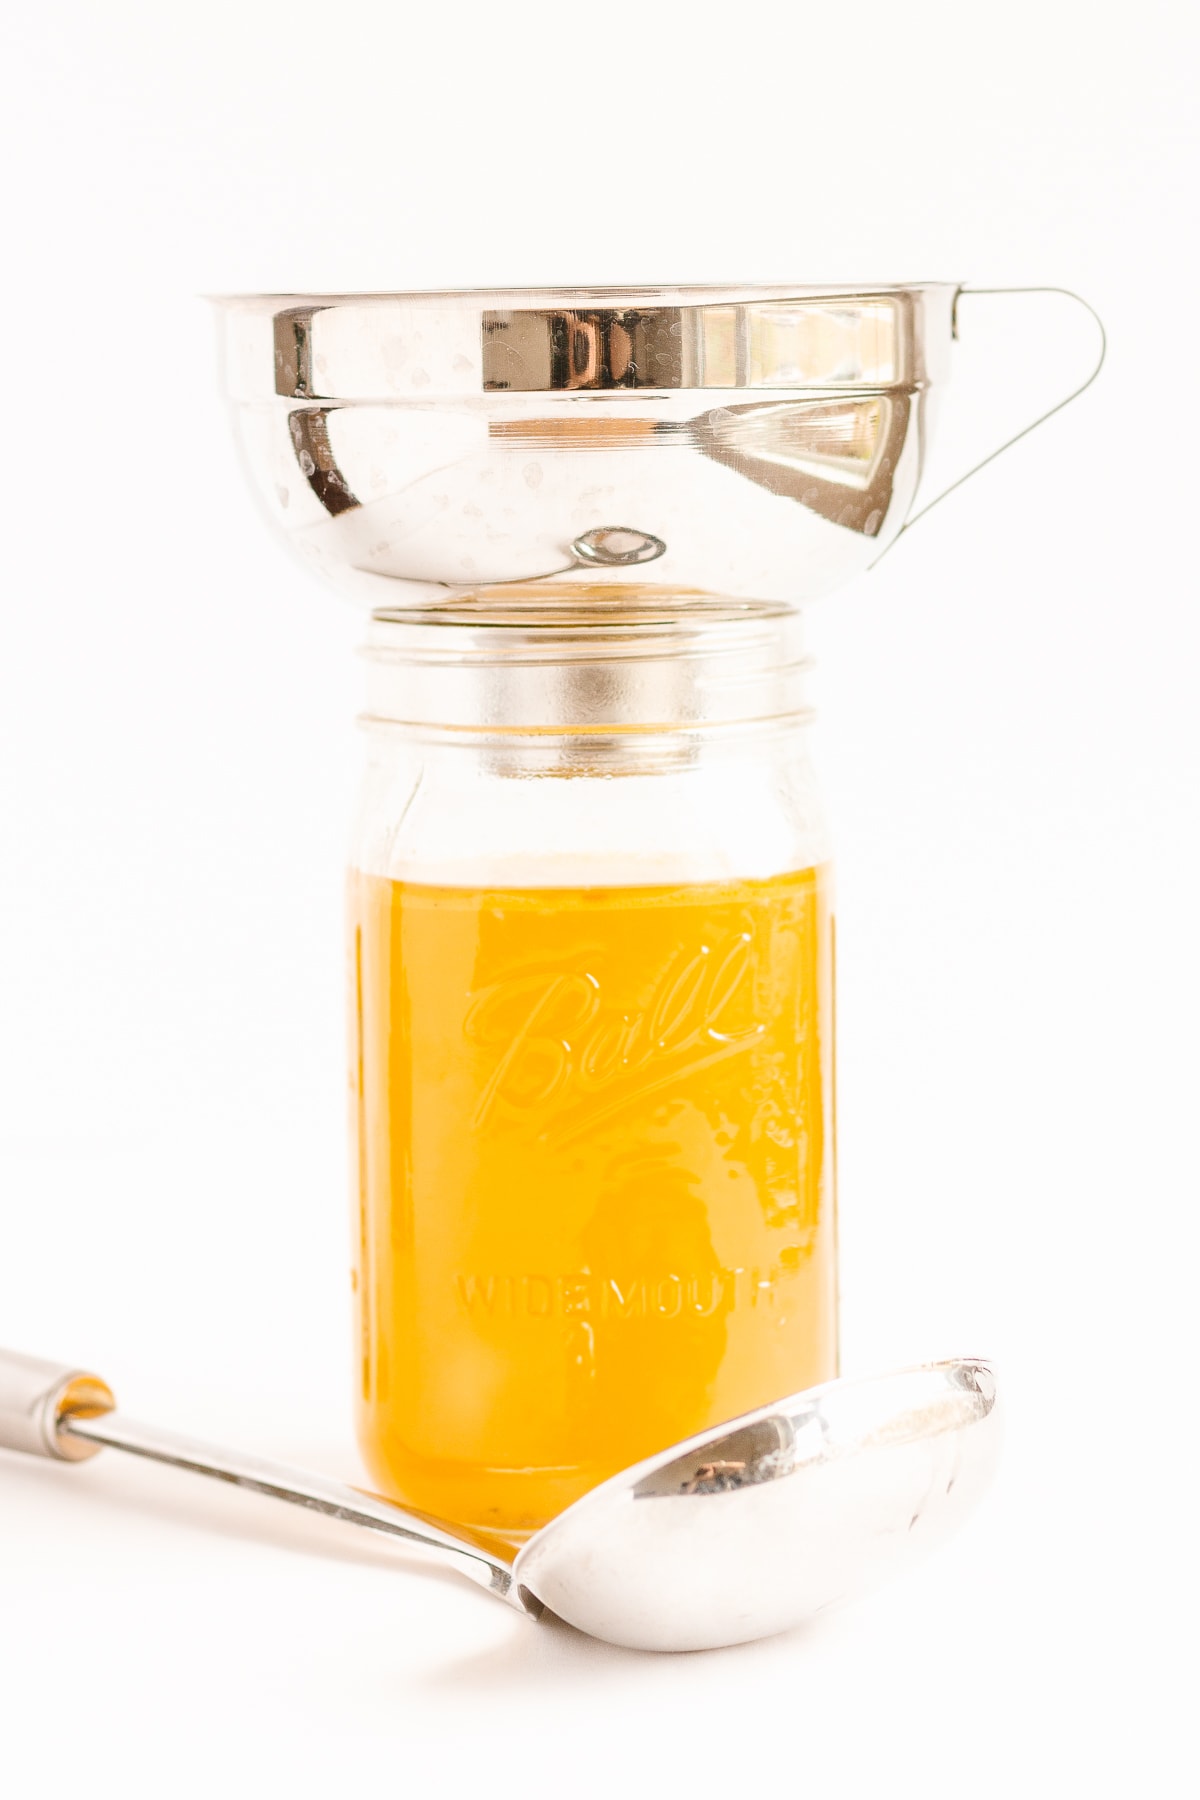
- Mason Jars: These are a great size for recipes requiring larger quantities of broth like soups and stews. I like to use the wide mouth Ball mason jars with screwtop plastic storage caps. My three favourite sizes are the 16 oz, 24 oz and 32 oz. Tip: A wide mouth funnel makes filling jars easy and less messy.
- Silicone Molds: This is my favourite way to portion out broth for all those times you only need a bit. There are so many options but some of my favourites include:
- Silicone Muffin Trays: Simply place it on a baking sheet and fill each muffin cup with broth. Put into the freezer and once frozen, easily pop out your broth “pucks” and store in a freezer bag or container.
- Baby Food Storage Trays: Great way to re-purpose these after you no longer need them for baby food. Also great to purchase specifically for this reason – you can either store right in the tray or pop them out once frozen and store in a freezer bag.
- Souper Cubes: These allow you to freezer your broth in 1 cup segments which is super handy.
Tips for freezing in glass mason jars
I love using mason jars in the freezer but they can crack if you aren’t careful. Follow the tips in this post on Freezing Food In Mason Jars to prevent breakage.
Helpful Tips + Questions
What are the best bones to use?
The best bones to use for bone broth are high quality bones from well-raised animals: grass-fed and pasture-raised. Use a variety of bones that include some bones with connective tissue as well as meaty bones for a bone broth that has great flavour and is rich in protein and gelatin. Some examples include:
- Poultry (chicken, turkey, etc): carcasses, backs, necks, wings, feet (if you are brave they contain a high amount of gelatin)
- Beef (or other meat like pork or lamb): “soup bones”, shanks, oxtails, short ribs, knuckle, feet, joint and neck bones
Where do you get high quality bones from?
Here are a few ways to source bones for bone broth:
- Save leftover bones from meals that you have cooked and store in the freezer until ready to use (i.e. roast chicken or turkey carcasses, bones from roasts, steaks, etc)
- Ask a local butcher or farmer’s market for “soup bones”
- Some grocery stores or health food stores may also sell bones.
- Ask a quality meat delivery service like ButcherBox or truLOCAL
I like to use a combination of saved bones from meals with a few added collagen rich bones (those with connective tissue like necks, backs, wings, knuckles, feet, etc.).
Do you have to roast bones for bone broth?
Roasting the bones first gives your broth/stock great flavor, color and richness. It is a highly recommended step when using meat bones like beef or the bone broth can end up tasting a little funky. However, when it comes to poultry, the choice is yours. Also, if you are using saved bones from previously cooked or roasted meat, you can skip this step.
When should you add salt?
This comes down to personal preference. I avoid adding salt to the bone broth while simmering. Instead, I prefer to season to taste when using the broth since it adds greater flexibility and control. I can then season it in a way that suits the dish it is being used in or I simply just season to taste after broth has been strained with some himalayan pink salt or Herbamare or this homemade bouillon powder.
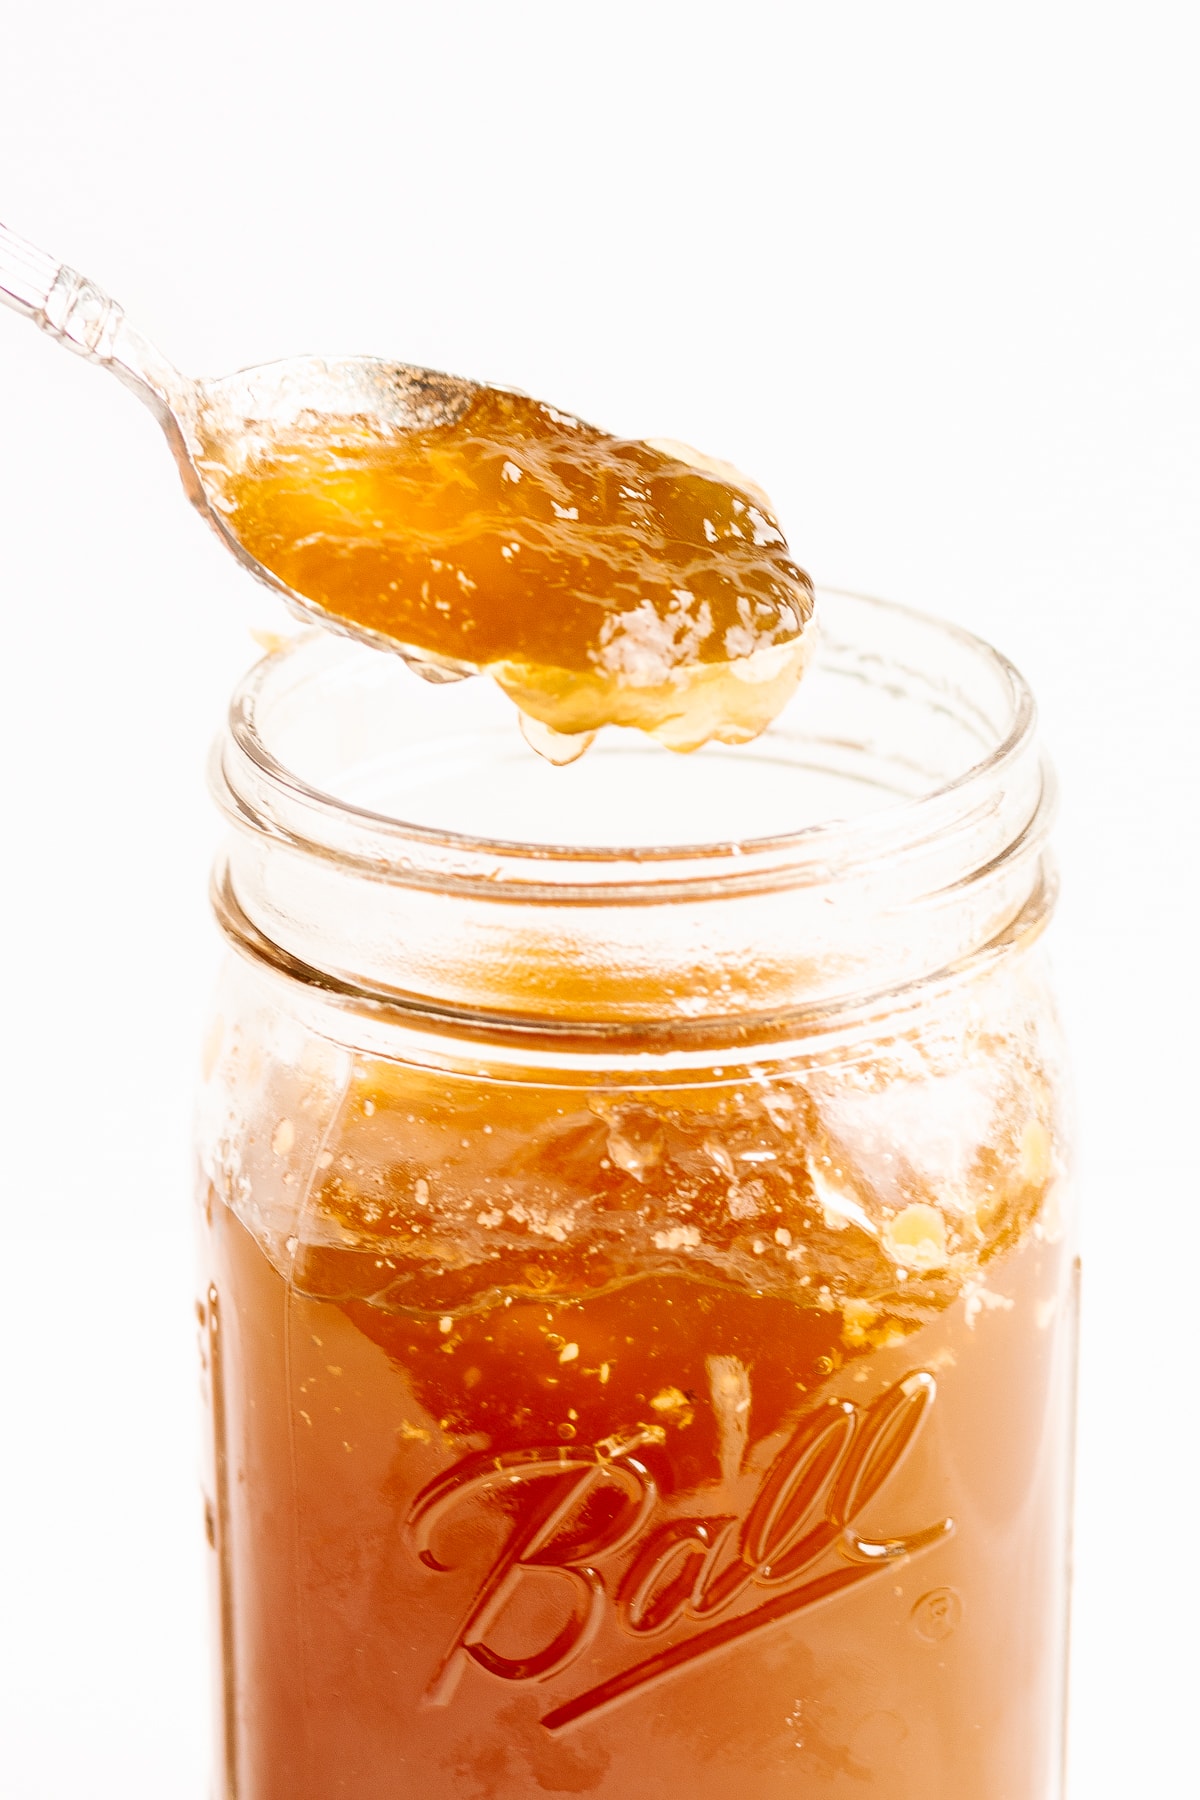
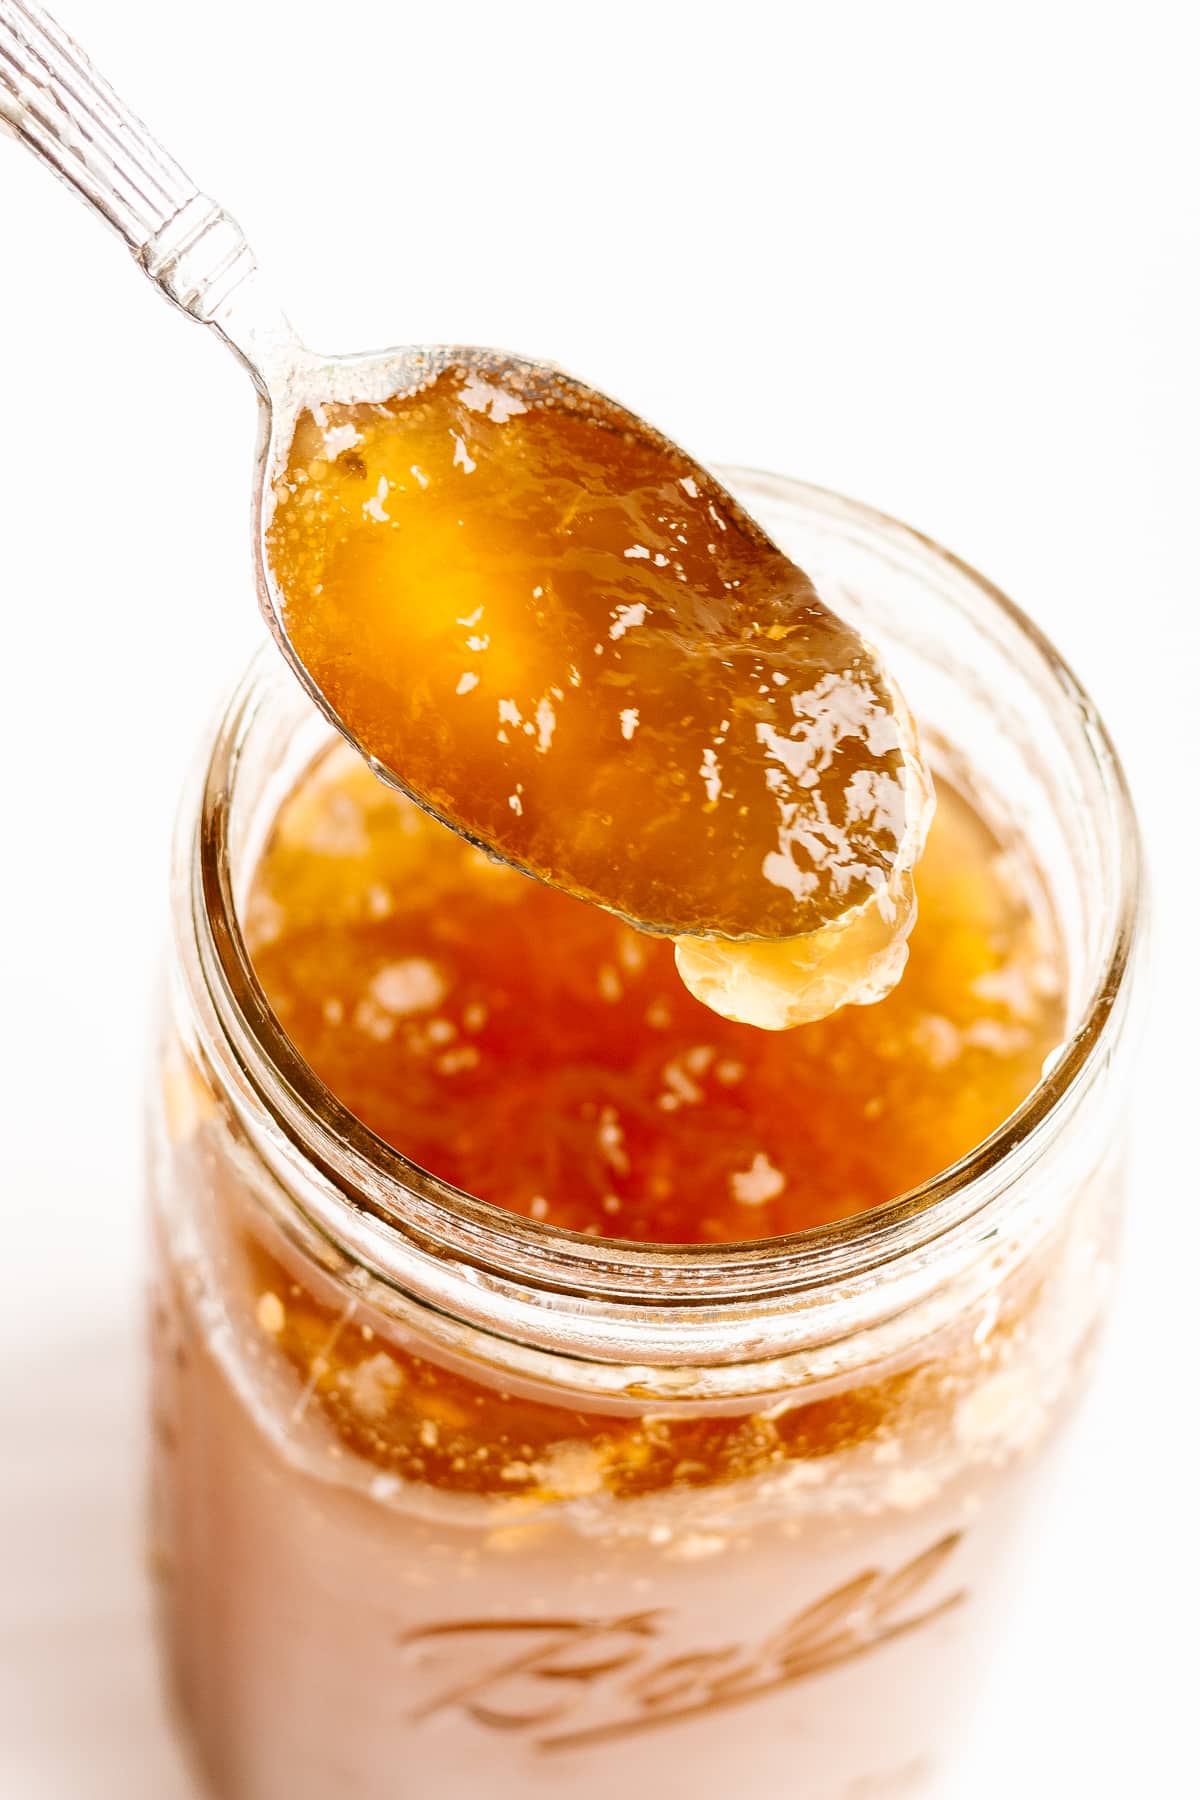
Should it be jiggly once cooled?
That’s the goal! After your bone broth has cooled completely in the fridge, it should have a “jello like” consistency with a solid layer of fat on top. You can either scoop the fat off the top with a spoon or just allow it to melt back in when reheating. The jiggly texture means that your broth is rich in gelatin. It will turn back to liquid when reheated.
What if it doesn’t gel?
No worries! Mine doesn’t always gel either (especially when I only use saved bones from meals) and I am not too fussed about it. It will still be delicious and packed with nutrition. It just means that it isn’t super high in gelatin (cooked form of collagen). This could be due to adding too much water or not using enough collagen rich bones. Next time, try adding in a few bones that are full of connective tissue like necks, backs, wings, knuckles, feet, etc.
Tip: You can also “cheat” a little and add in some quality gelatin (I like this one) for an added boost.
Ways To Use Bone Broth
I love keeping a stash of bone broth in my freezer at all times since it is so versatile. Here are a few ways to use it…
- In Recipes Calling For Stock Or Broth: Simply use it any time a recipe calls for stock or broth. No need to buy the boxed stuff!
- Soups + Stews: Makes a delicious base in all your favorite soup and stew recipes.
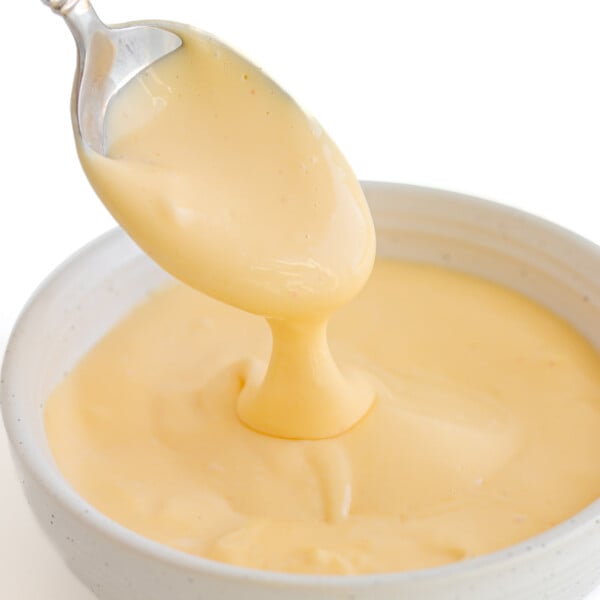
- Sauces + Gravies: Makes the most delicious homemade sauces and gravies.
- Rice + Grains: Substitute for water when cooking rice or other grains. Adds a nutritional boost and flavor. Great way to incorporate more bone broth for kids or people who do not like soups.
- Risotto + Casseroles: Absolutely delicious in risotto or casseroles that call for broth.
- Sip It Alone: Jazz it up with some additional herbs and seasonings and simply drink it on its own for a healthy, warming pick me up.
More Bone Broth Recipes
Looking for a specific type of bone broth or stock? Check out these recipes…
How To Make Bone Broth
- Prep Time: 1 hour
- Cook Time: 2 hours
- Total Time: 3 hours
- Yield: varies
- Category: Soup
- Method: Instant Pot, Stovetop, Slow Cooker
- Cuisine: American
Description
Bone broth is delicious, rich in nutrients and a versatile staple to have on hand. Learn how to make homemade bone broth using 3 different cooking methods: Instant Pot (pressure cooker), slow cooker and the stovetop.
Ingredients
- 2–3 pounds or 1-1.5 kg bones (chicken, turkey, beef, pork, lamb, etc.)
- 2–4 cups roughly chopped onions, carrots and celery (or collected scraps)
- 2 bay leaves
- 1 tablespoon apple cider vinegar
- Optional aromatics: (herbs, peppercorns, etc)
- Cold filtered water, to cover
Instructions
Roast The Bones
- If using raw bones, roast them first. This is important if using meat bones like beef, pork, lamb, etc. It is not necessary with poultry but does add a nice flavour. You can skip this step if you are using saved bones from previously cooked or roasted meat.
- Preheat oven to 400F (or 200C). Toss the bones in a touch of oil and arrange in a single layer on a baking sheet or roasting pan. Roast in the oven for 30-40 minutes (flipping halfway through) or until golden brown.
Place Everything In Your Instant Pot, Slow Cooker or Pot
- Place the bones, vegetables, bay leaves, apple cider vinegar and any additional aromatics into your Instant Pot, Slow Cooker or stock pot. Fill with water until it just covers the bones.
- Note: If using the Instant Pot, make sure the water stays 1 inch below the Max Fill line (it’s ok if the bones are not fully covered).
Cook The Bone Broth
- Pick one of the following 3 methods: Instant Pot, Stovetop or Slow Cooker.
Instant Pot Method:
- Secure the lid and set the steam release valve to the “Sealing” position.
- Press the “Soup” button (or Manual/Pressure Cook button) and set to cook for 120 minutes or 2 hours (high pressure) followed by a natural release.
Stovetop Method:
- Bring pot to a boil over medium-high heat and then immediately reduce heat to low so that it is at a very gentle simmer.
- Cover with a lid left slightly ajar and cook for 12-24 hours for poultry and 24-48 hours for beef and other meats.
- Skim off any scum if it develops while cooking. You may also need to add a little extra water after a few hours if too much has cooked off.
Slow Cooker Method:
- Set to cook on High for the first hour and then set to Low for the remaining time (same time frame as stovetop method).
Strain + Quick Chill
- Strain the broth by first using tongs to pull out all the large pieces and then pouring the rest through a fine mesh sieve into a large bowl, pitcher or pot.
- Cool down the strained broth quickly before storing by using an ice bath. Simply fill a sink or large bowl with ice water and place the bowl or vessel containing the strained bone broth into it. Alternatively, you could also add a few ice cubes directly into the broth. Quick chilling prevents bacteria from growing and your fridge heating up.
Store It
- Pour into storage containers and store in the fridge for up to 1 week or freeze for up to 6 months.
- Once chilled, the bone broth should be jiggly with a solid layer of fat on top that can be scraped off with a spoon before using. The bone broth will return to liquid once reheated. Season to taste after straining or when using for added flexibility.
Notes
- Bones: Use a variety of bones that include some bones with connective tissue (i.e. necks, backs, wings, knuckles, feet, etc.) as well as some meaty bones for a bone broth that has great flavour and is rich in protein and gelatin. Preferably use high quality bones from well-raised animals: grass-fed and pasture-raised. Source them from a local butcher, farmers market, etc. You can also save bones from day-to-day cooking (roast chicken carcasses, bones from roasts, steaks, etc.).
- Additional Aromatics: You can make a basic bone broth or have fun playing with flavours and aromatics. I tend to also add garlic, peppercorns and fresh herbs to my chicken bone broth. Whereas, with beef bone broth I tend to also add mushrooms, tomato paste and a splash of tamari to build a richer flavour. Note: If using the stovetop or slow cooker methods, it is best to wait and add garlic and fresh herbs during the last hour of cooking (if using) or they can be a little overpowering.
- My Preferred Cooking Method: I use my Instant Pot the majority of the time since it is so easy and takes a fraction of the time vs. the other methods.
- Storage Tips: Portion out into various size storage containers for different uses. My favourite storage options are mason jars and silicone molds. Wide mouthed mason jars (like these Ball 16 oz, 24 oz and 32 oz ones) with plastic storage caps are great for storing larger quantities that will be used in soups or stews. Silicone molds like muffin trays, baby food freezer storage containers and Souper Cubes are all great for freezing smaller portions to be used in a variety of recipes (freeze on a baking sheet, pop out your frozen “broth pucks” and store in a freezer bag).
- Freezing In Glass Mason Jars: Prevent cracks by following these tips for freezing food in jars.
- Broth Didn’t Gel: Don’t worry if your broth doesn’t gel up after chilling in the fridge. It just means it isn’t super high in gelatin but is still delicious and nutritious. This could be due to adding too much water or not using enough collagen rich bones. Next time, try adding in a few more bones that are full of connective tissue like necks, backs, wings, knuckles, feet, etc. You can also add in some quality gelatin (I like this one) for an added boost.
⬇ PIN it for later! ⬇


If my broth doesn’t gel can I put it back on the stove and add more bones to it and cook it some more?
You could but it is still fine to use. It’s just not as concentrated in collagen but still flavorful and full of nutrients. You could also supplement it with a bit of a quality powdered gelatin powder.
Hi,
I want to drink bone broth every morning for its health benefits. If I make a full jar. Can I scoop one spoon and add water or must I drink it just like that ?
I would just warm up enough for a small cup and drink as is.
Hi there, I made a chicken bone broth, skimmed it, placed it in the fridge and forgot about it. It’s 6 days old and still has the original big layer of fat on top. Do you think it’s still safe to skim, can and freeze for another time? Are there any tell tale signs regarding when it’s better to toss?
Hi Gina! Bone broth can typically be stored in the fridge for up to 5-7 days. If it smells sour or has any visible growth on top like mold, you should definitely toss it.
Hi Venessa
Question on the leftover bones after making the broth. Can we re-freeze the bones once they’ve made the broth? Or do they need to be in the normal fridge segment?
Hi Puja! I would not recommend refreezing the bones after you have made broth with them. If you would like to make a second batch of broth with the same bones, I would recommend doing it either immediately after the first batch or putting them in the fridge and making the next batch the following day.
Thank you for sharing this post. We LOVE bone broth in our house and this helps so much in making it at home. Great time to prepare for those winter colds.
So great to have it stocked up for those upcoming winter sniffles!
I love the jiggle you get from the Instant Pot. I typically use wing tips from my local poultry counter and they are packed with collagen. 🙂 I will have to try roasting bones first! Sounds like a great way to kick it up a notch.
Wing tips are a great addition!
Great post! I didn’t really know what the difference between bone broth and stock was to be honest. Now I know…lots of great information here!
Thanks for the kind comment! I am so happy to hear that you found the post informative:)
Great informative post. I really appreciate all of the detail. Definitely saving this for when the colder weather comes.. 🙂
I am so happy that you found the post helpful!
I want to can my bone broth to store in the pantry with a hot water canner. Can I do that?
I am sure that it is possible but I am not familiar with hot water canning. I would assume there are specific precautions especially with something like a broth and would advise you to research it so that you don’t get sick. I just tend to freeze my broth since I have an upright freezer in the basement.