This post may contain affiliate links. See my disclosure policy.
This beef bone broth recipe is flavorful, rich and so much easier to make at home thanks to the Instant Pot (pressure cooker). Learn how to make this amazing staple and use it to boost up your dishes!
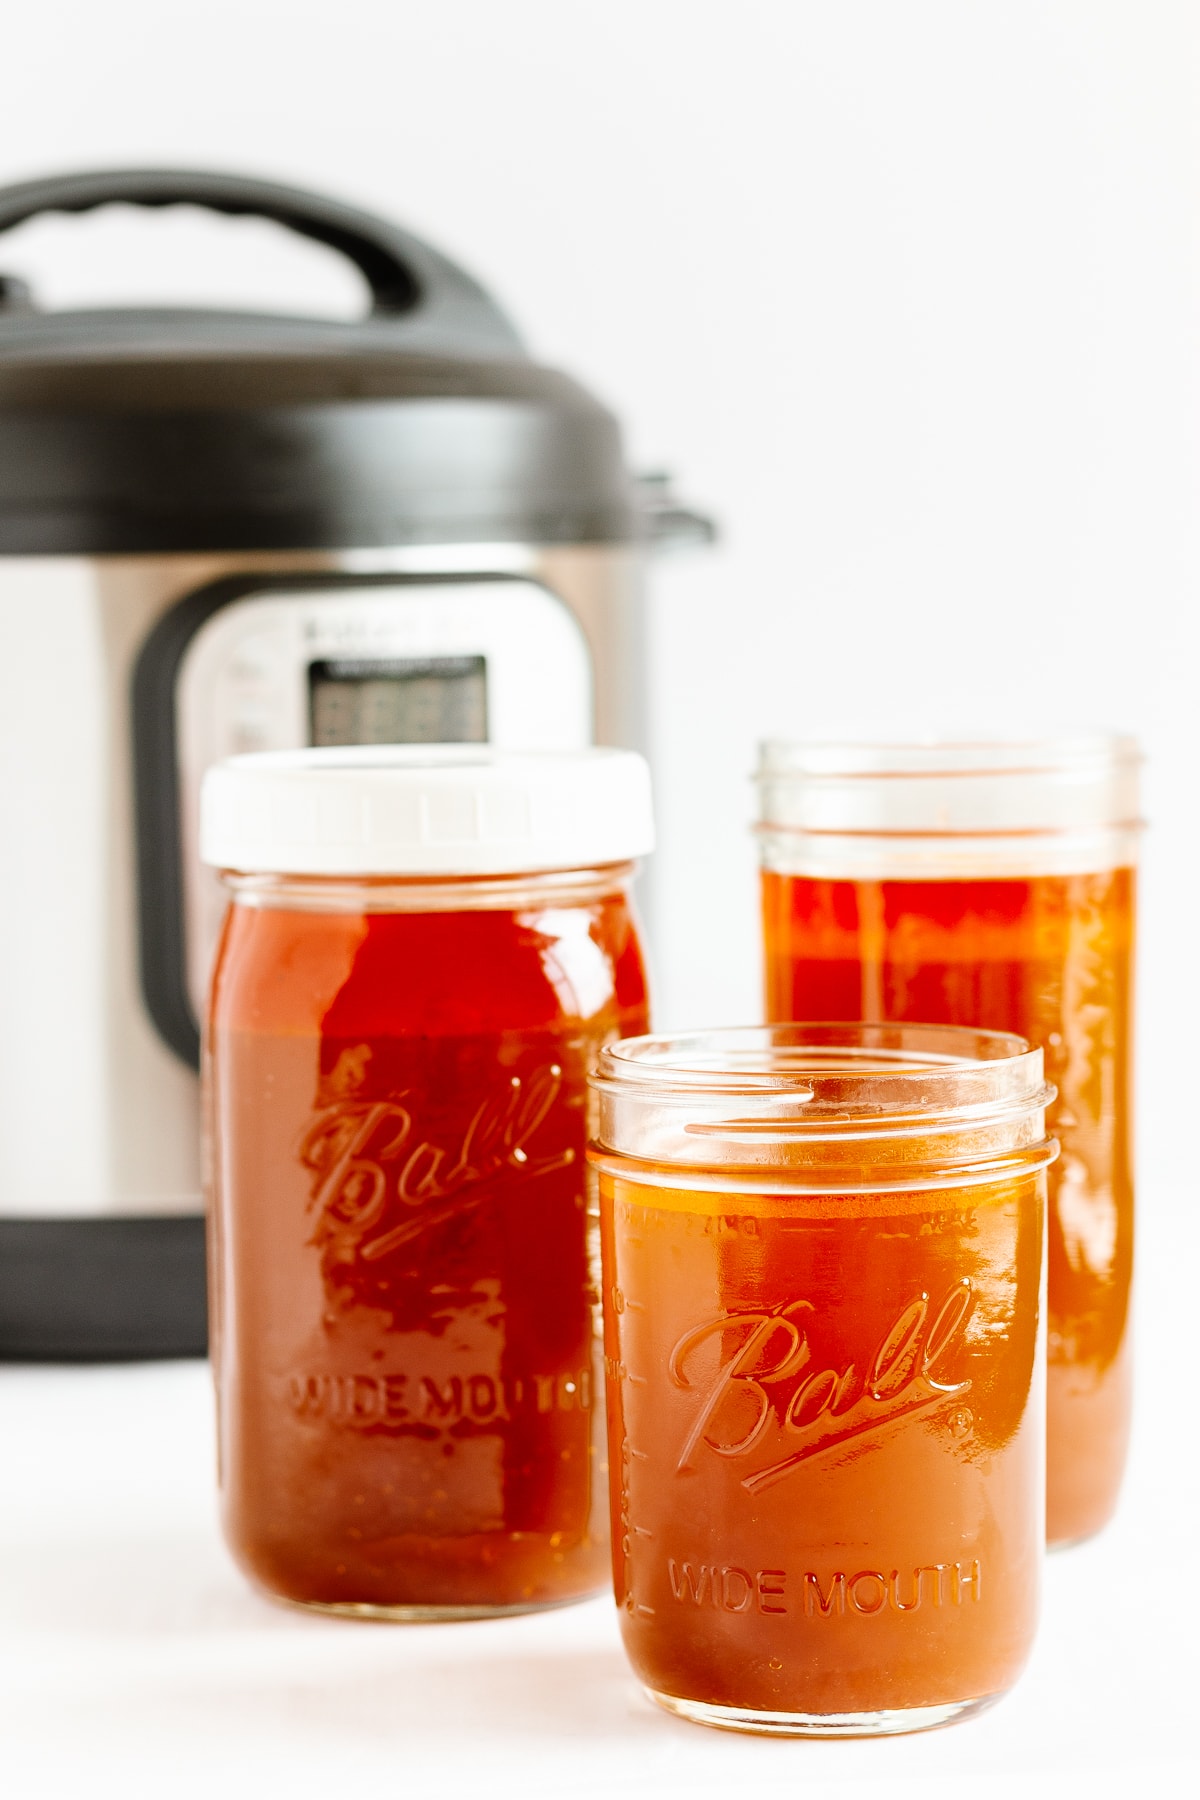
Jars and little frozen pucks of homemade bone broth or stock can be found in my freezer at all times. This “liquid gold” is one of my staples since it is a great way to add flavor and nutrition to so many dishes. The Instant Pot makes it so easy and is the only way I will make it now – no more boxed broth for this girl!
This delicious beef bone broth is made from roasted beef bones, vegetables and a few other simple ingredients. You simply throw it all in the Instant Pot, wave your magic wand (this step is optional but fun) and the result is a flavorful, gelatin-rich stock that tastes delicious in sauces, soups, stews and more!
What Is Beef Bone Broth?
Before we get into it, you might be wondering what the heck beef bone broth even is. Beef bone broth is a flavorful, nutrient rich liquid similar to beef stock. It is made by simmering beef bones in water usually along with some veggies, aromatics and a touch of apple cider vinegar (helps to extract minerals and collagen from the bones and connective tissue).
What’s the difference between beef broth, stock and bone broth?
It gets a little confusing since all these terms are used interchangeably. Here’s a quick overview of the differences:
- Beef Broth: Made from simmering meat for a short amount of time. Typically more clear in color.
- Beef Stock: Made from simmering bones that have a small amount of meat attached to them for a longer period of time. Typically rich in color.
- Beef Bone Broth: Made from simmering bones that have a small amount of meat attached to them for a long time. Bone broth is slightly different from stock, in that it is cooked longer with a little acidity to help extract trace minerals and collagen from the bones and connective tissue. Traditionally, it is simmered on the stovetop for a VERY LONG time. This is why I prefer to use the Instant Pot (pressure cooker) – so much easier and faster!
Why Make It Homemade
But can’t I just buy it? You definitely can but here are some reasons why I like to make my own beef bone broth:
- Tastes Better: Most store bought broths and stocks tend to be pretty bland whereas this homemade version is so rich and flavorful.
- Higher Quality: Many boxed broths can contain low quality ingredients and additives. When you make it yourself, you have full control over the quality of ingredients and what goes into it. Note: You can purchase high quality bone broth but it does come at a hefty price.
- Less Expensive: Buying quality bone broth is quite expensive. The cost of making it is minimal or essentially free if you are using the bones from meat that you are eating anyways and veggie scraps.
- No Waste: You could make it entirely from things that you normally throw away. It is also package free!
Why should I use the Instant Pot to make it?
Because it is so much easier and faster! Traditional beef bone broth is simmered on the stovetop for a VERY long time in order to extract all the nutrients and flavor (usually between 12-48 hours!). Who has time for that? It makes me very nervous because I don’t have time to babysit the stove for that long. This is why I recommend using an Instant Pot (or other electric pressure cooker). Just set it up and in a fraction of the time, you will have a rich and flavorful beef bone broth/stock.
How To Make Instant Pot Beef Bone Broth
Let’s make some…
What You Will Need
You will need the following ingredients…
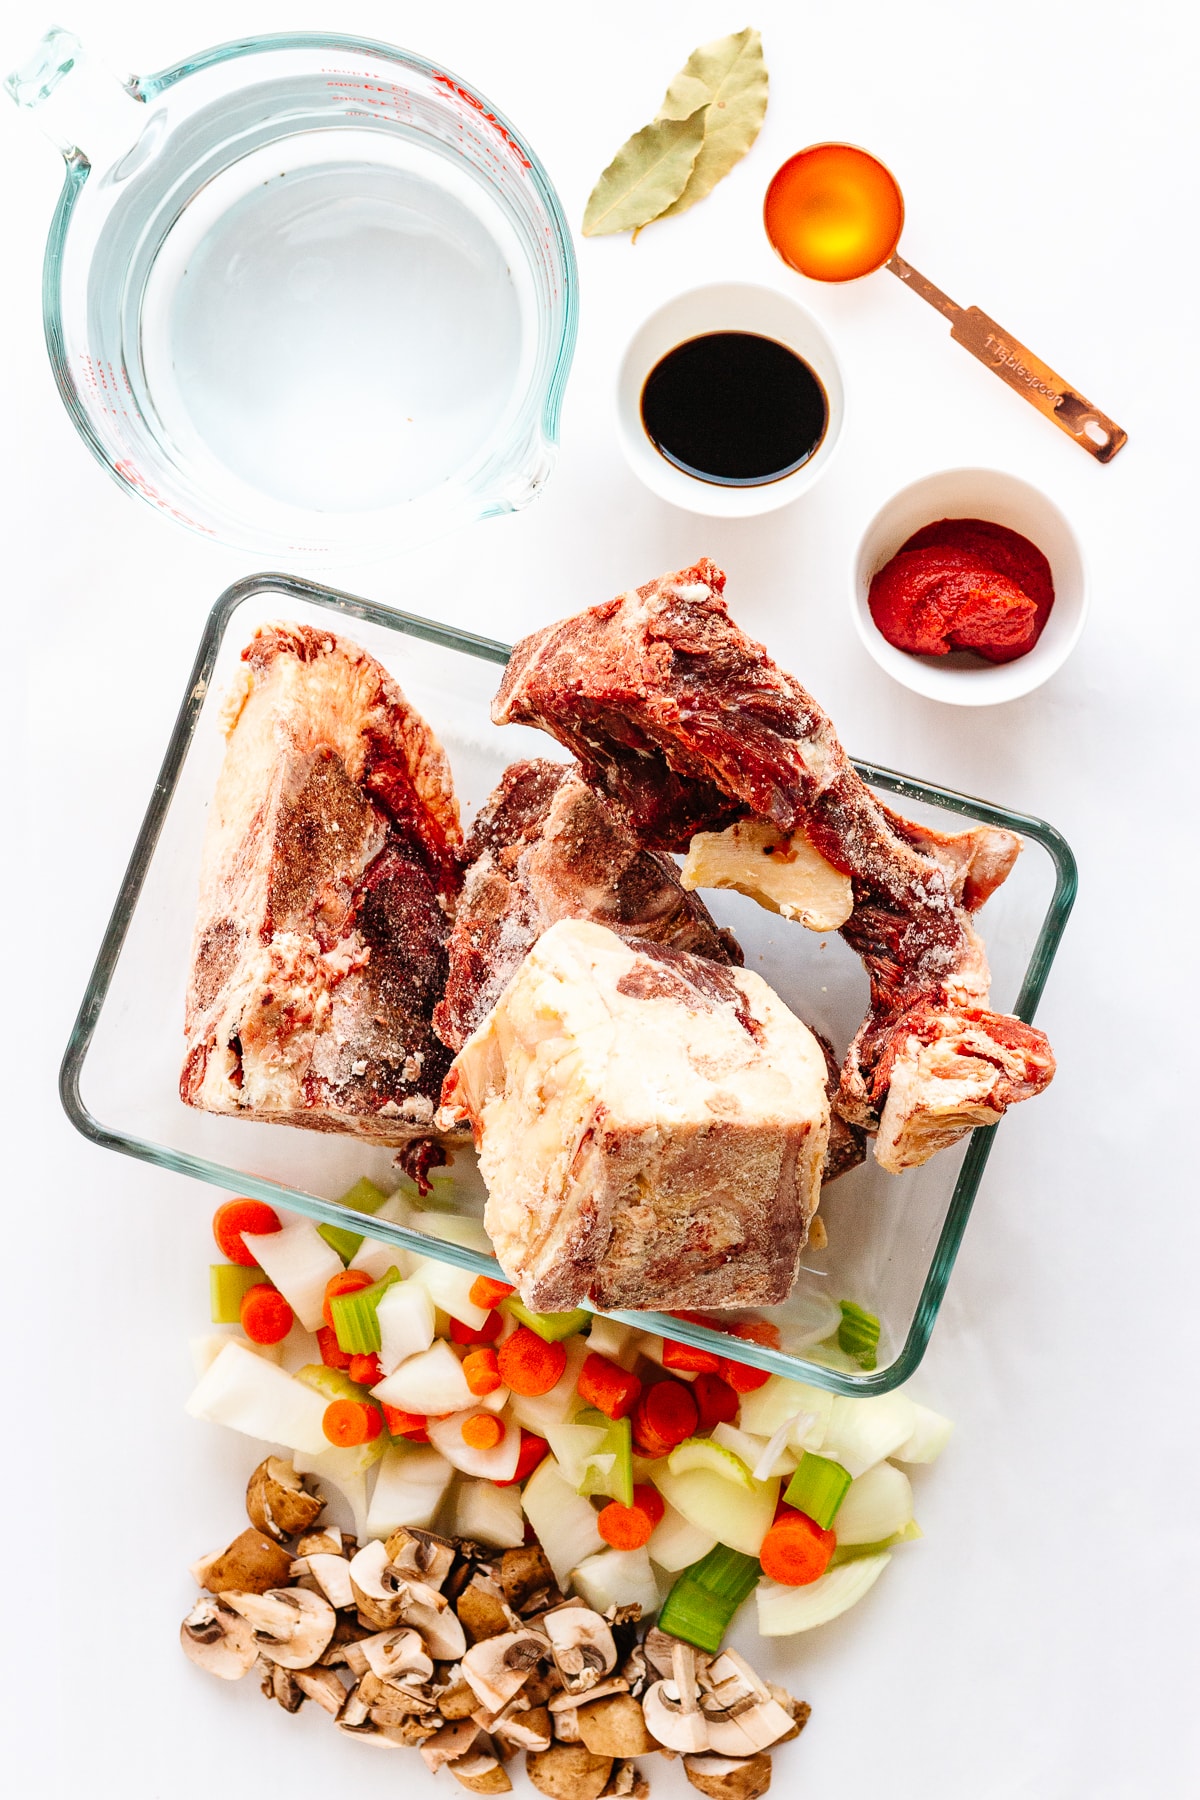
- Beef Bones: Use a variety of bones that include some joints as well as meaty bones. This will make a broth that is both flavorful and rich in protein and gelatin. You can either purchase them from a local butcher or farmers market (ask for soup bones) or save them from bone-in cuts you have cooked.
- Vegetables: I like to use a mixture of chopped onion, carrot, celery and mushrooms.
- Tomato Paste + Bay Leaves + Tamari (or soy sauce): These help to add a richer flavor.
- Apple Cider Vinegar: This helps to pull the nutrients and collagen out of the bones and connective tissue. It won’t taste sour – just a touch is added. This is the brand that I like to use.
- Optional – Additional Aromatics: You can play with adding some additional aromatics if you like. Some ideas include peppercorns, fresh herbs, garlic, etc. I prefer to salt to taste afterwards since it provides more flexibility.
- Water: Everything gets covered in cold, filtered water.
Detailed ingredient list and directions located in the recipe card below.
You will also need some special equipment…
- Instant Pot: Or any type of electric pressure cooker. This is the Instant Pot that I use.
- Fine Mesh Sieve: A fine mesh sieve or strainer is used to strain the broth.
- Large Bowl, Pitcher or Pot: You need a large vessel of some sort to strain your broth into.
- Optional Insert: I found this special strainer insert for the Instant Pot that would eliminate the need for the fine mesh sieve + bowl. You would simply place the insert into the inner pot of the Instant Pot before adding the ingredients. Once the cooking is done, simply lift it out to strain the broth directly into the inner pot.
Step By Step Instructions
To make some homemade beef bone broth in the Instant Pot, simply…
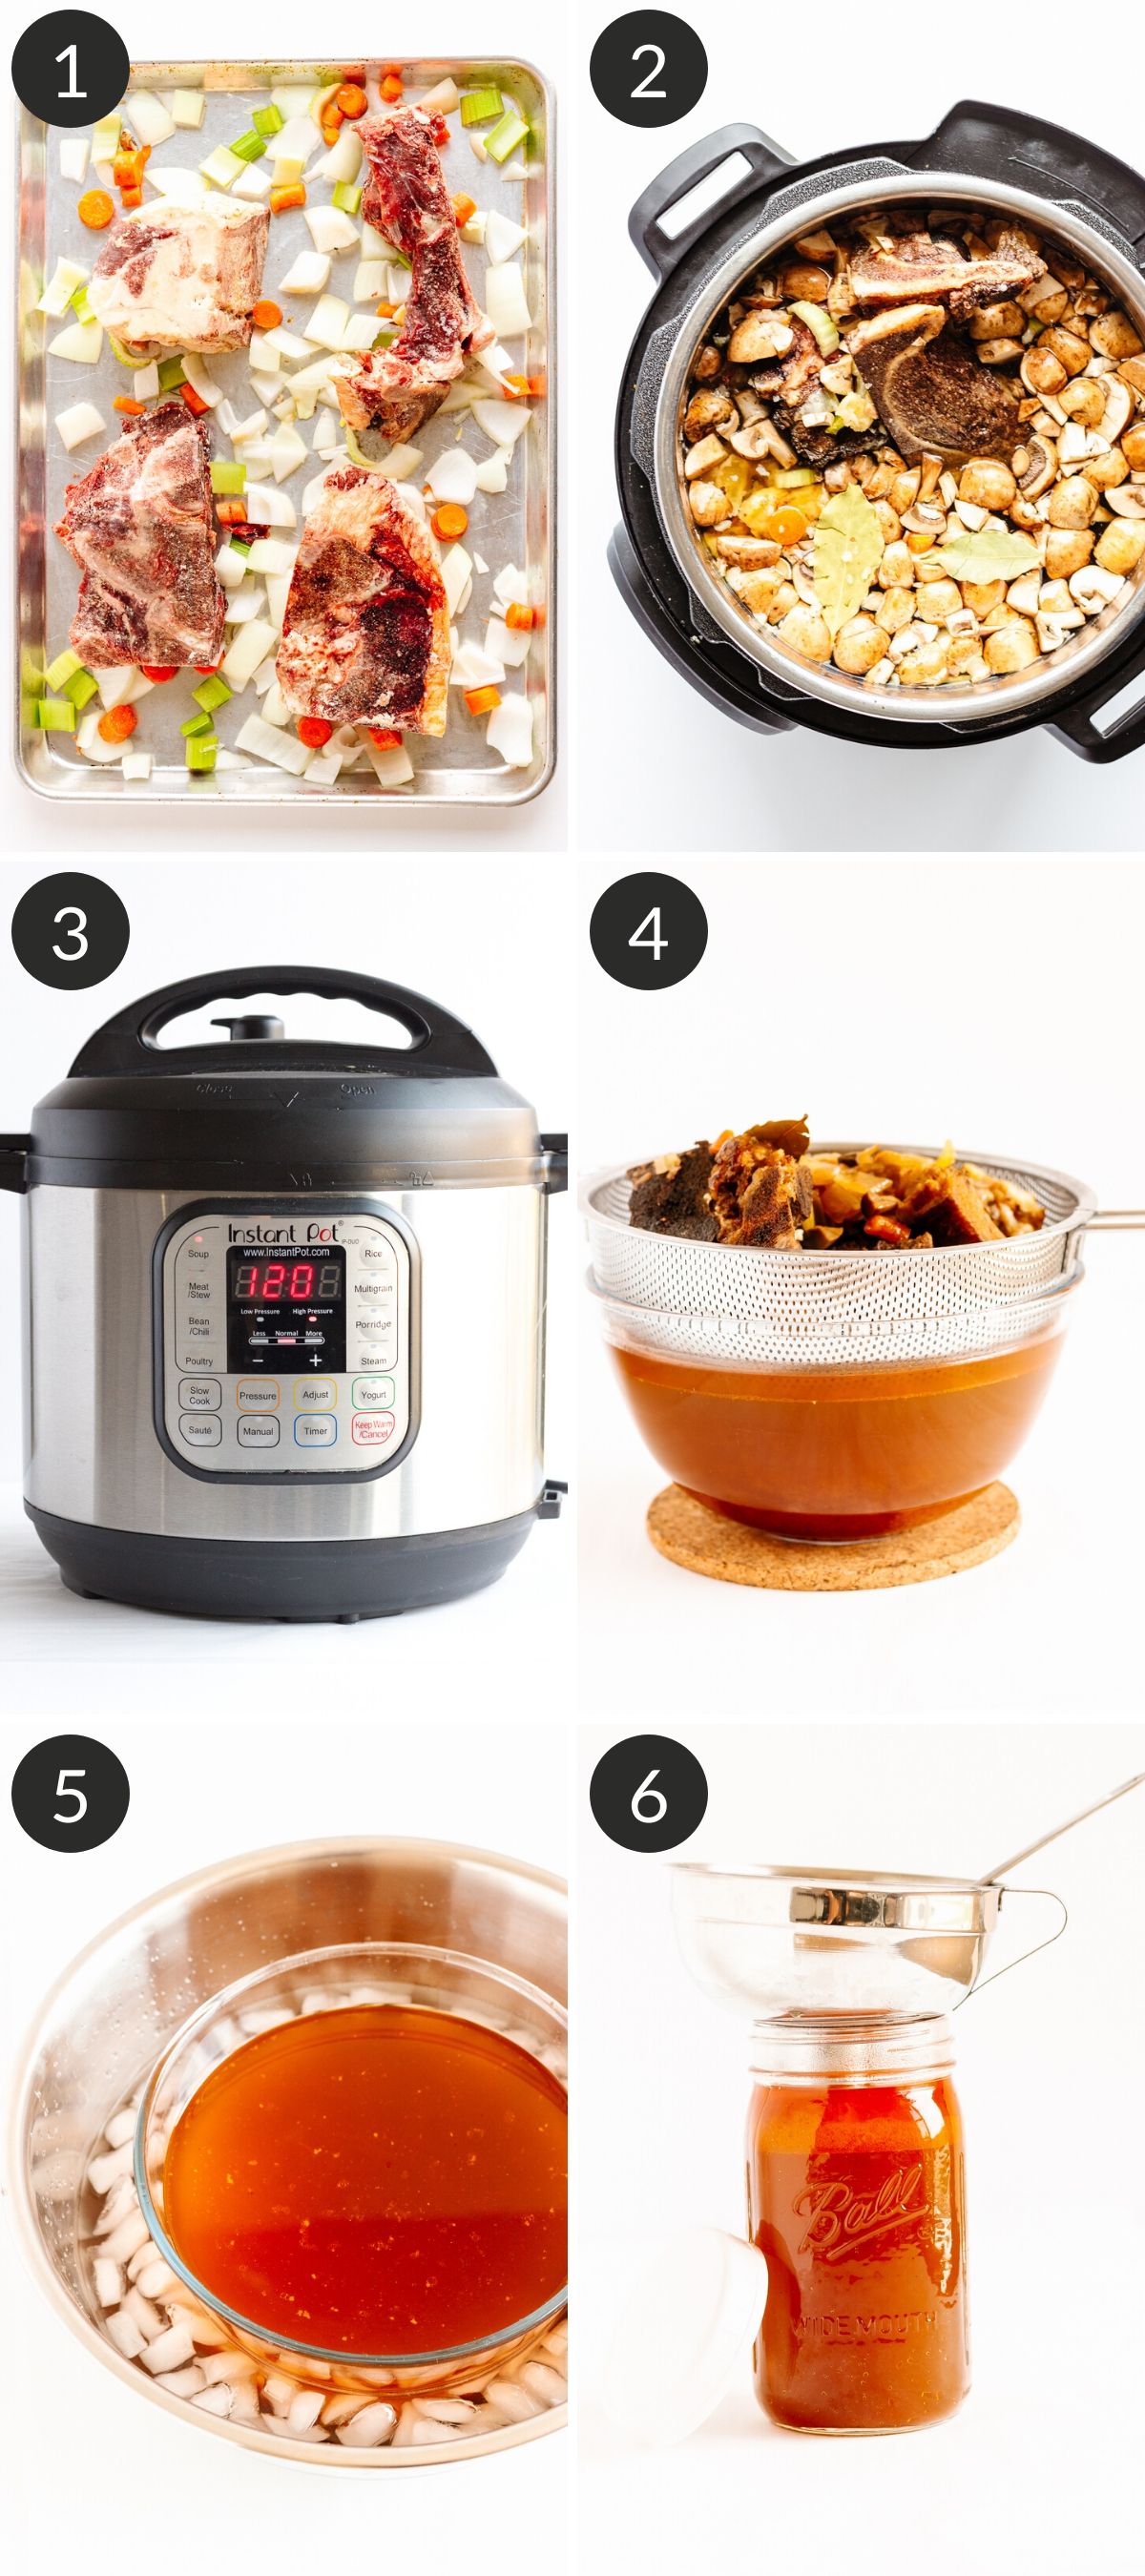
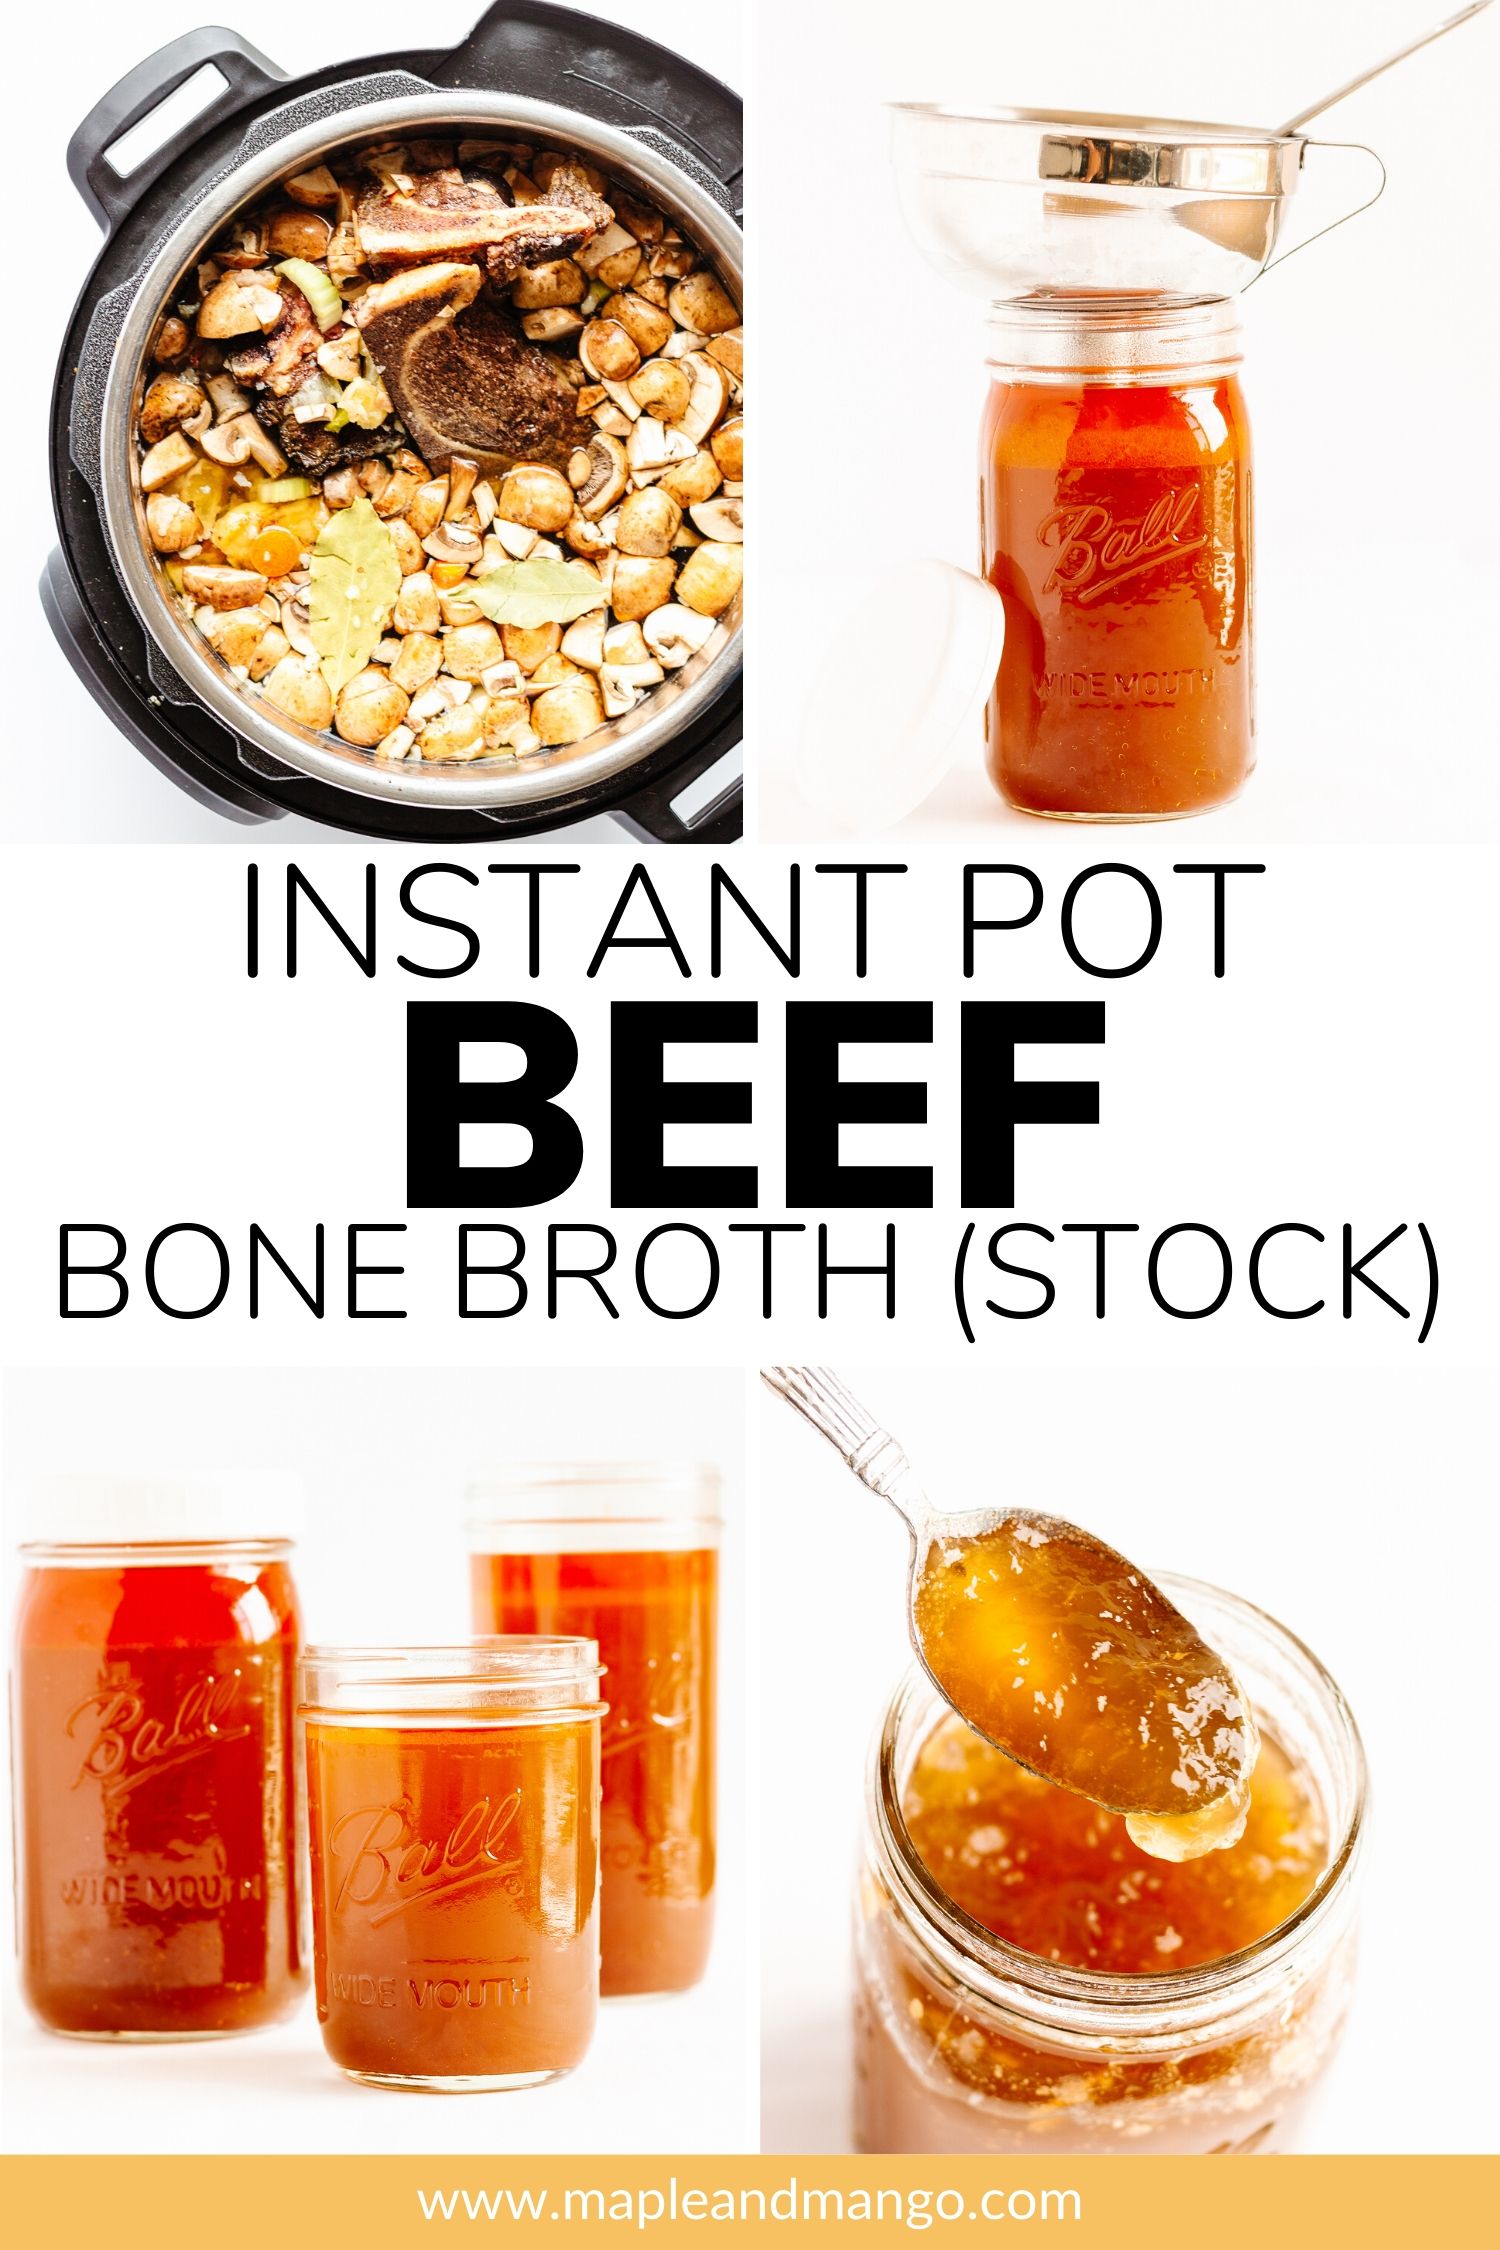
- Roast the bones and veggies. This gives the bone broth/stock great flavor, color and richness. Toss the bones, onion, celery and carrot in a bit of oil and arrange in a single layer on a baking sheet or roasting pan. Roast in a 400F oven for 20 minutes, give them a toss and continue for another 20 minutes or until everything is golden brown.
- Add everything to the Instant Pot. Transfer the bones and roasted veggies to the Instant Pot. Add in the mushrooms, tomato paste, bay leaves, tamari (or soy sauce) and apple cider vinegar. Fill with water until it just covers the bones or reaches 1 inch below the Max Fill Line (whichever comes first). Don’t worry if some solids are sticking up past the water.
- Pressure cook. Secure the lid and set the steam release valve to the “Sealing” position. Press the “Soup” button (or Manual / Pressure Cook button) and set to cook for 120 minutes (2 hours) followed by a natural release. Note: I usually use the “Soup” function when making broth/stock since this setting controls the pressure and temperature to ensure that the liquid never goes into a heavy boiling state.
- Strain the broth. Using tongs, first pull out the large pieces and then pour the rest through a fine mesh sieve into a large bowl, pitcher or pot.
- Quickly chill the broth. Cool down the strained broth quickly by using an ice bath. Simply fill a sink or big bowl with ice water and place your bowl or vessel containing the strained broth into it. Alternatively, you could also add a few ice cubes directly into the broth. Quick chilling prevents bacteria from growing and your fridge heating up.
- Store it. Pour into storage containers and store in the fridge for up to 1 week or freeze for up to 6 months. I like to place it in the fridge overnight and then scoop the fat layer off the top with a spoon before portioning out for the freezer.
How To Store It
Store your beef bone broth in the fridge for 5-7 days or freeze for up to 6 months.
Storage Container Options
You can store it in any freezer safe storage container. I like to freeze my broths and stocks in a variety of sizes so that I can easily pull out what I need. These are my 2 favorite storage options:
- Mason Jars: I like to use wide mouth mason jars with screwtop plastic storage caps. I use the Ball mason jars in 3 sizes: 16 oz, 24 oz and 32 oz. These are a great size for recipes requiring larger quantities like soups or stews. Tip: A wide mouth funnel makes filling jars easy and less messy.
- Silicone Molds: I also like to freeze smaller portions for recipes that only require a bit. Silicone molds are perfect for this. I use either full size or mini silicone muffin trays and baby food storage trays. Another great option that I found are these silicone Souper Cubes. To freeze in silicone molds, simply place the muffin tray or whatever mold you are using on a baking sheet and pour the bone broth into the mold. Then place the baking sheet in the freezer. Once frozen, pop out the broth “pucks” and store in a freezer bag or container.
Tips for freezing in glass mason jars
Make sure to follow these 4 important tips to prevent your mason jars from breaking in the freezer!

Beef Bone Broth Questions
What are the best bones to use?
For a beef bone broth that has great flavor and is rich in protein and gelatin, you want to use a variety of bones that include some joints as well as meaty bones.
Preferably use high quality, organic, grass-fed bones if you can. Source them from a local butcher, farmer’s market or delivery service like ButcherBox or truLOCAL. I like to ask for “soup bones”. You can also save bones in the freezer from bone-in cuts you have cooked (i.e. rib roast, t-bone steak, etc).
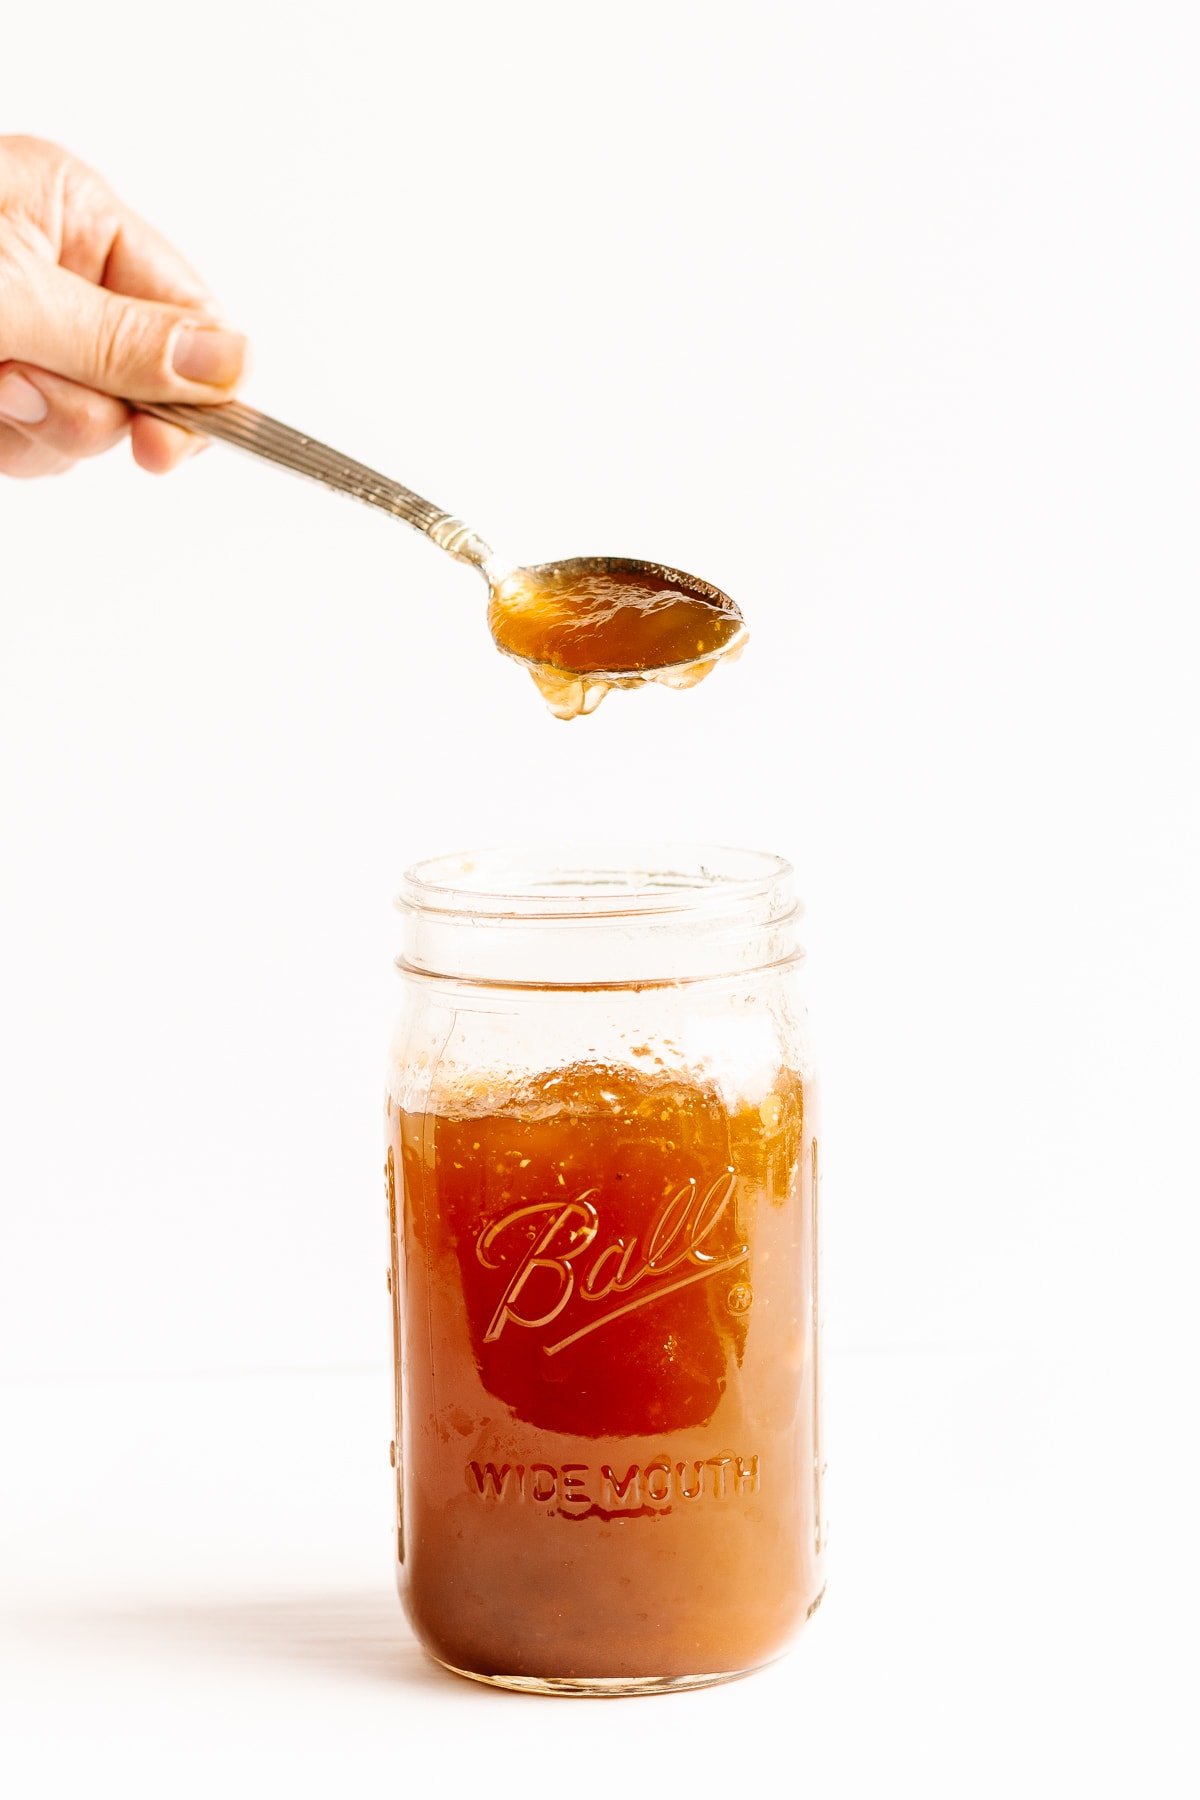
Should it be jiggly once cooled?
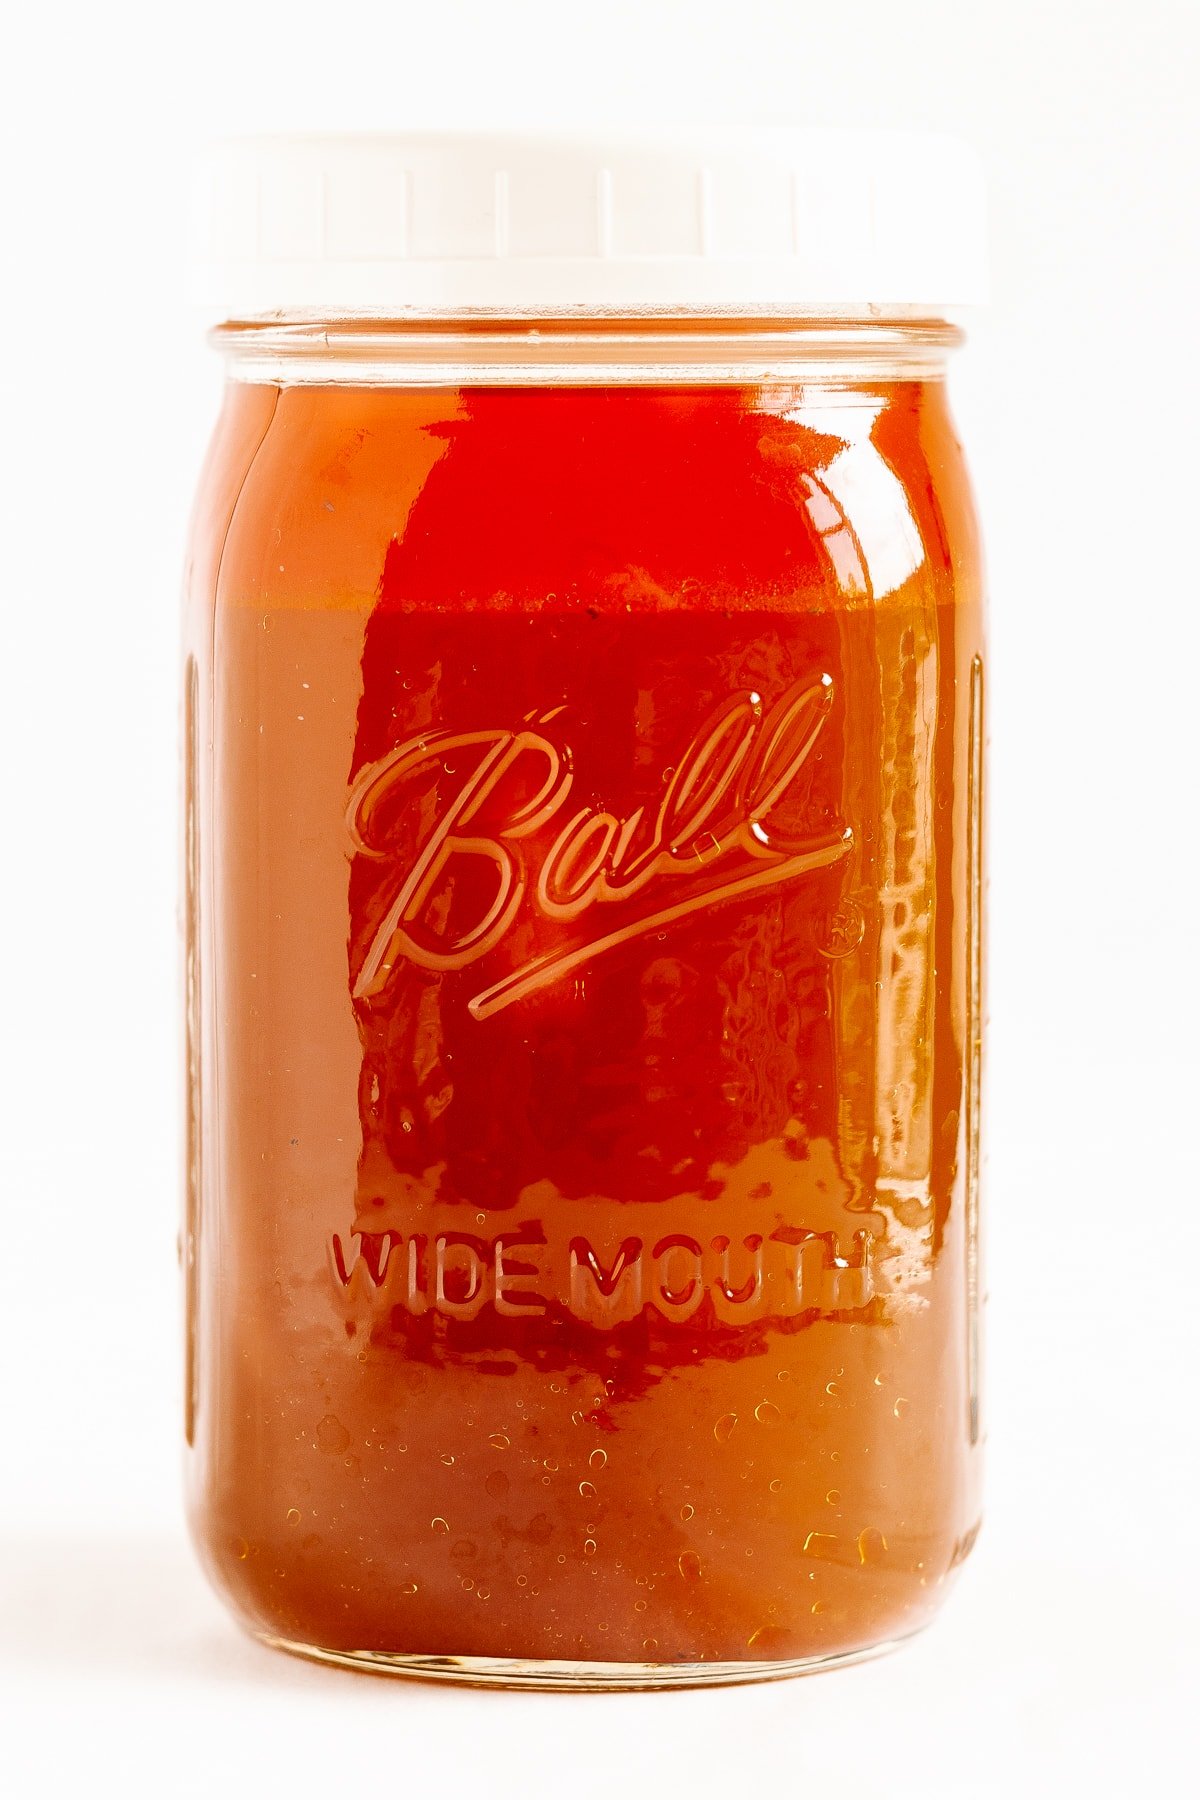
Yes indeed – that is the goal! After it has been cooled completely in the fridge, it should have a “jello like” consistency with a solid layer of fat on top. You can just scoop off the fat with a spoon. The jiggly texture means that your broth is rich in gelatin. It will turn back to liquid when heated.
What if it doesn’t gel?
No worries! Mine doesn’t always gel either and I am not too fussed about it. It will still be delicious and nutritious. It just means that there is a lower gelatin content (cooked form of collagen). This could be due to adding too much water or not using enough collagen rich bones. Next time try adding in a few more bones that are full of connective tissue.
Tip: You can also add in some quality gelatin (I like this one) for an added boost.
Can you make it on the stovetop?
You sure can if you enjoy monitoring it for a long period of time. Traditionally, the bones are simmered for 12-48 hours on the stovetop. This is why I prefer to use the Instant Pot instead.
What are the benefits? Is it good for you?
Not only is it delicious and provides great flavor to dishes but beef bone broth is also good for you. It is great for gut health, joint health, skin health, boosts the immune system and more. Here is an article on the benefits of bone broth if you are interested in learning more.
Ways To Use Beef Bone Broth
It is super versatile and can add a boost of flavor and nutrition to so many dishes. Here are a few ideas on how to use it:
- Any recipe calling for stock or broth: Simply use it any time a recipe calls for beef broth or stock. No need to buy the boxed stuff!
- Soups + Stews + Chili: Use it to add amazing flavor to any beefy soup, stew and chili recipes.
- Sauces + Gravies: Makes the most delicious sauces and gravies.
- Rice + Grains: Use instead of water to cook rice or grains.
- Sip It: Jazz it up with some additional herbs and seasonings and simply drink it on its own for a healthy, warming pick me up.
More Bone Broth Recipes
Looking to stock your freezer with more homemade broth and stock recipes? Check these ones out…
- Instant Pot Chicken Bone Broth
- Turkey Bone Broth (Stock): Instant Pot + Stovetop
- All About Bone Broth (comprehensive guide includes tips, benefits, uses and recipe with Instant Pot, slow cooker and stovetop instructions)
New to the Instant Pot? Check out these 10 Instant Pot Tips For Beginners.

Instant Pot Beef Bone Broth
- Prep Time: 1 hour
- Cook Time: 2 hours
- Total Time: 3 hours
- Yield: varies
- Category: Soup
- Method: Pressure Cook, Instant Pot
- Cuisine: American
Description
This beef bone broth recipe is flavorful, rich and so much easier to make at home thanks to the Instant Pot (pressure cooker). Learn how to make this amazing staple and use it to boost up your dishes.
Ingredients
- 3–4 pounds or 1.5–2 kg mixed beef bones
- 1 tablespoon avocado oil
- 1 onion, roughly chopped
- 1 carrot, roughly chopped
- 1 celery stalk, roughly chopped
- 1 cup roughly chopped mushrooms
- 2 tablespoons tomato paste
- 2 bay leaves
- 1 tablespoon apple cider vinegar
- 2 tablespoons tamari or soy sauce
- cold filtered water, to cover
Instructions
Roast The Bones + Veggies
- Preheat oven to 400F (or 200C).
- Toss the bones, onion, carrot and celery in the oil and arrange in a single layer on a baking sheet or roasting pan. Roast in the oven for 20 minutes. Flip the bones and give the veggies a toss. Place back in the oven and continue to roast for an additional 20 minutes or until everything is golden brown (watch that nothing burns).
Put Everything In The Instant Pot
- Transfer the bones and roasted veggies to the Instant Pot. Add in the mushrooms, tomato paste, bay leaves, apple cider vinegar and tamari.
- Fill with water until it just covers the bones or reaches just below the Max Fill line (whichever comes first). Be careful not to overfill (don’t worry if some of the solids are sticking up past the water). Secure the lid and set the steam release valve to the “Sealing” position.
Pressure Cook
- Press the “Soup” button (or Manual/Pressure Cook button) and set to cook for 120 minutes or 2 hours (high pressure) followed by a natural release.
Strain + Chill
- Strain the broth by first using tongs to pull out all the large pieces and then pouring the rest through a fine mesh sieve into a large bowl, pitcher or pot.
- Cool down the strained broth quickly before storing by using an ice bath. Simply fill a sink or big bowl with ice water and place your bowl or vessel containing the strained broth into it. Alternatively, you could also add a few ice cubes directly into the broth. Quick chilling prevents bacteria from growing and your fridge heating up.
Store + Enjoy
- Pour into storage containers and store in the fridge for up to 1 week or freeze for up to 6 months. I like to place it in the fridge overnight and then scoop the fat layer off the top with a spoon before portioning out for the freezer.
Notes
- Beef Bones: Use a variety of bones that include some joints as well as meaty bones. Preferably use high quality, organic, grass-fed bones. Source them from a local butcher or farmers market (ask for beef soup bones). You can also save bones from bone-in cuts that you have cooked like rib roasts, t-bone steak, etc.
- Additional Aromatics + Seasoning: You could also add things like fresh herbs (parsley, thyme, etc), peppercorns, garlic cloves, etc. As for salt, I prefer to wait and add salt when I use the broth for added flexibility.
- “Soup” Button: I usually use the “Soup” function on my Instant Pot when making broth/stock since this setting controls the pressure and temperature to ensure that the liquid never goes into a heavy boiling state. However, you can also simply use the “Manual” or “Pressure Cook” button.
- Storage Tips: Portion out into various size storage containers for different uses. I like to store in mason jars and silicone molds. Wide mouthed mason jars (like these Ball 16 oz, 24 oz and 32 oz ones) with plastic storage caps are great for storing larger quantities that will be used in soups or stews. Silicone molds like muffin trays, baby food freezer storage containers and Souper Cubes are all great for freezing smaller portions to be used in a variety of recipes (freeze them on a baking sheet and then once frozen pop them out and store in a freezer bag).
- Freezing In Glass Mason Jars: Prevent cracks with these tips for freezing food in glass jars.
- Special Strainer Insert: Instead of using a fine mesh sieve and bowl to strain your broth, you could also use a special insert for the Instant Pot like this mesh steamer basket. You would place it into the inner pot of the Instant Pot and then add all the ingredients into it. Once cooking is finished, you simply lift the special insert out containing all the chunky bits and will be left with strained broth.
- Mine Didn’t Gel?: Don’t worry if your broth doesn’t gel up after chilling in the fridge. It just has a lower gelatin content but is still delicious and nutritious. This could be due to adding too much water or not using enough collagen rich bones. Next time, try adding in a few more bones that are full of connective tissue. You can also add in some quality gelatin (I like this one) for an added boost.
⬇ PIN it for later! ⬇


How long should the natural release be for on the IP?
I tend to let it naturally release all the way until the pin drops. Usually bone broth is something that I set up, go do other things and then later on when I have time, I strain it and carry on. However, if you want to carry on with the next steps as quickly as possible, I would allow it to naturally release for 10-20 minutes first and then very carefully release the remaining pressure (you don’t want hot broth all over the kitchen!). Release the valve a bit at a time until the pin drops.
This is great info, I didn’t know the difference between stock and bone broth before. Thanks for this great recipe!
So happy to hear that you found the post helpful!
Love beef broth and its so good for collagen and for making pho toO!
I agree! Pho is a great use for it!
Wonderful to have this resource, given the popularity of all things Instant Pot AND all things bone broth. We’ve been making bone-based soups for yeaaaars, but it’s really nice to have a consistent recipe with the methodology laid out like this. Cheers!
I am so happy to hear that you found the detailed step-by-step and FAQ useful!
The gel is no joke! The IP is worth it just for the bone broth alone. 😉 Definitely put this beef broth on the to do list, people!
Glad you enjoyed the beef bone broth. Funny enough, I originally purchased my Instant Pot to make broths and stocks (to replace using a slow cooker). I use it for so much more now as well!
We love having bone broth in the house at all times. So great that you can do it in an Instant Pot. I would never have thought to do that.
Once you make it in the Instant Pot you never go back!
I remember seeing your chicken bone broth recently and thinking what a great idea it was. I still don’t have an Instant Pot. Something tells me come the fall, I’m gong to have to get one. I bet this adds so much flavour to soups and stews.
The flavour is amazing and the Instant Pot makes it so easy!
That color is wonderful! Truly a liquid gold! Such a nice idea to have it in the freezer ready to use and add flavor and nutrients. Thanks!
It is definitely a freezer staple for me! Glad you enjoyed the post.
Thank you for the apple cider vinegar trick, I didn’t know this would help. I’ve just been simmering it for ages!
It’s a little trick I learned about years ago. I was hesitant at first but it does not make your broth sour.