Description
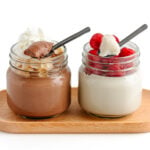
This easy Coconut Jelly recipe (aka coconut jello) can be prepped in just 15 minutes! It’s a fun and delicious coconut milk dessert or snack that the whole family will love. The recipe below includes two flavor options (vanilla & chocolate) – which will you choose?
Ingredients
Scale
Vanilla Coconut Jelly
- 1 can (13.5-14 oz/ 400 ml) full fat coconut milk, divided
- 1 tablespoon gelatin powder, unflavored & grass-fed
- 2-3 tablespoons honey, to taste
- 1 teaspoon vanilla extract
Chocolate Coconut Jelly
- 1 can (13.5-14 oz / 400ml) full fat coconut milk, divided
- 1 tablespoon gelatin powder, unflavored & grass-fed
- 3-4 tablespoons honey, to taste
- 2 tablespoon cocoa powder (I like to use dutch processed cocoa powder)
- pinch of salt
Instructions
- Bloom gelatin: Pour 1/4 cup of the coconut milk into a small bowl and sprinkle the gelatin over the top. Gently stir together and set aside to let the gelatin “bloom” or rehydrate.
- Heat up remaining ingredients: In a small saucepan, mix together the remaining coconut milk, honey and additional flavor ingredients depending on the version you are making (vanilla coconut jelly = vanilla extract, chocolate coconut jelly = cocoa powder and a pinch of salt). Heat the coconut milk mixture over medium heat, whisking frequently until the honey dissolves and the mixture is hot (but not boiling).
- Whisk in gelatin: Remove the saucepan from the heat and whisk in the softened gelatin mixture until the gelatin has dissolved. Place saucepan over low heat if needed but make sure the mixture is not boiling.
- Strain: Pour the mixture through a fine mesh sieve into a glass measuring cup or bowl to catch any small lumps of gelatin that didn’t dissolve.
- Assemble and chill: Divide evenly between 4 small glass jars or serving glasses. Chill in the fridge until set (about 3-4 hours). Timing will depend on the temperature of your fridge and the depth of the jelly in the jar or glass.
- Serve: Eat as is or add some toppings and enjoy! The coconut jellies can be stored covered in the fridge for up to 5 days.
Notes
- Gelatin Powder: I recommend using a good quality unflavored, grass-fed and pasture-raised powdered gelatin. I use this Great Lakes Gelatin. Vital Proteins Gelatin is another great option. Just make sure that you don’t accidently grab collagen peptides since collagen powder won’t gel.
- Do NOT boil the coconut milk mixture! This may cause it to separate or not set up and gel properly. It needs to be hot enough to dissolve the honey and gelatin but not boiling.
- Jars: I usually pour the jelly mixture into jars. I like to use 4-oz glass mason jars but you could also use larger ones if you want lots of extra room for toppings.
- Chilling Tip: I like to first chill the jars in the fridge for 1 hour uncovered and then add the lids for the remaining chill time to prevent a hard skin from forming on top. If the jellies are covered immediately, you might end up with some watery condensation on top since they are still usually slightly warm when they go into the fridge.