Description
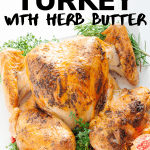
This delicious roast spatchcock turkey with herb butter is juicy, crispy-skinned and only takes 90 minutes to cook! Learn how easy it is to spatchcock and dry brine your Thanksgiving or holiday turkey.
Ingredients
Scale
- 1 12-14 pound turkey (fresh or defrosted)
- 3 tablespoons kosher salt
- 1 tablespoon aluminum free baking powder
- Optional: 1 onion, 1 carrot and 1 celery stalk chopped up
For The Herb Butter
- 1/2 cup softened butter (can also use ghee)
- 2 tablespoons finely chopped sage
- 1 tablespoon finely chopped thyme
- 1 tablespoon finely chopped rosemary
- Freshly ground pepper, to taste
Equipment Needed:
- Baking Sheet: A regular rimmed, uncoated baking sheet (half-sheet sized)
- Wire Rack: Make sure it is ovenproof to high temps, stainless steel and designed to fit inside baking sheet. This wire rack is great for roasting!
- Poultry Shears: A sharp pair of poultry shears are required if you are spatchcocking the turkey yourself.
- Digital Meat Thermometer: To ensure a perfectly cooked turkey, I like to use a duo of an alarm thermometer to track the internal temperature while roasting and an instant read thermometer to verify doneness temps in the breast and thighs.
Instructions
- Spatchcock the turkey: Ask the butcher to do this for you! Make sure to ask for the backbone to use for stock or gravy. If having a butcher spatchcock the turkey for you isn’t an option, here are the steps to do it yourself:
- Remove the neck and giblets from inside the turkey.
- Place the turkey breast-side down and cut along both sides of the backbone with a sharp pair of poultry shears to remove it.
- Cut a small incision on the cartilage that is between the two breast bone. Optionally, you could also remove the whole wishbone to make carving easier later. Flip the turkey over so that it is breast-side up and using both hands, firmly press down on the breast bone to flatten out the turkey (you will hear it crack). Trim off any excess fat or skin you might see near the neck or cavity areas.
- Create pockets under skin: Using your fingers, gently separate the skin of the turkey from the breast and thigh meat to create pockets. Go in through the bottom of the breast and work up along both breast halves and thighs. Be careful not to tear any holes or detach the skin from the turkey entirely.
- Dry brine turkey: Dry the turkey off with a paper towel. Combine the kosher salt and baking powder in a small dish. Sprinkle it all over the outside of the turkey on all sides. You may have extra salt mixture (you want to sprinkle on an even layer all over the turkey but it doesn’t need to be a really thick layer – simply discard any extra you might have). Set a wire rack on top of a baking sheet and lay the turkey on top (skin side up). The direction the turkey sits on the baking sheet depends on the size of the turkey so try both and see which is better. Loosely cover with some plastic wrap and place in the fridge for 1-3 days. For really crispy skin, remove the plastic wrap and leave uncovered in the fridge for the last 12-24 hours.
- Bring turkey to room temperature: Take turkey out of the fridge 1-2 hours before roasting and pat dry with a paper towel.
- Make herb butter: Mix together herb butter ingredients in a small bowl (can also blitz in a food processor for a smoother consistency). Spoon some under the skin of the turkey breasts and press your fingers on top of the skin to spread the butter underneath around evenly. Do the same thing under the skin on the thighs. Massage remaining herb butter all over the outside of the turkey.
- Prep turkey for oven: Adjust oven rack to middle position and preheat oven to 450F (425F convection). Lay turkey flat on a wire baking rack fitted over a clean foil-lined baking sheet. The turkey should be skin side up with legs spread out. Tuck wing tips behind the breasts. Pour 3 cups water into bottom of the tray to prevent drippings from smoking (along with the optional chopped onion, carrot and celery for more flavorful drippings).
- Roast: Roast turkey until a meat thermometer reads 150F on the breast and at least 165F on the thickest part of the thigh (about 90 minutes or less). If the skin is perfectly browned before the meat is cooked, just cover loosely with foil. Tip: It can be helpful to place foil on the oven rack below to catch any excess drippings (sometimes a leg can splay out a bit over the baking sheet as the turkey cooks causing drippings to fall to the bottom of the oven which can smoke).
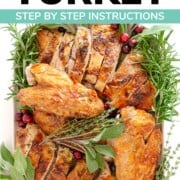
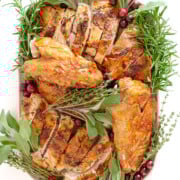
- Rest and carve: Let rest for 20-30 minutes before carving. Enjoy! I like to serve with Make Ahead Turkey Gravy and Cranberry Orange Sauce and all my favorite side dishes.
Notes
- Make sure to use a natural turkey! This recipe is not suitable for a preseasoned or self basting bird. You can find natural turkeys at the butcher shop, in many grocery stores or have it delivered through ButcherBox.
- Salt: Use kosher salt to dry brine. The granules are larger and easier to distribute. Table salt is too fine and will make the turkey too salty.
- Baking Powder: The baking powder helps to make the skin crispy. Make sure to use aluminum free baking powder since it has a neutral taste. DO NOT accidentally grab baking soda or your turkey will have a horrible metallic taste.
- Keep the turkey carcass to make Turkey Bone Broth (stock).
- Meat thermometers: The thermometer duo that I love to use for perfectly cooked turkey is the ChefAlarm to monitor while roasting (without opening oven door) and the Thermapen to quickly verify doneness in multiple areas.
- Check out the post for more details and FAQ on the spatchcocking, dry brining and carving process.