This post may contain affiliate links. See my disclosure policy.
Save your sanity on turkey day with this delicious make ahead turkey gravy recipe. Learn how to make turkey gravy in advance without sacrificing flavor. Say goodbye to last minute stress!
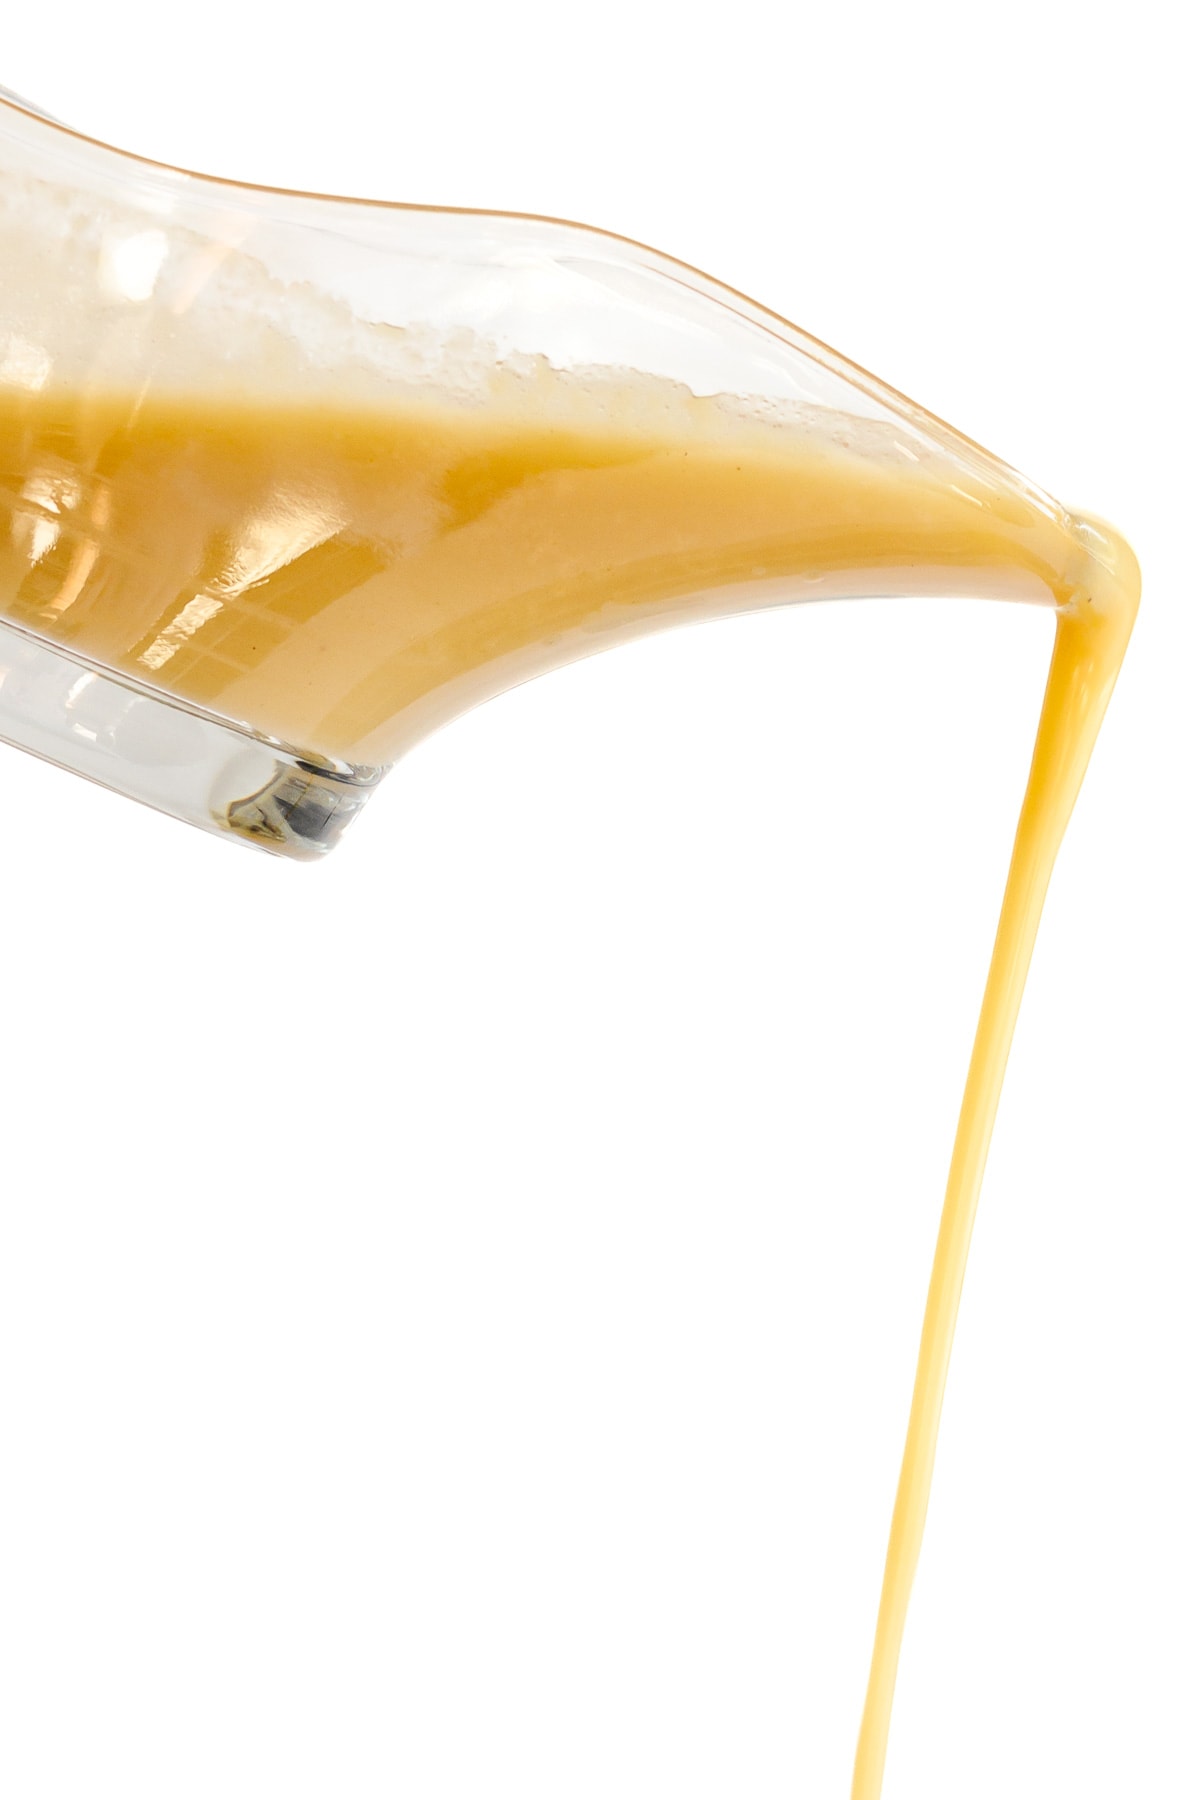
Why You’ll Love This Homemade Turkey Gravy Recipe
A turkey dinner isn’t complete without a generous pour of delicious gravy. It’s one of the best parts! This turkey gravy recipe is absolutely amazing and it’s always a huge hit.
- Make ahead recipe: No last minute stress on turkey day! This turkey gravy is made ahead of time. At dinner time, just reheat and serve!
- Full of flavor: Not sacrificing any flavor here! Made with a delicious turkey stock and for even more flavor some turkey drippings can be stirred through when reheating.
- Real food ingredients: Nothing crazy here! Made from simple, real ingredients.
- Perfect for the holidays: A must-have side for turkey dinners making it perfect for Thanksgiving or the holidays!
What Are The Benefits Of Making Turkey Gravy Ahead Of Time?
Your sanity!! One of the worst parts of making a holiday turkey dinner is frantically attempting to make the gravy amidst all the last minute chaos. It’s already stressful enough near the end trying to heat up and dish up the side dishes, carve the turkey, etc. Why add on to the last minute frenzy?
This make ahead gravy recipe let’s you wave goodbye to the last minute stress without compromising flavor! It feels so good knowing that a delicious turkey gravy is waiting in the fridge and just needs to be reheated and enjoyed!
Ingredients You’ll Need
This recipe is a two-part process. First a flavorful turkey stock is made which is then used as the base of the gravy.
For the turkey stock, you will need:
- Turkey parts: If you are making a spatchcock turkey (my favorite), you are set! Just use the backbone (chopped into a few pieces to fit into the pot) and the turkey neck. If not, you can purchase a few turkey wings instead to use along with the neck from your turkey. If you don’t have the turkey neck, just use the purchased wings.
- Veggies and herbs: Onion, carrot, celery, fresh thyme, garlic and bay leaves are added for flavor.
- Avocado oil or olive oil: To brown the turkey pieces and veggies.
- Water: Liquid to make stock.
To make the turkey gravy, you will need:
- Butter: The fat to make the roux with. You could also replace some of the butter with the fat from the top of the turkey stock when cooled which has lots of flavor.
- Flour: Used to make a roux with the butter to thicken the gravy.
- Turkey Stock: Base of the gravy that was made previously.
- Salt & pepper: Season with salt and freshly ground pepper.
- Tamari: A bit of tamari (or soy sauce) adds some depth of flavor and color. Might seem odd but don’t skip it or your gravy will be missing out on the boost of umami flavor it gives!
Detailed ingredient list and directions located in the recipe card below.
How To Make Turkey Gravy In Advance
Ready to get started? Let me show you how to make the best turkey gravy ahead of time to save your sanity on turkey day. A delicious turkey broth or stock is the key to this amazing gravy. Once your stock is made, the gravy is a breeze.
Step 1: Make The Turkey Stock
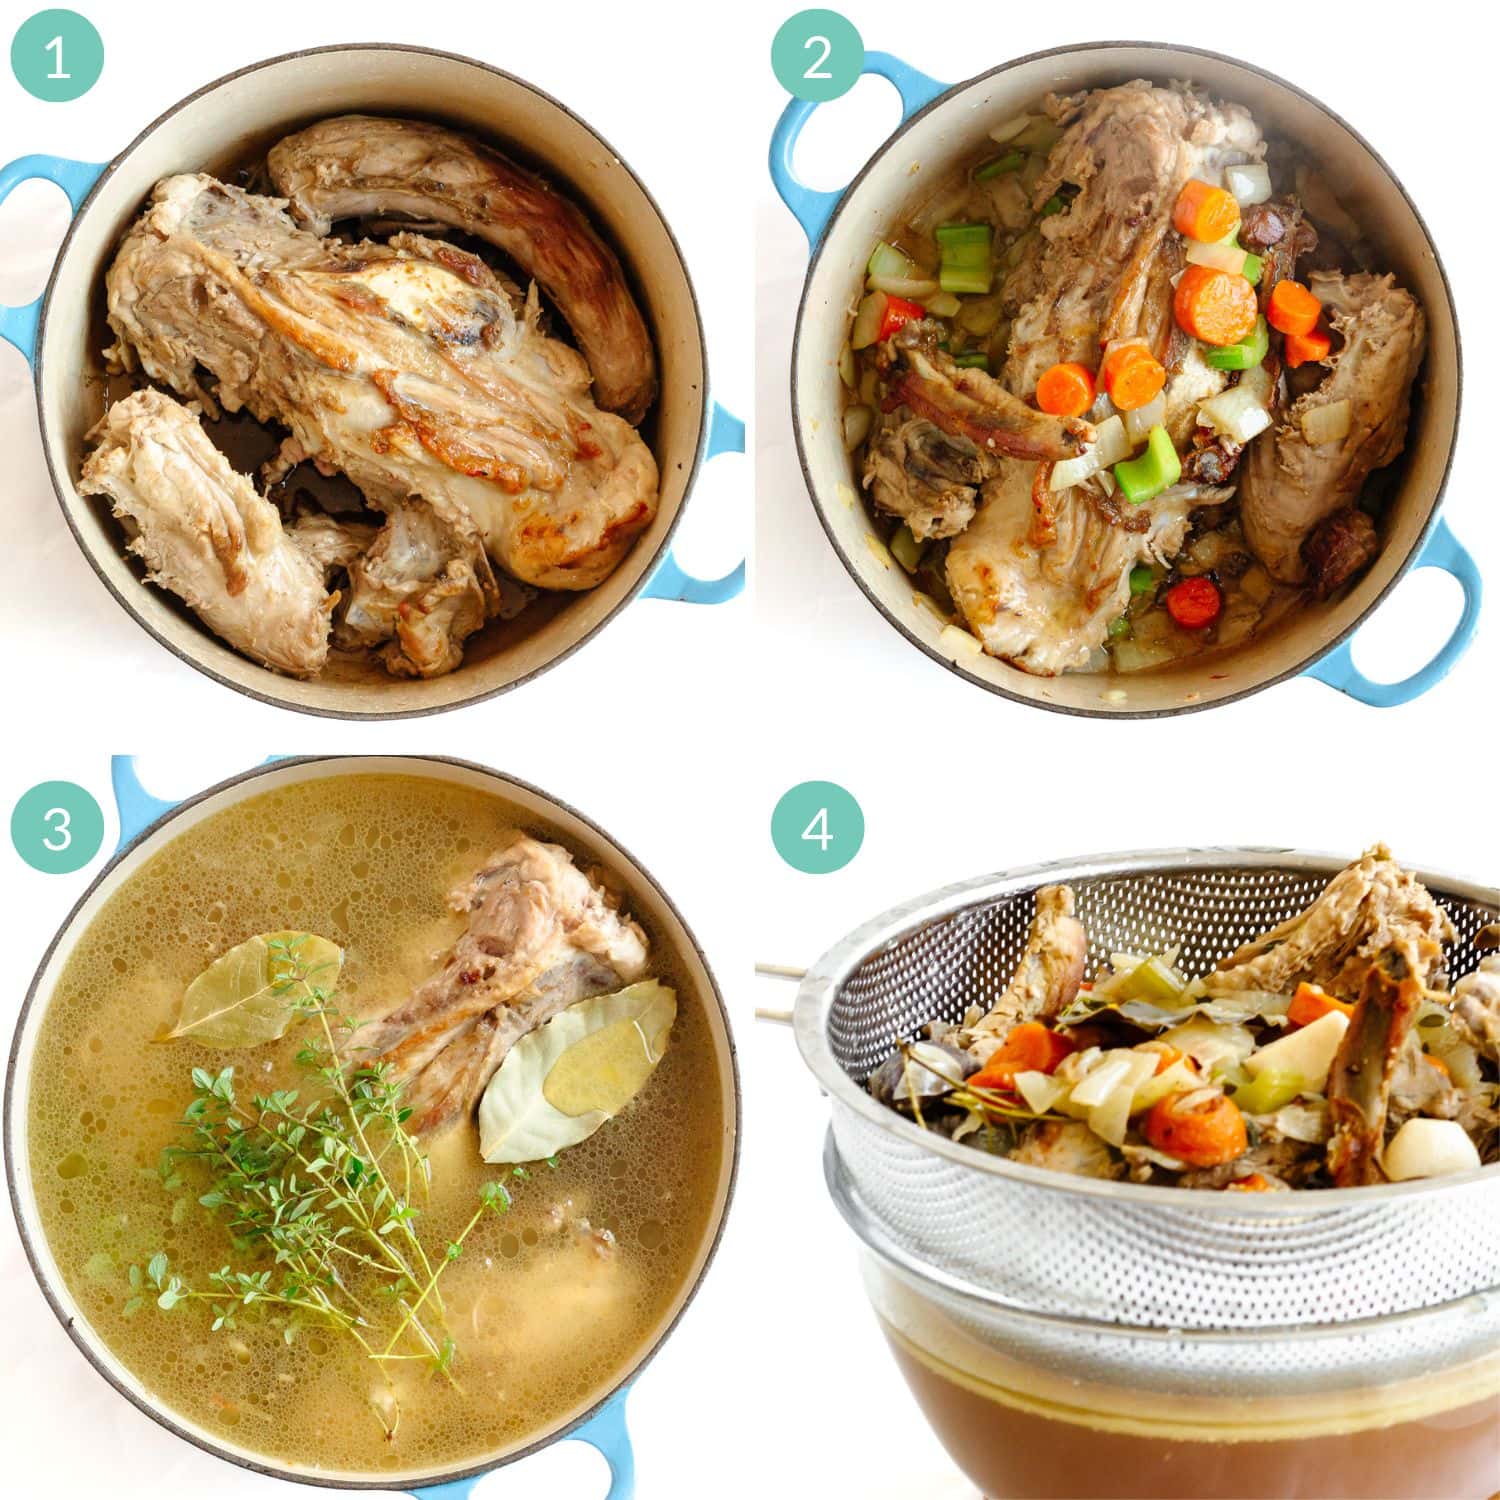
- Brown the turkey parts: Heat a large stock pot or dutch oven over medium/high heat. Add the oil, followed by the turkey pieces and cook until browned while turning occasionally. Alternatively, you can roast them in the oven (see note below).
- Add veggies: Add the onion, carrot and celery and sauté until starting to brown.
- Add water/herbs and simmer: Add water, thyme, garlic and bay leaves. Simmer for 2-4 hours.
- Strain: Strain the stock through a large fine mesh sieve. Set aside 5 cups for the gravy and store the remainder in the fridge for other dishes that may need some broth/stock like this bacon, sage and onion stuffing recipe.
Oven roasting method: The turkey parts and vegetables can be roasted in the oven (sometimes easier). Preheat oven to 400F. Place turkey parts, chopped onion, carrot and celery on a baking sheet. Drizzle over the oil and toss to coat. Roast for 1 hour or until well browned, flipping occasionally. Add everything to a large pot and continue with the recipe.
Step 2: Make The Turkey Gravy
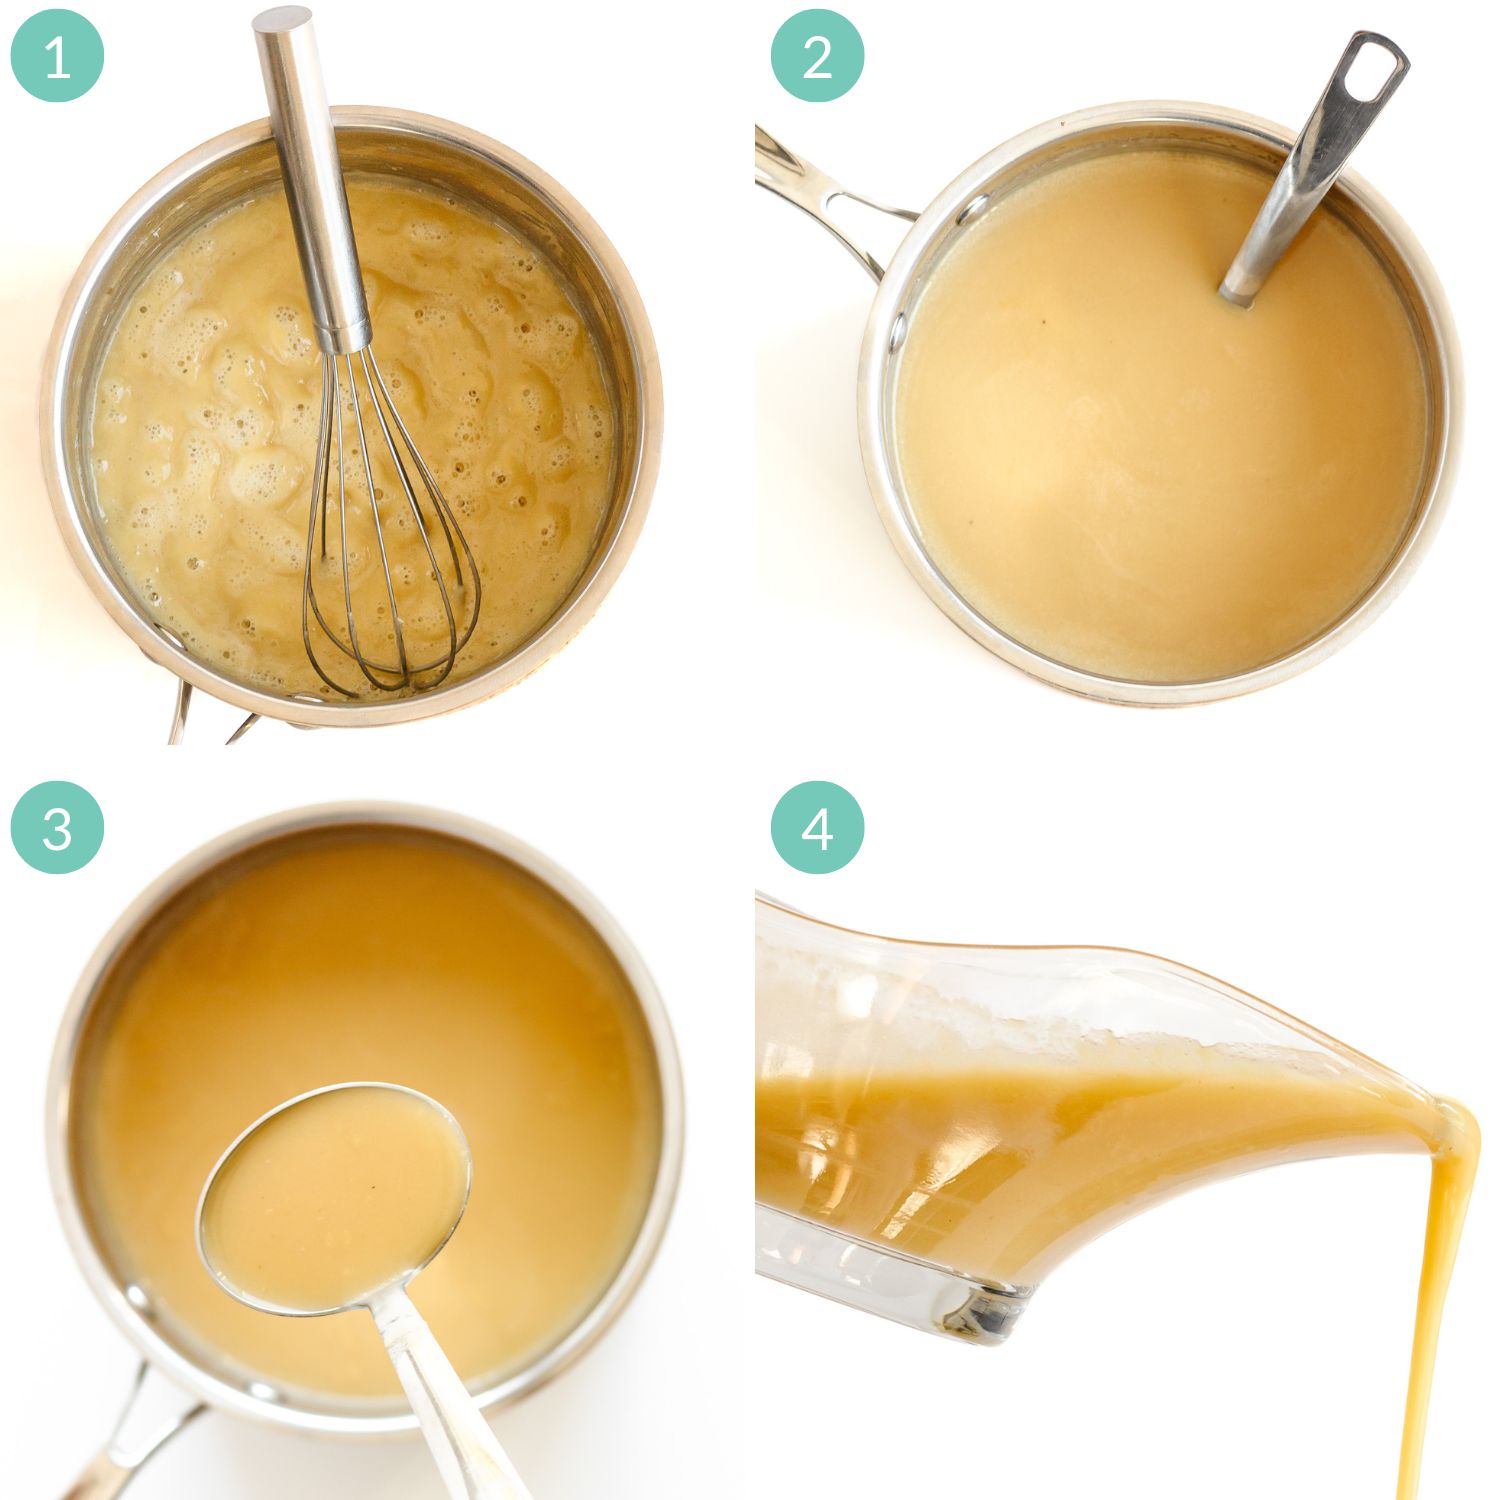
- Make a roux: Melt butter in a saucepan over medium heat and whisk in the flour for a few minutes until golden brown.
- Add stock, simmer and season: Slowly whisk in the turkey stock and simmer until thickened. Season to taste and store in the fridge until ready to reheat. The gravy will look thick after sitting in the fridge but will loosen back up once reheated.
- Extra flavor boost: Whisk in some turkey drippings for gravy so good that you will want to lick the plate! I highly recommend this step if you roasted a turkey! Simply whisk through some of the drippings while reheating the gravy.
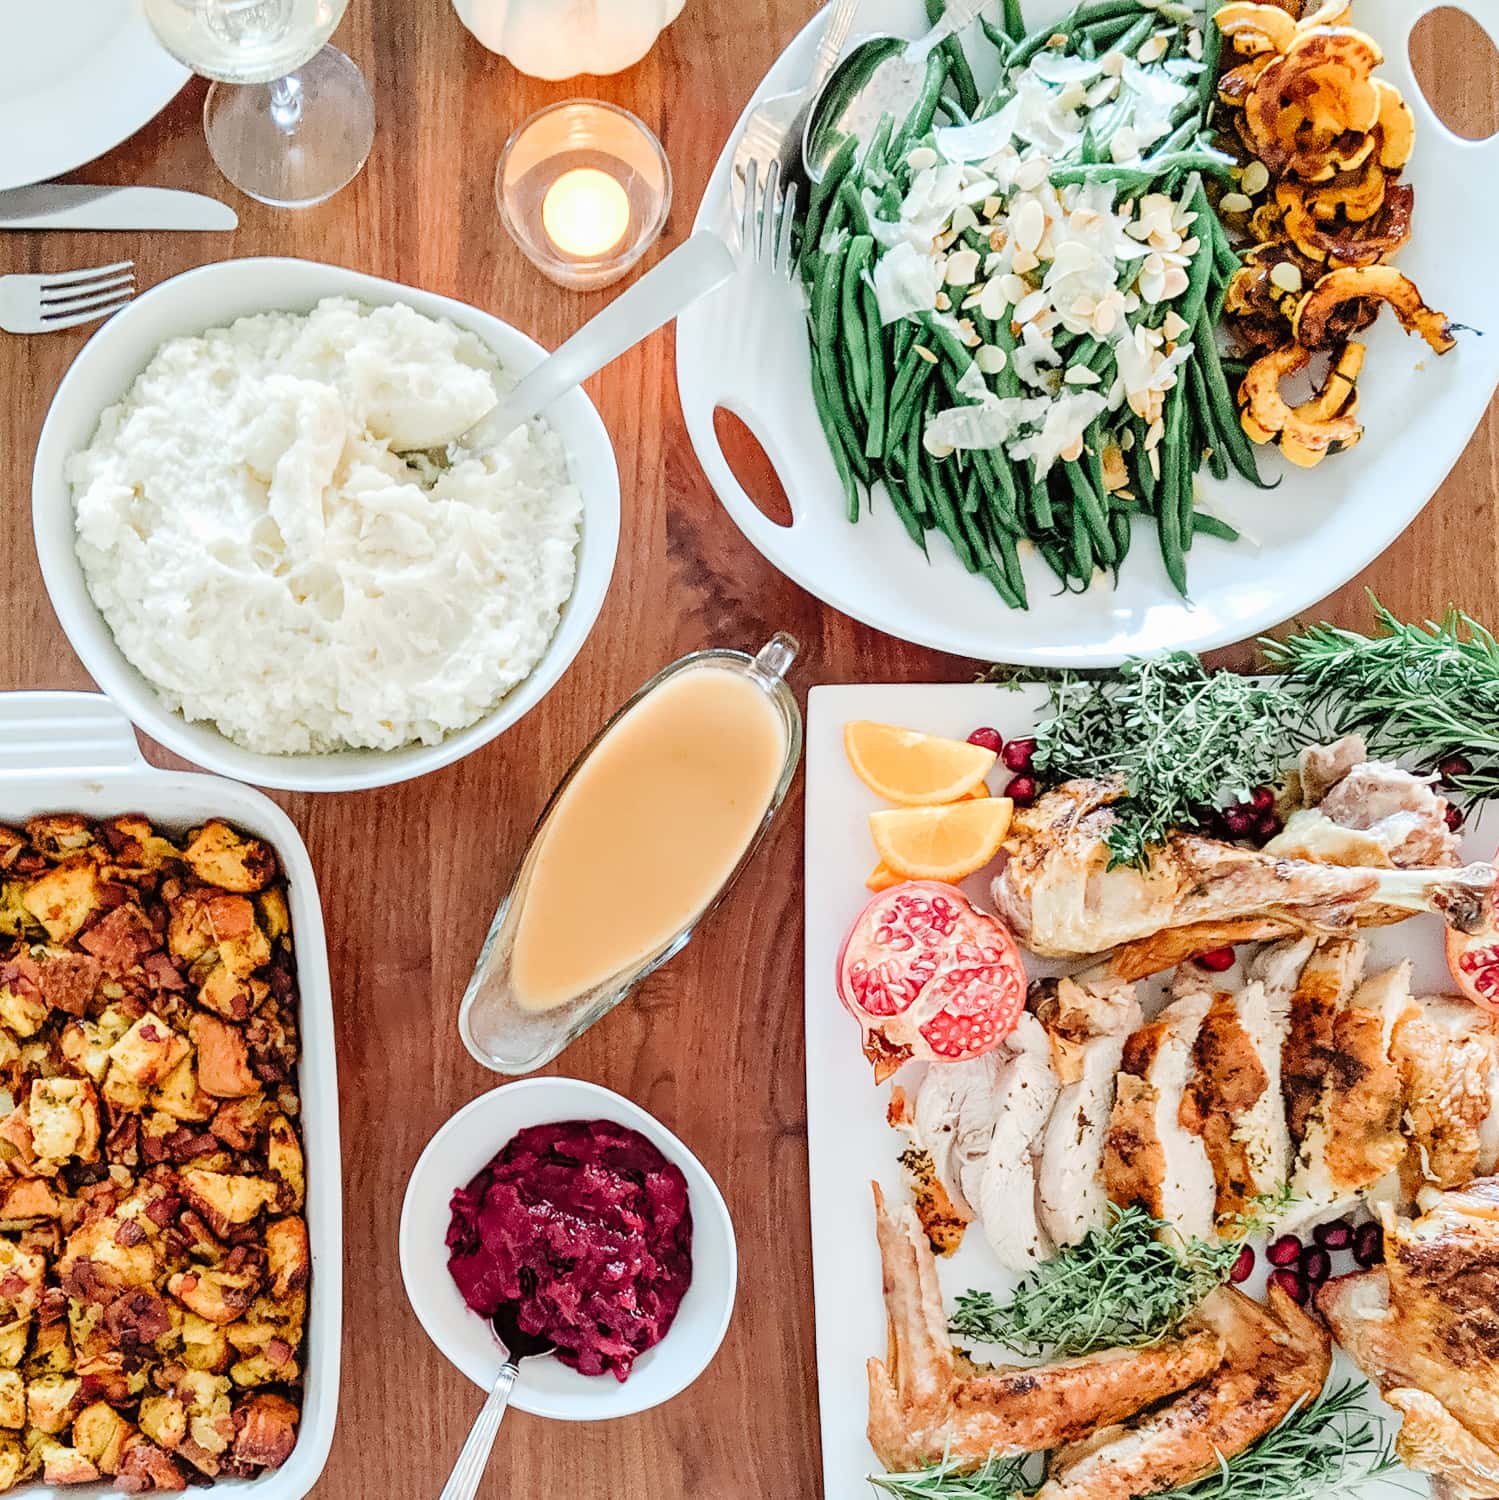
- Enjoy! This turkey gravy along with this Cranberry Orange Sauce are the perfect side kicks for a delicious turkey dinner.
Storing and Reheating
How long does turkey gravy last in the fridge?
Gravy can be made ahead and stored in the fridge for up to 4 days.
Can you freeze turkey gravy?
Yes! It will keep in the freezer for up to 4 months. To freeze, let it cool completely first and then transfer to freezer safe containers, bags (Stasher bags are a great reusable option), Souper Cubes or even mason jars (see tips on freezing food in glass jars without breakage). To thaw, place in fridge overnight.
How do you reheat gravy?
Reheat in a saucepan over low heat while whisking occasionally for a smooth gravy. If the gravy was frozen, make sure to first thaw overnight in the fridge.
If you roasted a turkey, you can also whisk some of the drippings into the gravy as it reheats for added flavor.
A Few Questions Answered
Don’t worry! All of these issues can easily be solved.
Too thick? Add some extra turkey stock (or turkey drippings).
Too thin? Mix 1 tablespoon butter with 1 tablespoon flour and whisk into the gravy.
Lumpy? Pour through a fine mesh sieve.
The recipe makes more stock than what is needed for the gravy. This is intentional! The extra turkey stock is so useful. Use it in your homemade stuffing or other side dishes, to thin out the gravy if needed or to make a nice soup. You can also freeze it to use later.
Definitely! Use the same recipe to make chicken gravy by simply replacing the turkey parts with chicken pieces like chicken backs and chicken wings.
More Thanksgiving Sides
Here are a few more delicious side dishes to enjoy with your Thanksgiving or holiday turkey!
I hope you love this Make Ahead Turkey Gravy recipe as much as I do. Please leave me a comment below if you try it out!

Make Ahead Turkey Gravy
- Prep Time: 15 min
- Cook Time: 3 hours
- Total Time: 3 hours 15 minutes
- Yield: 5 cups
- Category: Sauce
- Method: Stovetop
- Cuisine: American
Description
Save your sanity on turkey day with this delicious make ahead turkey gravy recipe. First a flavorful turkey stock is made which is then used as the base for the gravy. Say goodbye to last minute stress without sacrificing flavor!
Ingredients
For The Turkey Stock:
- 2 tablespoons avocado oil or olive oil
- Turkey backbone and neck OR 2 whole turkey wings (4 split pieces) and optional neck (see notes)
- 1 onion, roughly chopped
- 1 carrot, roughly chopped
- 1 celery stalk, roughly chopped
- 8 cups water
- 5 sprigs fresh thyme
- 3–4 garlic cloves, peeled
- 2 bay leaves
For The Turkey Gravy:
- 1/2 cup butter
- 1/2 cup unbleached all purpose flour
- 4–5 cups turkey stock (made above)
- Season to taste with salt, freshly ground pepper and 1-2 teaspoons of tamari (or soy sauce)
Instructions
A delicious turkey stock is the key to this gravy. Once the stock is made, the gravy comes together quickly.
Turkey Stock:
- Brown the turkey parts: Heat a large stock pot or dutch oven over medium/high heat. Add the oil, followed by the turkey pieces and cook until browned while turning occasionally. Or roast them in the oven (see directions for the “oven roasting method” below).
- Add veggies: Stir in chopped onion, carrot and celery and sauté until starting to brown.
- Add water and herbs: Pour in water and add the thyme, garlic and bay leaves.
- Simmer: Bring to a simmer and cook for 2-4 hours.
- Strain: Strain the stock through a large fine mesh sieve. Allow to cool for a bit and skim the fat off the top. Set aside 5 cups of stock for the gravy and store the remainder in the fridge.
Oven Roasting Method: Sometimes it’s easier to brown the turkey parts and vegetables in the oven. Preheat oven to 400F/200C. Place turkey pieces, onion, celery and carrot on a baking sheet. Drizzle over the oil and toss to coat. Roast for 1 hour or until well browned, flipping occasionally. Add everything, including drippings, to a large pot and continue with Step 3 above.
Turkey Gravy:
- Melt butter: Melt the butter in a medium saucepan over medium heat. You can also replace some of the butter with the fat from the top of the cooled turkey stock which has lots of flavor.
- Whisk in flour: Whisk in the flour for a few minutes until lightly golden brown.
- Add stock: Slowly whisk in 4-5 cups of the turkey stock. The amount will depend on the thickness you like and if you will be adding in any drippings when reheating.
- Simmer: Simmer until thickened, while continuing to whisk occasionally (about 5-10 minutes).
- Season: Season to taste with salt, pepper and tamari. Store in the fridge for up to 4 days. The gravy will look thick after sitting in the fridge but will loosen back up once reheated.
- Reheat: Reheat over low heat while whisking occasionally for smooth gravy.
Extra Flavor Boost: If you roasted a turkey, you can also whisk some of the drippings into the gravy as it reheats for added flavor. I highly recommend this! After roasting your turkey, pour the drippings from the finished turkey through a fine mesh sieve into a measuring cup. Skim off the fat and then whisk some of the drippings into the gravy as it reheats.
Notes
- Turkey Parts To Use: If you spatchcock your turkey like I do, then you can simply use the backbone and the neck (you may need to chop the backbone up into a few pieces to fit into the pot). If not, purchase a few turkey wings to use instead of the backbone and make the stock with the wings and neck. If your turkey didn’t include a neck, just use turkey wings.
- Tamari: Adding a bit of tamari (or soy sauce) adds some depth of flavor and color. Don’t skip it or your gravy will miss out on the umami flavor boost it gives!
- Storing and Reheating: Store in the fridge for up to 4 days or in the freezer for up to 4 months (thaw in fridge overnight before serving). Reheat gravy over low heat while whisking occasionally for a smooth consistency.
- Gravy Issues:
- Too Thick? Add more stock or turkey drippings.
- Too Thin? Mix 1 tablespoon butter with 1 tablespoon flour and whisk into gravy.
- Lumpy? Pour through a fine mesh sieve.
- Leftover Turkey Stock: This recipe makes more stock than needed for the gravy. Use the extra stock in your homemade stuffing or other sides, to thin out your gravy if required or to make a nice soup. Or freeze it for later.
- Make Chicken Gravy: Use this recipe to make chicken gravy by simply replacing the turkey parts with chicken pieces like chicken backs and wings. Or use a homemade chicken bone broth made from leftover roast chicken carcasses.
⬇ PIN it for later! ⬇



This sounds delicious, and I’m so tired of feeling frazzled while attempting to produce a good gravy while everyone’s chomping at the bit to sit down and eat.
But we never have enough gravy. So how to adjust this recipe to use all the stock? Double it?
You can most definitely double the gravy part of the recipe to use up all the stock. Just make sure to use a pot large enough since you will end up with a lot of gravy.
This is perfect. I am not a good gravy maker so making it early relieves the stress and pressure. Those last minutes before guest arrive are usually a little hectic. Now no worries about the gravy. I know it will be perfect.
I’m so happy that this will help you alleviate some stress! Enjoy!
Do I ever need this recipe! You are 100% correct about the added stress of making the gravy under pressure. Thanks for this useful post. It will be on repeat for the holidays
I’m so happy that you found this recipe helpful!
Wow! This is gonna be the best turkey gravy I’ve ever made! My family is gonna love it on Thanksgiving. Thank you
You’re welcome!
I am a big fan of making as much as I can ahead of the big Thanksgiving meal. This Turkey gravy is perfect for exactly that.
Such a great way to make things easier on the big day!
This turkey gravy is fantastic! I swear by make-ahead gravies. Anything to keep the day-of prep for a big dinner running more smoothly!
It totally makes turkey day way more relaxing!
This is so perfect for me – the cook that doesn’t like pressure! I never though to make it ahead and this is brilliant!
I hate being stressed in the kitchen too. This makes holiday meals so much easier! And if you add some drippings in at the end, it tastes AH-MAZING!
Love the thought of making gravy ahead of time, it’s always such a pain at the time when you’re busy entertaining family, and such. Thanks for sharing this.
You’re welcome! Hopefully it makes turkey dinners easier for you!
Can’t wait to give this a try! It will come in handy next month!
Hope you enjoy!
I love a turkey dinner and the gravy is the final touch! Such a great idea to make it ahead of time and avoid the chaos!
There is always so much happening while trying to put together a turkey dinner. I love this recipe since I prefer not to frantically make gravy right at the end lol.