This post may contain affiliate links. See my disclosure policy.
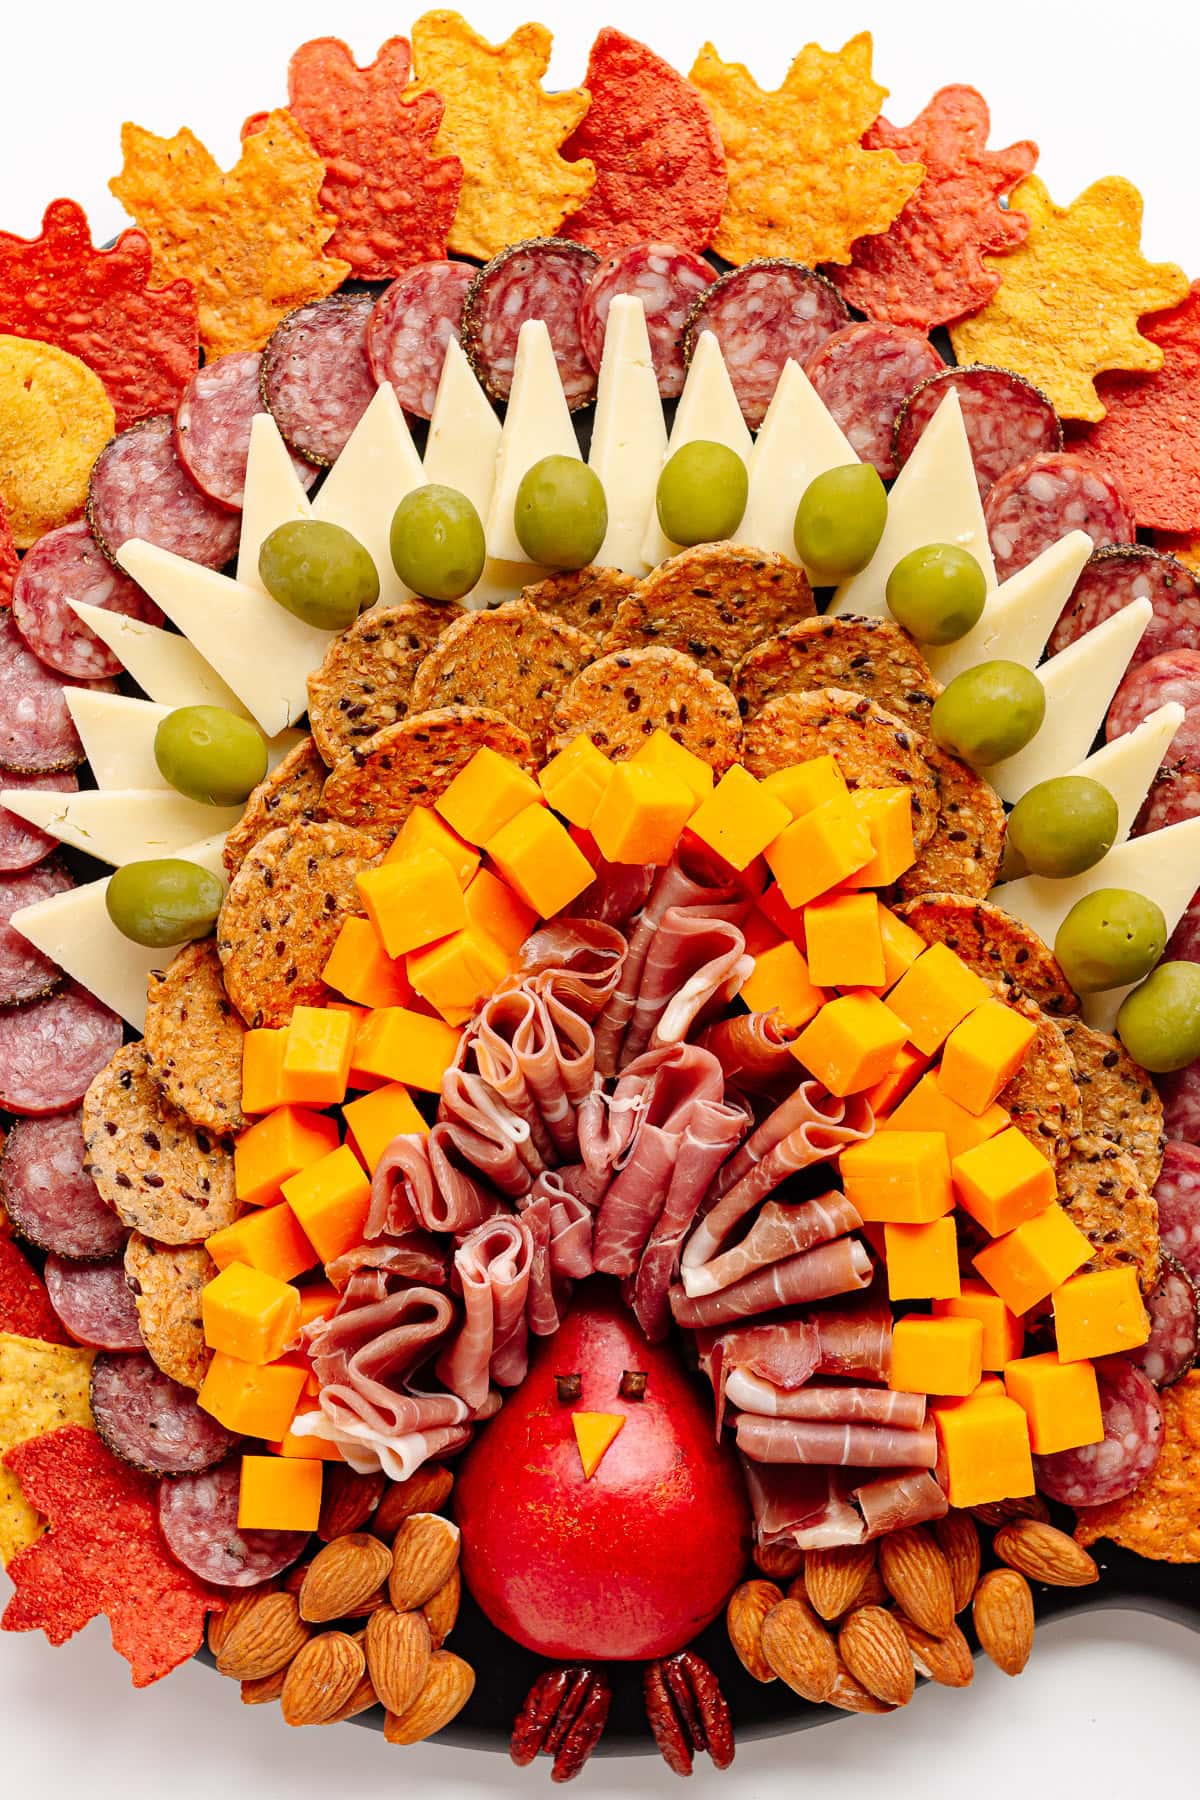
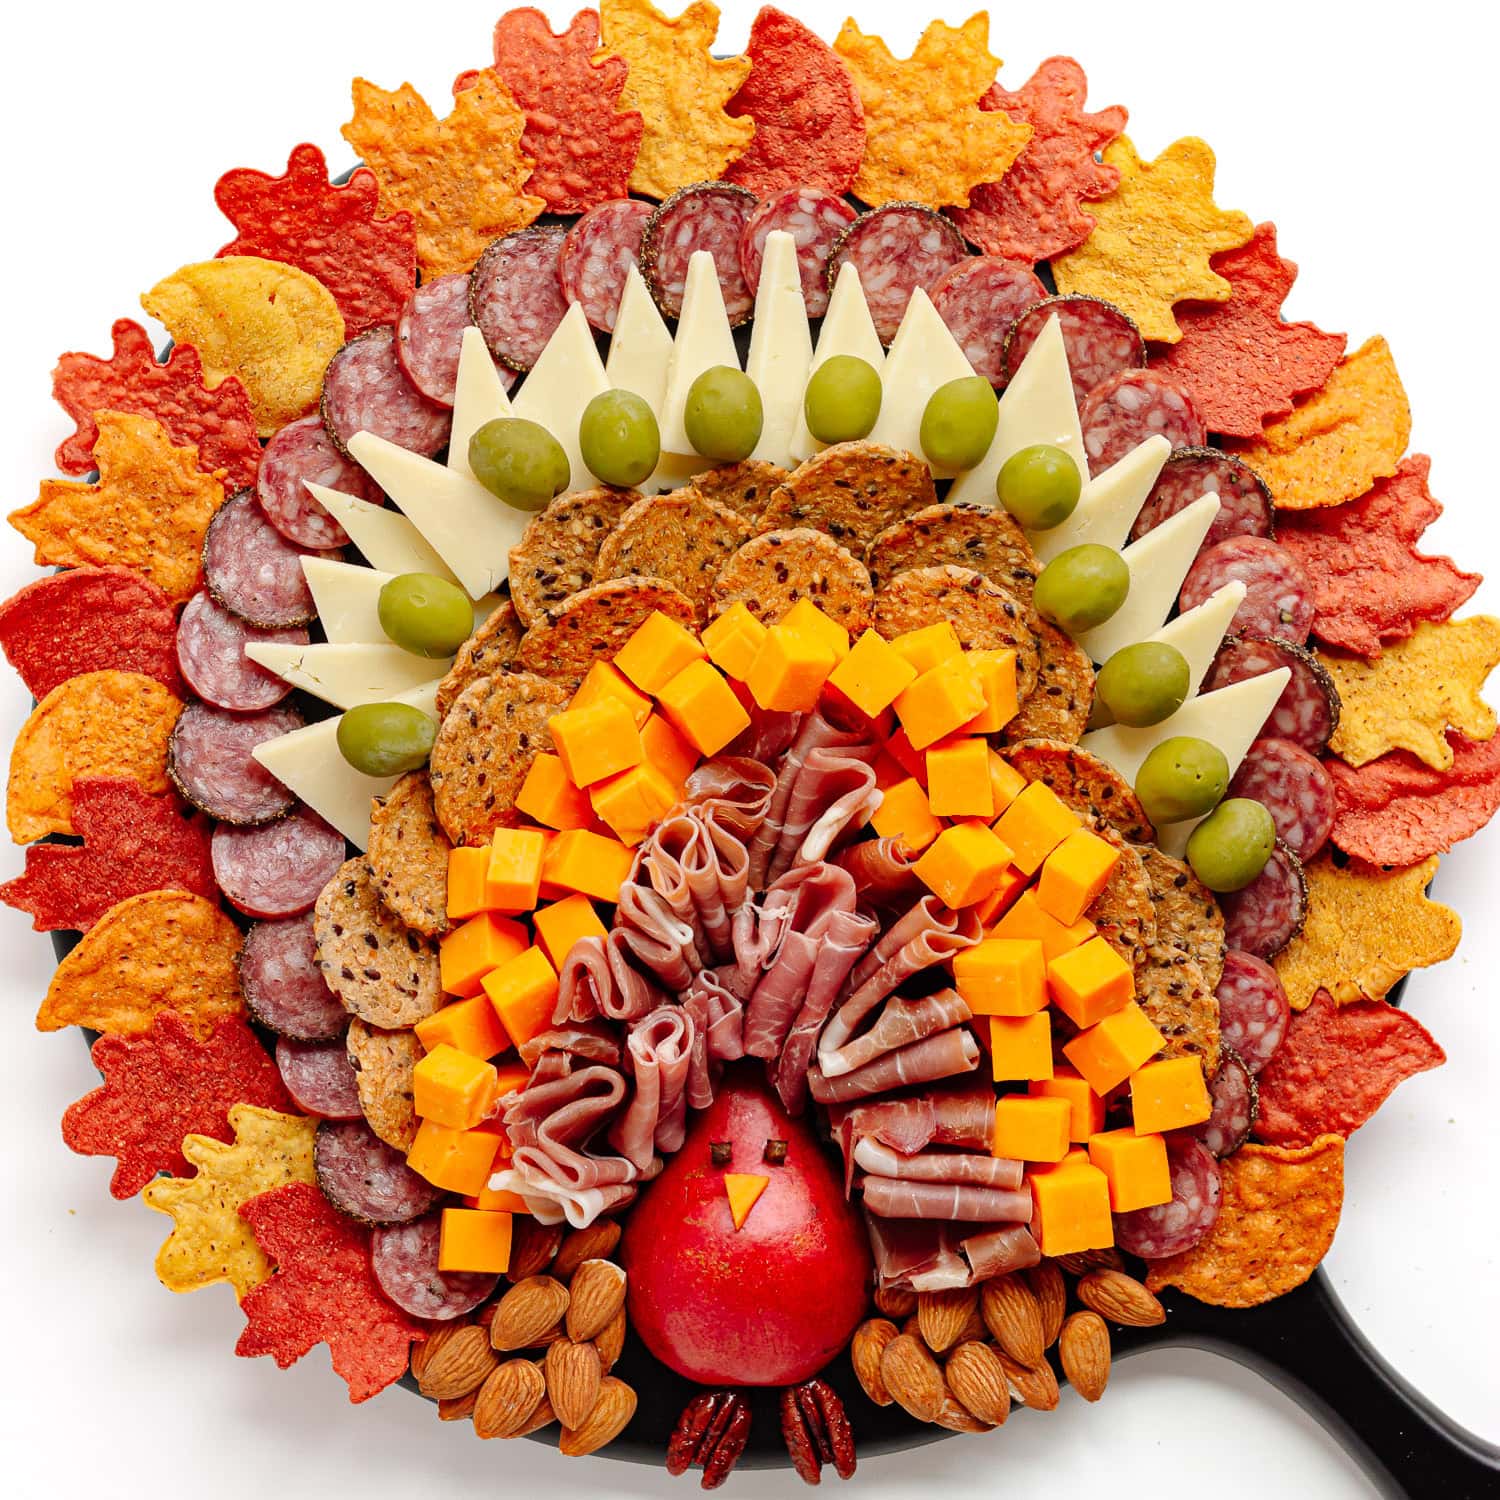
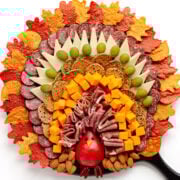
This turkey shaped Thanksgiving charcuterie board is such a cute appetizer idea. So easy to pull together and guaranteed to be a total hit at Thanksgiving or Friendsgiving.
Pin this now to find it later
Pin It3 Reasons To Make This Turkey Charcuterie Board For Thanksgiving
- First of all, it’s so easy! No cooking, just arranging everything on a board and you’re done.
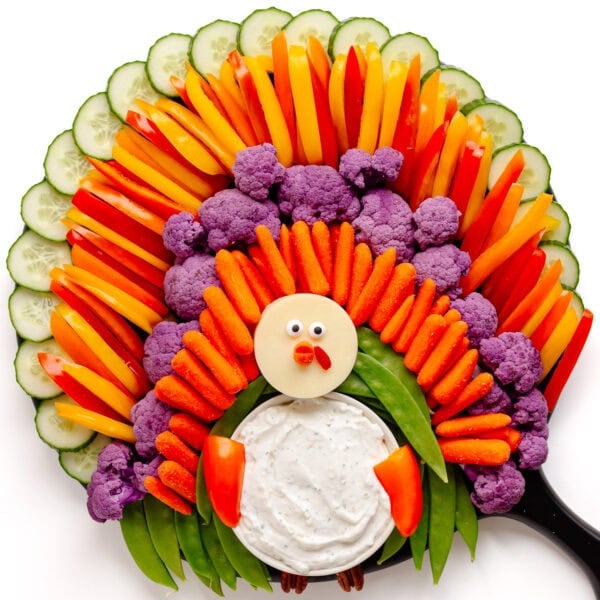
- It’s also the most fun (and super cute!) appetizer for Thanksgiving or Friendsgiving. Sure, we all love a classic charcuterie board but arranging it into the shape of a turkey? So much more fun! And if you love the idea of turkey shaped appetizers, definitely check out my Turkey Veggie Tray too!
- And the best part, it’s completely customizable! There are zero rules here. Use whatever meats, cheeses, crackers and other charcuterie board stuff that you love. Go simple, go fancy, go big, go small… it all works!
What You’ll Need
- Board or a platter: I used a 14-inch round wooden charcuterie board but you could use any round board or serving platter you have.
- For the “turkey body”: You will need a pear, 2 cloves, a small triangle cut out of cheddar and 2 pecan halves (or candied pecans).
- For the “feathers”: All the charcuterie board ingredients will be arranged in rainbow shaped layers to form the tail feathers. You can use any variety of cheeses, meats, crackers, nuts, olives, etc. that you like. For my board, I used leaf shaped tortilla chips (found at Trader Joe’s), hard salami, aged white cheddar, Castelvetrano olives, seed crackers, cubed cheddar, prosciutto and almonds.
How To Make This Thanksgiving Charcuterie Board
Let’s walk through step-by-step how to assemble this easy turkey shaped charcuterie board for Thanksgiving!
Step 1: Make the pear “turkey body”
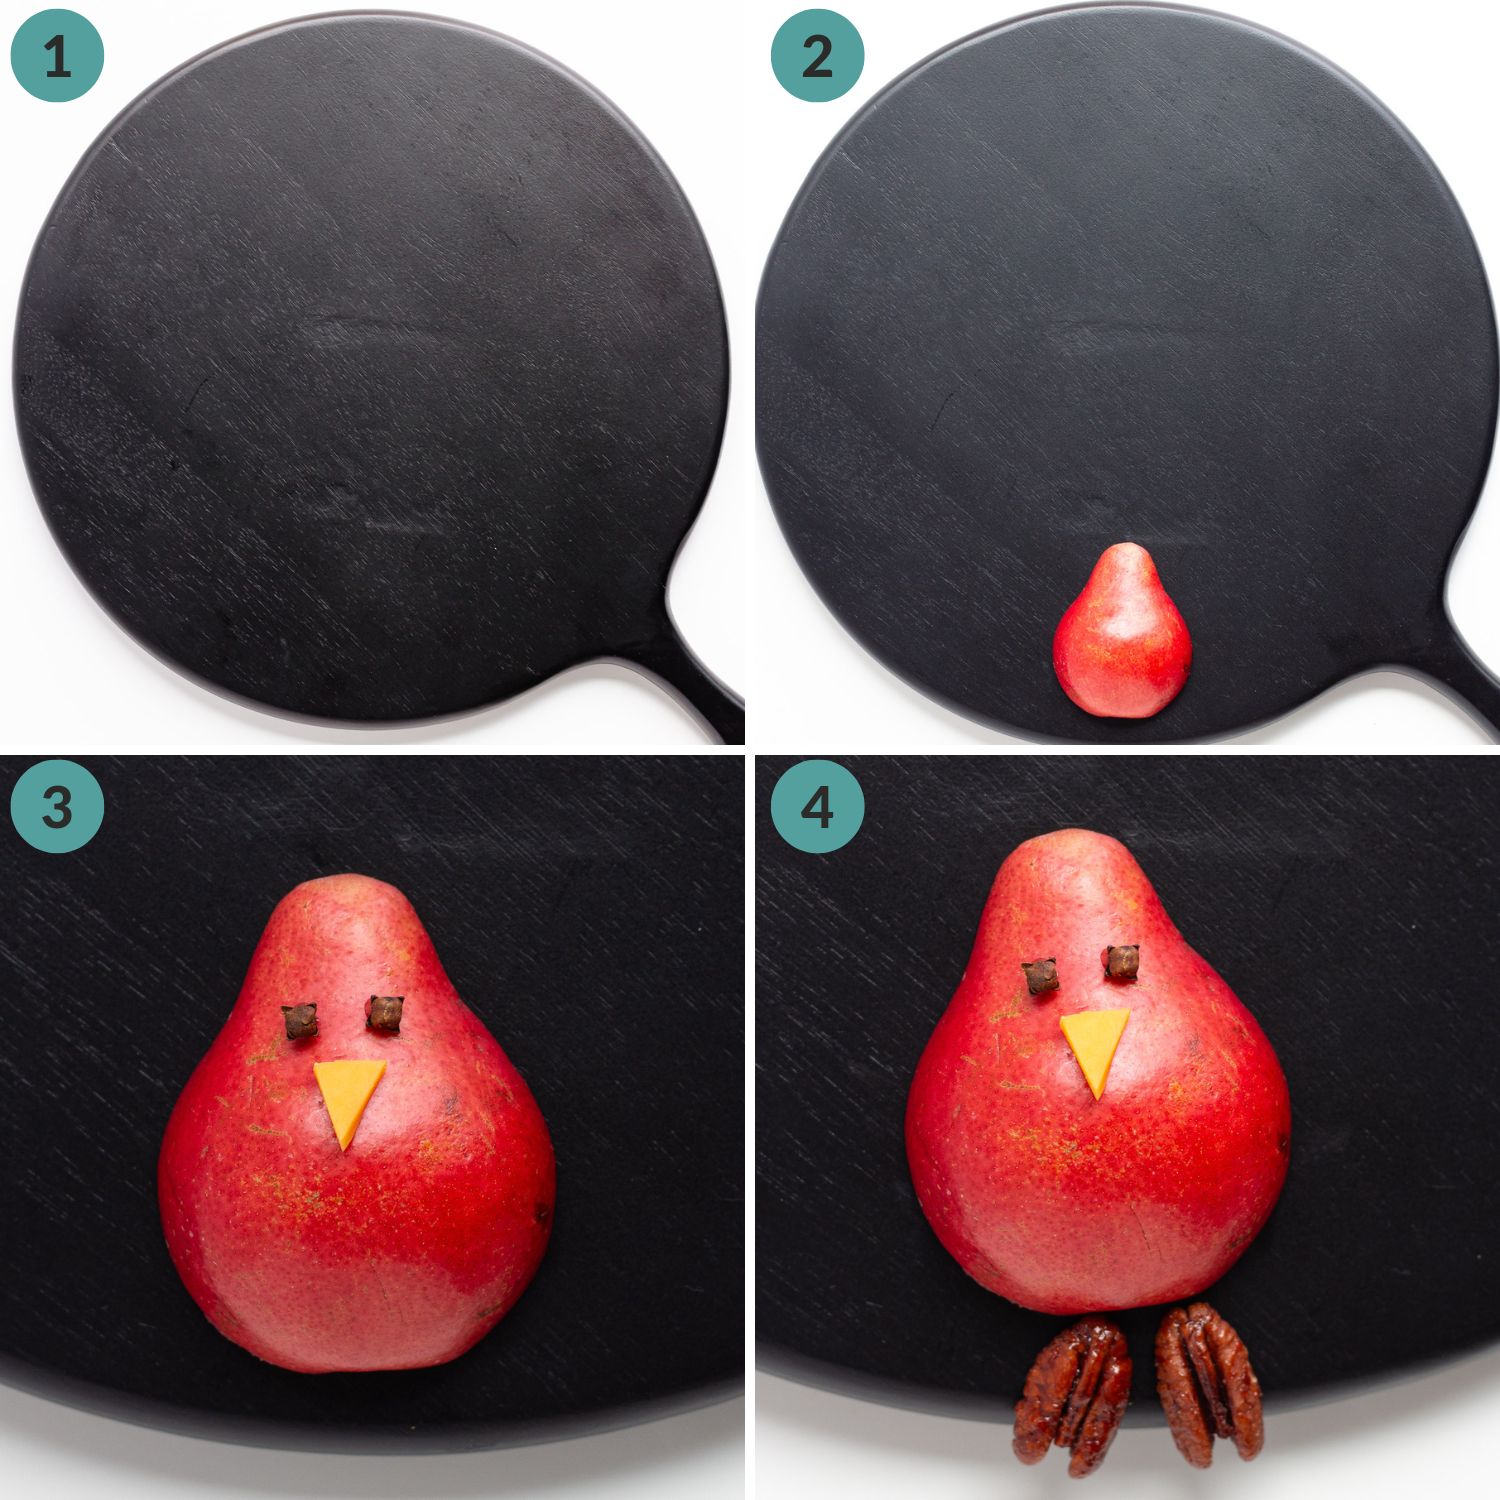
- Grab a round board or serving platter. In the photos, I am using a 14-inch round wooden charcuterie board but any size works (super versatile!).
- Cut a pear in half lengthwise to create a turkey body shape and place one half cut-side down near the bottom center of your board. You can use any type of pear you like.
- For the eyes, insert 2 whole cloves (or attach some candy eyeballs with a little honey). For the beak, attach a little triangle cut out of cheddar with some honey to keep it in place.
- Finally, for the feet, place two pecan halves or candied pecans at the bottom of the pear (you can add a little dab of honey to hold them in place if needed).
Step 2: Arrange the “tail feathers”
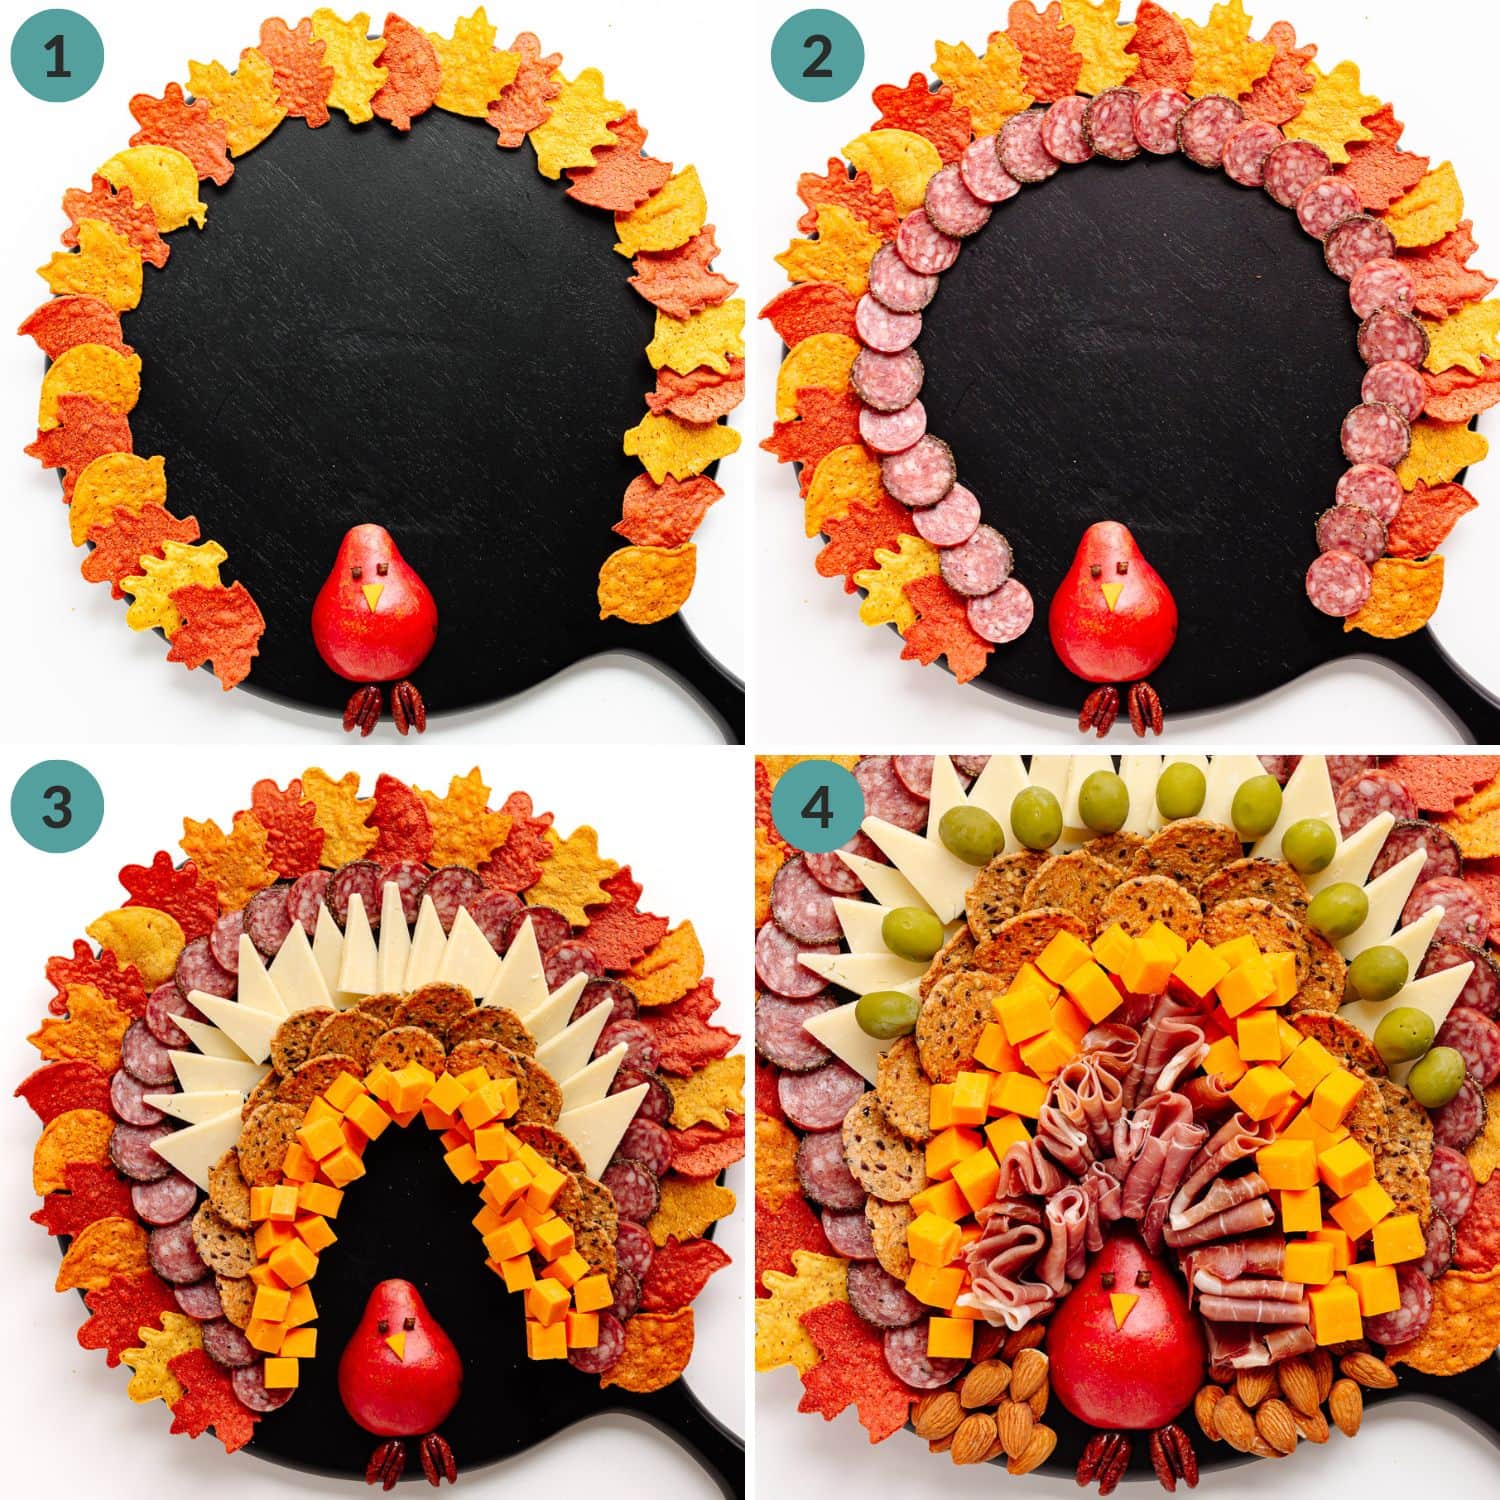
- Start building the “feathers” by layering all the charcuterie goodies in a semi-circle rainbow shape, starting at the top of the board and working in. Mix up the colors and textures for visual interest. For mine, I started with a layer of fun leaf shaped tortilla chips fanned out in an arc around the top edge of the board.
- Then I added a layer of two types of sliced hard salami.
- Next up, I added a layer of aged white cheddar cut into triangles, followed by a layer of seed crackers and then some cubed cheddar.
- For my last layer, in the space above the pear, I tucked in prosciutto folded into ruffly fans (I folded each slice in half lengthwise, then folded it back and forth like an accordion). To finish it all off, I added some almonds at the bottom and popped a few Castelvetrano olives between the white cheddar triangles.
Step 3: Enjoy
Now for the best part – serve it up! Let everyone soak in the cuteness for a minute and then lead the way by digging in!

Tips
A Few Tips
- A round charcuterie board or platter is definitely the easiest for shaping your turkey since you can just follow the curve to build the “feathers” into the perfect shape. But if all you’ve got is a square or rectangular board, no worries! Just fan those layers in a gentle arc around the turkey body and it totally works.
- Choose ingredients in a fall color palette.
- Have fun with it! Don’t stress about making it perfect (mine definitely isn’t, and it’s still so cute). Enjoy the process, play around and trust that it’s going to turn out adorable.
FAQ
Due to the size, you probably won’t be able to fit it in your fridge so it’s best to assemble shortly before serving. However, you can prep everything ahead like cutting up your cheeses and storing in airtight containers in the fridge until ready to assemble the board.
A large round board or serving platter works best to spread out the layers of “turkey feathers” and to follow the rounded edge as a guide. I used a 14-inch board (since that is what I have) but you can use any size depending on how large you want your charcuterie board to be.
I like to start off by making the turkey body out of the pear and placing it on the bottom center of my board. Then for the nicest layering effect, start arranging the various charcuterie ingredients in semi-circle shapes starting at the top and working in, ending around the pear. Alternate colors and textures of your ingredients for each arc and have fun with it!
Wrap up any cheese and meats separately and refrigerate for up to 3 days. Crackers are best stored separately at room temperature.
More Thanksgiving Appetizers
I hope you have fun assembling your own turkey shaped Thanksgiving charcuterie board! Please leave me a comment below if you make one or tag me on Instagram.
Thanksgiving Turkey Charcuterie Board
- Prep Time: 20 min
- Cook Time: 0 min
- Total Time: 20 min
- Yield: varies
- Category: Appetizer, Snack
- Method: No Cook
- Cuisine: American
Description
This turkey shaped Thanksgiving charcuterie board is such a cute appetizer idea. So easy to pull together and guaranteed to be a total hit at Thanksgiving or Friendsgiving.
Ingredients
- 1 pear, for turkey body
- 2 cloves, for eyes
- small piece of cheddar cut into triangle, for beak
- 2 pecan halves or candied pecans, for feet
- charcuterie board ingredients (variety of meats, cheeses, nuts, crackers, olives, etc.), see notes
- round board or platter (any size, mine was 14 inches)
Instructions
- Grab your board: A round board or platter works best – any size you like! For mine, I used a 14-inch round wooden board.
- Make the turkey body: Cut a pear in half lengthwise and place one half cut-side down near the bottom center of your board. For the eyes, insert 2 whole cloves. Cut a tiny cheddar triangle for the beak (you can use a dab of honey to secure) and position two pecan halves or candied pecans at the bottom of the pear for feet (once again, honey can help keep them in place).
- Arrange the tail feathers: Start building the “feathers” by layering all your favorite charcuterie goodies in a semi-circle rainbow shape, starting at the top of the board and working your way in. Mix up the colors and textures for visual interest. For mine, I started with a layer of leaf shaped tortilla chips fanned out in an arc across the top. Then came two types of sliced hard salami, followed by aged white cheddar triangles, seed crackers, cheddar cubes and finally some ruffly folded prosciutto above the pear. I finished it off with some almonds at the bottom and a few Castelvetrano olives placed between the white cheddar triangles.
- Enjoy: Now for the best part – serve it up! Let everyone soak in the cuteness for a minute and then lead the way and dig in!
Notes
- Charcuterie Board Ingredients: Use any variety of charcuterie board goodies that you love (cheeses, meats, crackers, nuts, olives, etc.). Since they will all be arranged in rainbow shaped layers to form the tail feathers, picking ingredients in a fall color palette makes it extra pretty. For my board, I used leaf shaped tortilla chips (found at Trader Joe’s), two types of hard salami, aged white cheddar, Castelvetrano olives, seed crackers, cubed cheddar, prosciutto and almonds.
- Prep Time and Yield: This will totally depend on the size of your board and how detailed you want to get with arranging.
- Make It Your Own: This is meant to be super versatile! These steps are just a guide but the magic of a charcuterie board is how customizable it is. Play around, get creative and fill it with your favorites. The possibilities are endless! And if you want a little inspirations, the step-by-step photos in the post will walk you through what I did.