This post may contain affiliate links. See my disclosure policy.
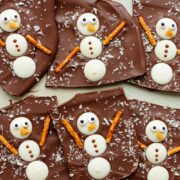
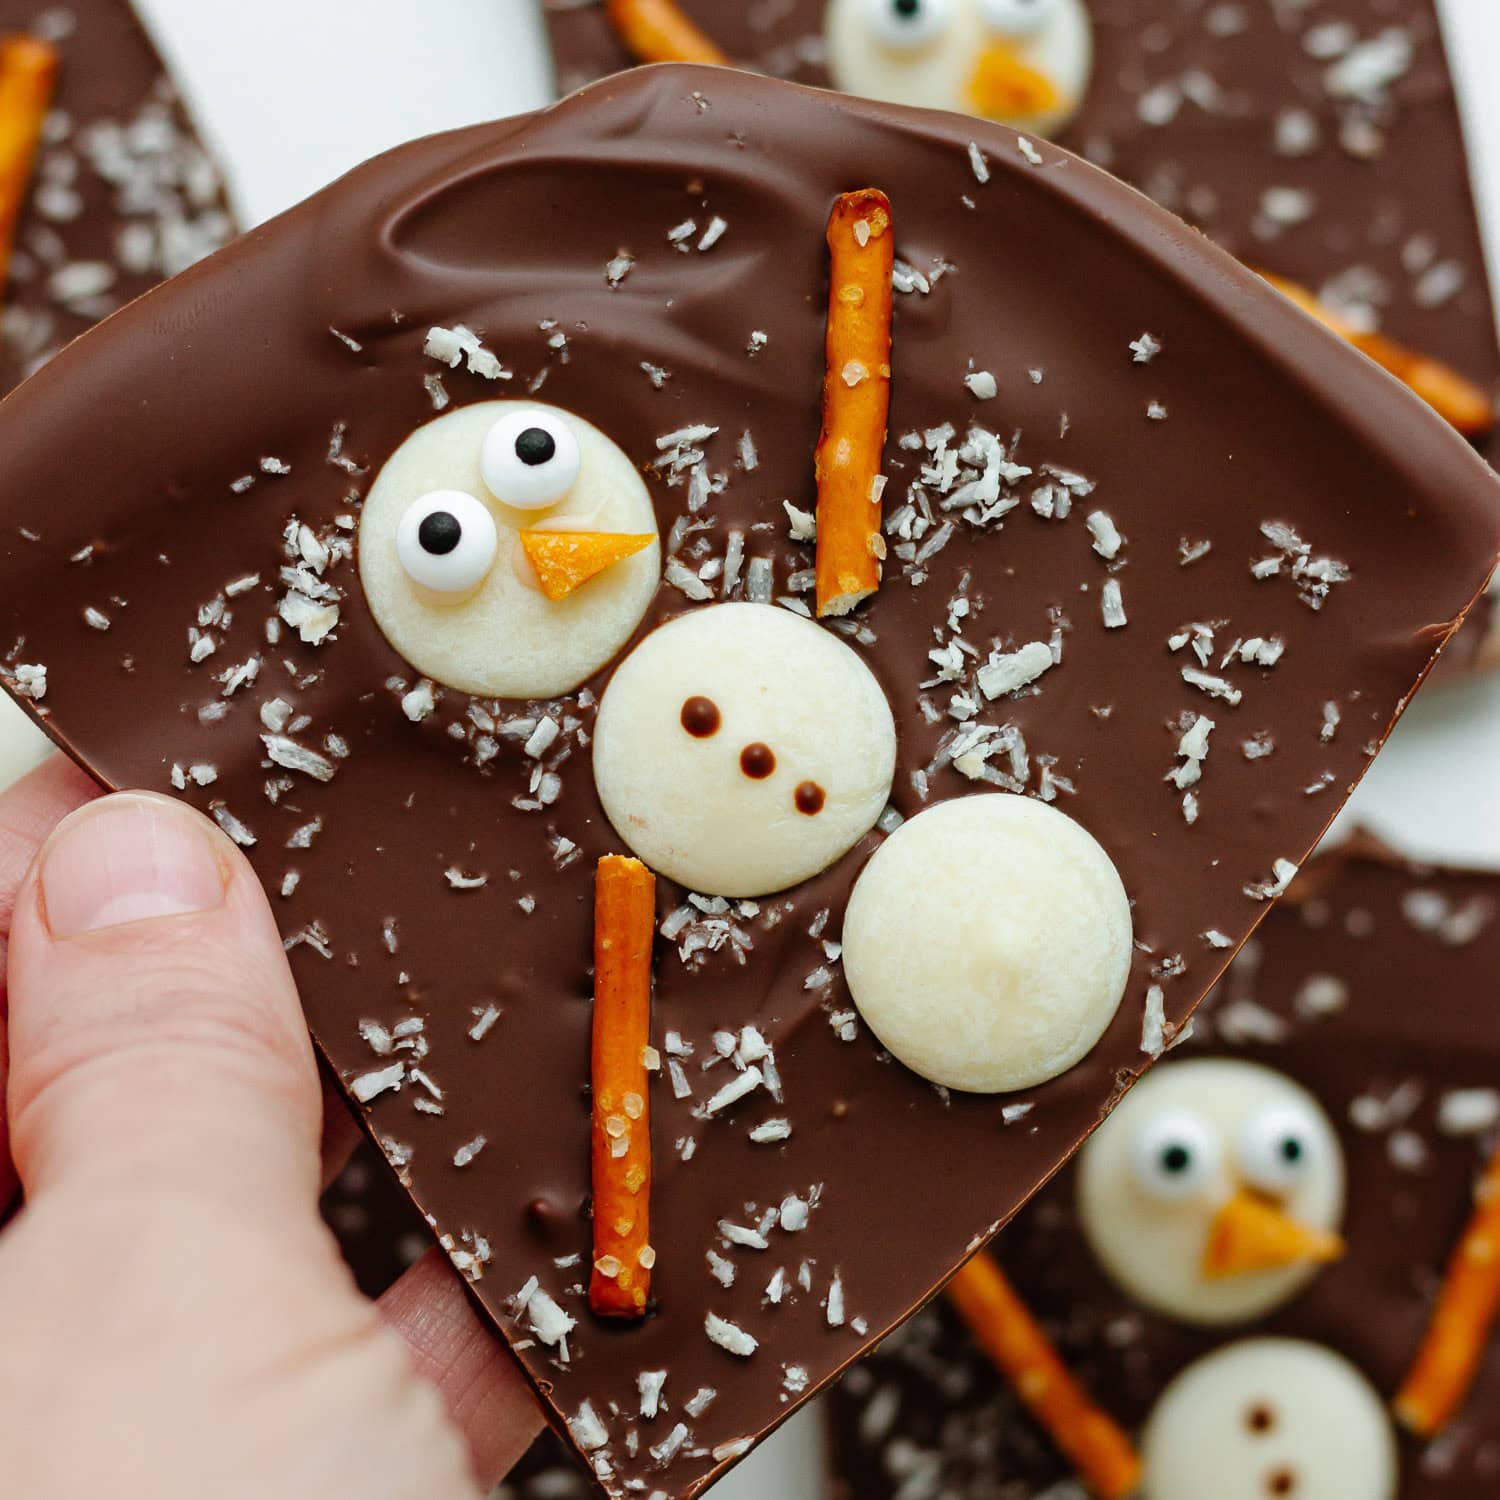
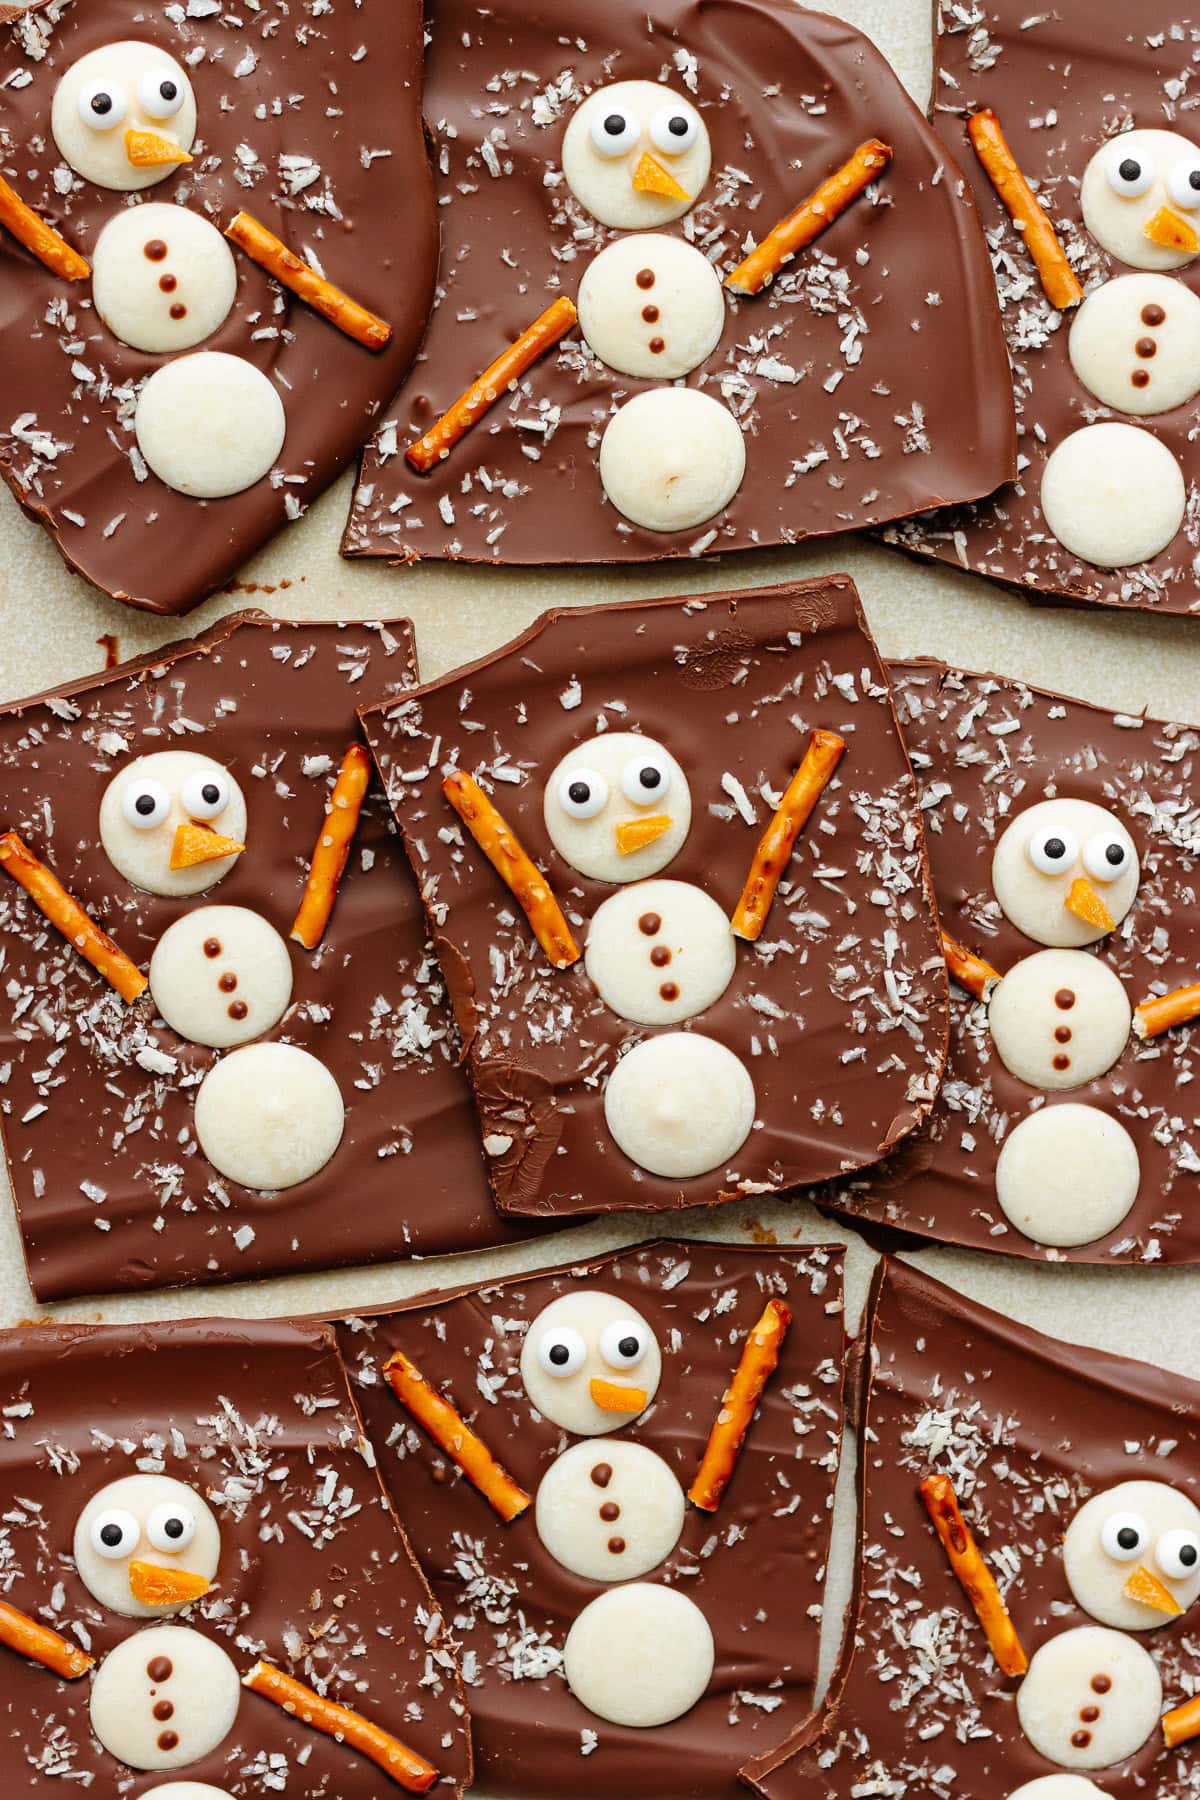
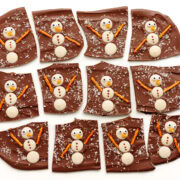
This Snowman Chocolate Bark is almost too cute to eat…almost! If you’re all about simple, no-bake holiday treats, this Christmas bark recipe is for you! Fun, easy and perfect for snacking or gifting.

3 Reasons To Love This Christmas Chocolate Bark
- A quick and easy no-bake treat! This simple holiday treat takes just 10 to 15 minutes of hands on time.
- It’s so adorable! The little snowmen on this chocolate bark are just too cute!
- Perfect for gifting! This makes such a great homemade gift – just pack it up in cute little boxes, tins or cellophane bags.
Ingredient Notes
Here’s what you’ll need to make this Snowman Chocolate Bark:
Detailed ingredient list and directions located in the recipe card below.
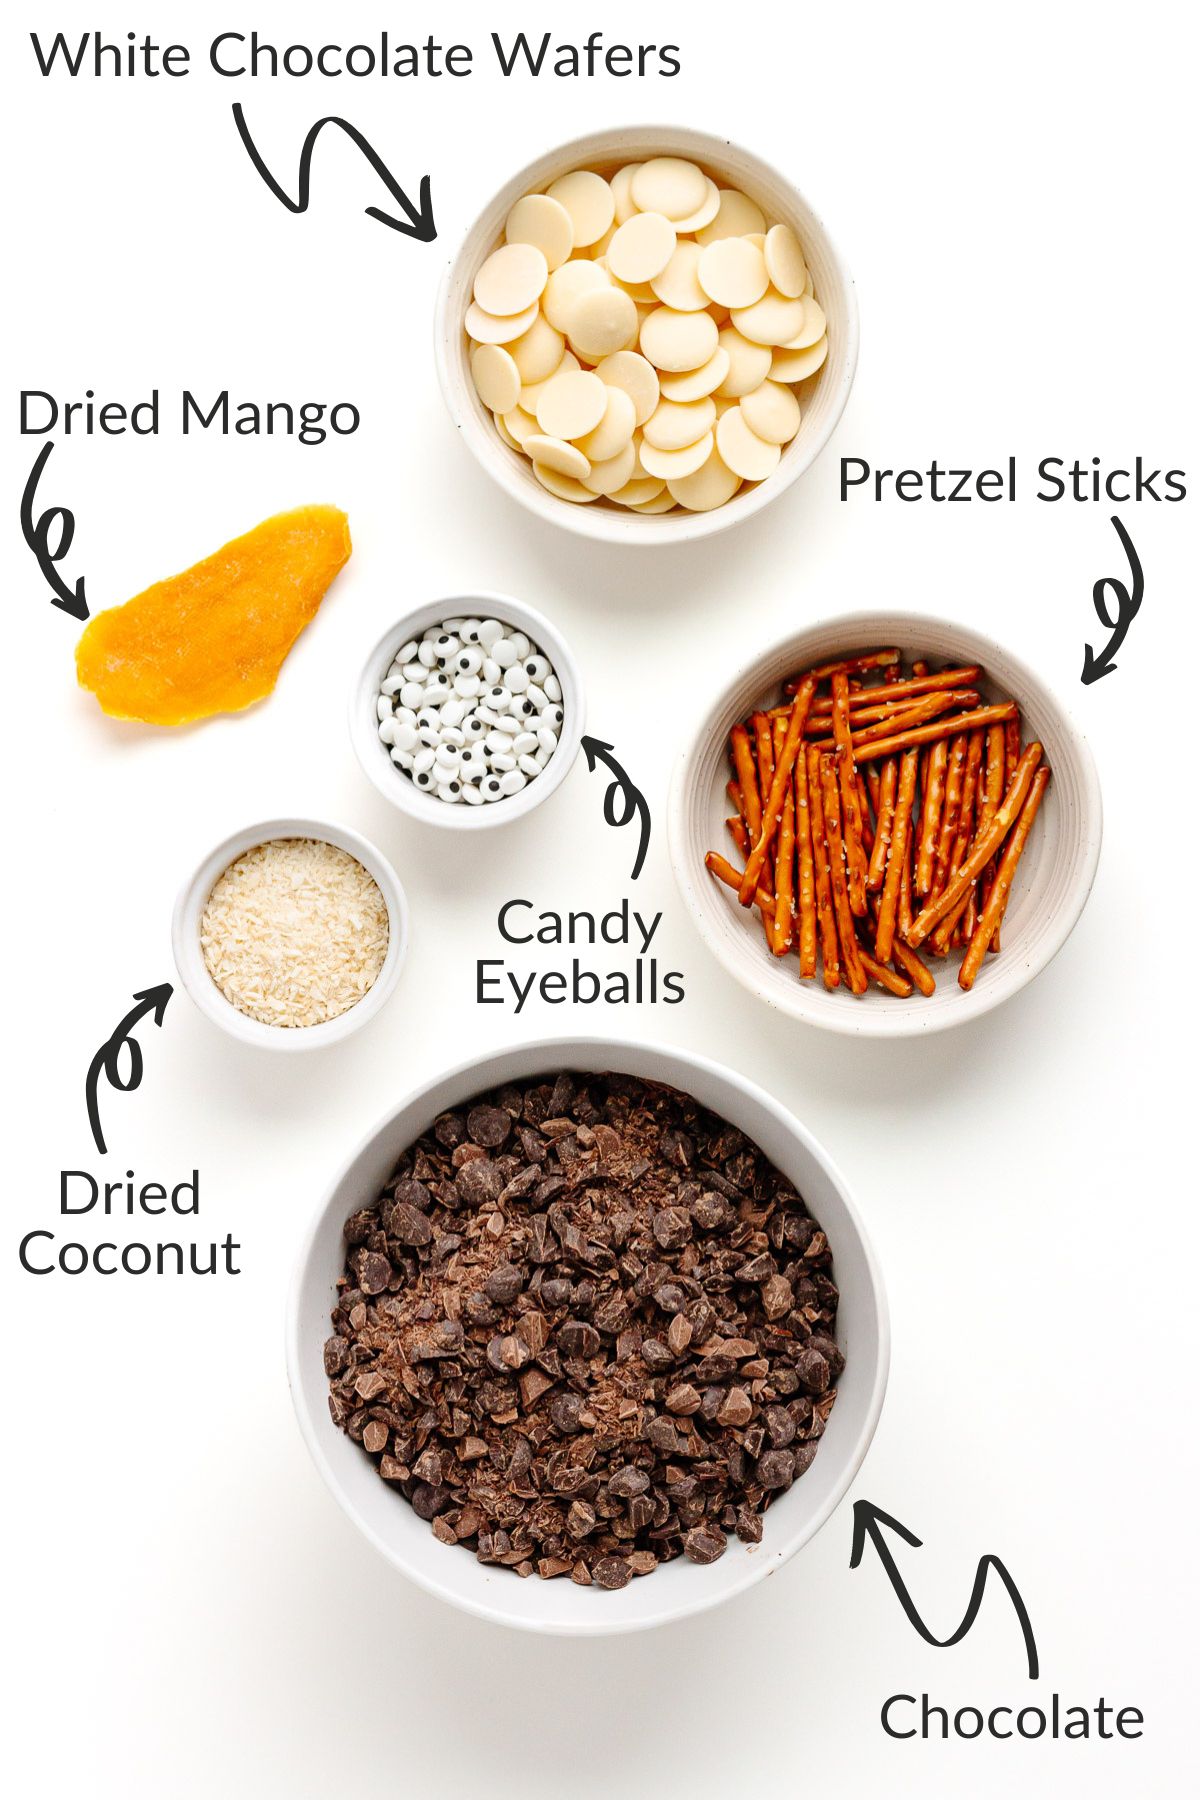
- Chocolate: Use good quality chocolate – milk, semi-sweet or dark chocolate. The better the chocolate, the better the bark! I don’t recommend melting chocolate chips for bark – they tend to contain stabilizers that help them hold their shape and make it tough to get a silky smooth consistency.
- Dried Coconut: Desiccated or fine shredded to resemble snow.
- White Chocolate Round Wafers: For the body of the snowman.
- Pretzel Sticks: Use thin pretzel sticks for the snowman’s arms. Break them apart to get the right size.
- Mini candy eyeballs: Using mini candy eyeballs for the eyes make the snowmen look so cute!
- Dried Mango: For the “carrot nose”, I like to cut little triangular shapes out of dried mango.
A Few Decorating Variations
There are lots of other ways to decorate this snowman bark. Here are some variations:
- Instead of dried coconut: You could also use white sprinkles or grated white chocolate for the “snow”.
- Make your own white chocolate round wafers: If you don’t have white chocolate wafers, no problem! Just melt some white chocolate, drop spoonfuls onto a parchment lined baking sheet, and shape them into small circles. Pop them in the fridge or freezer to set, and you’re good to go!
- Instead of mini candy eyeballs: Use mini chocolate chips, edible ink markers or dots of melted chocolate for the eyes.
- Swap the dried mango: The nose can be made from anything orange. You could also use dried orange peel, dried apricots, a long orange sprinkle or draw it on with an edible ink marker.
How To Make Snowman Bark
Let’s walk through how to make this incredibly cute Christmas bark, step-by-step!
Step 1: Melt chocolate
If needed, chop the chocolate first into small pieces (if in bar form). Place 1 pound (454 grams) chocolate in a heat-proof bowl set over a saucepan filled with 1-inch of gently simmering water (make sure water doesn’t touch the bottom of the bowl). Or use a real double boiler if you have one. Stir chocolate until almost fully melted (about 90% melted). Remove from heat and continue to stir until chocolate is fully melted and smooth.
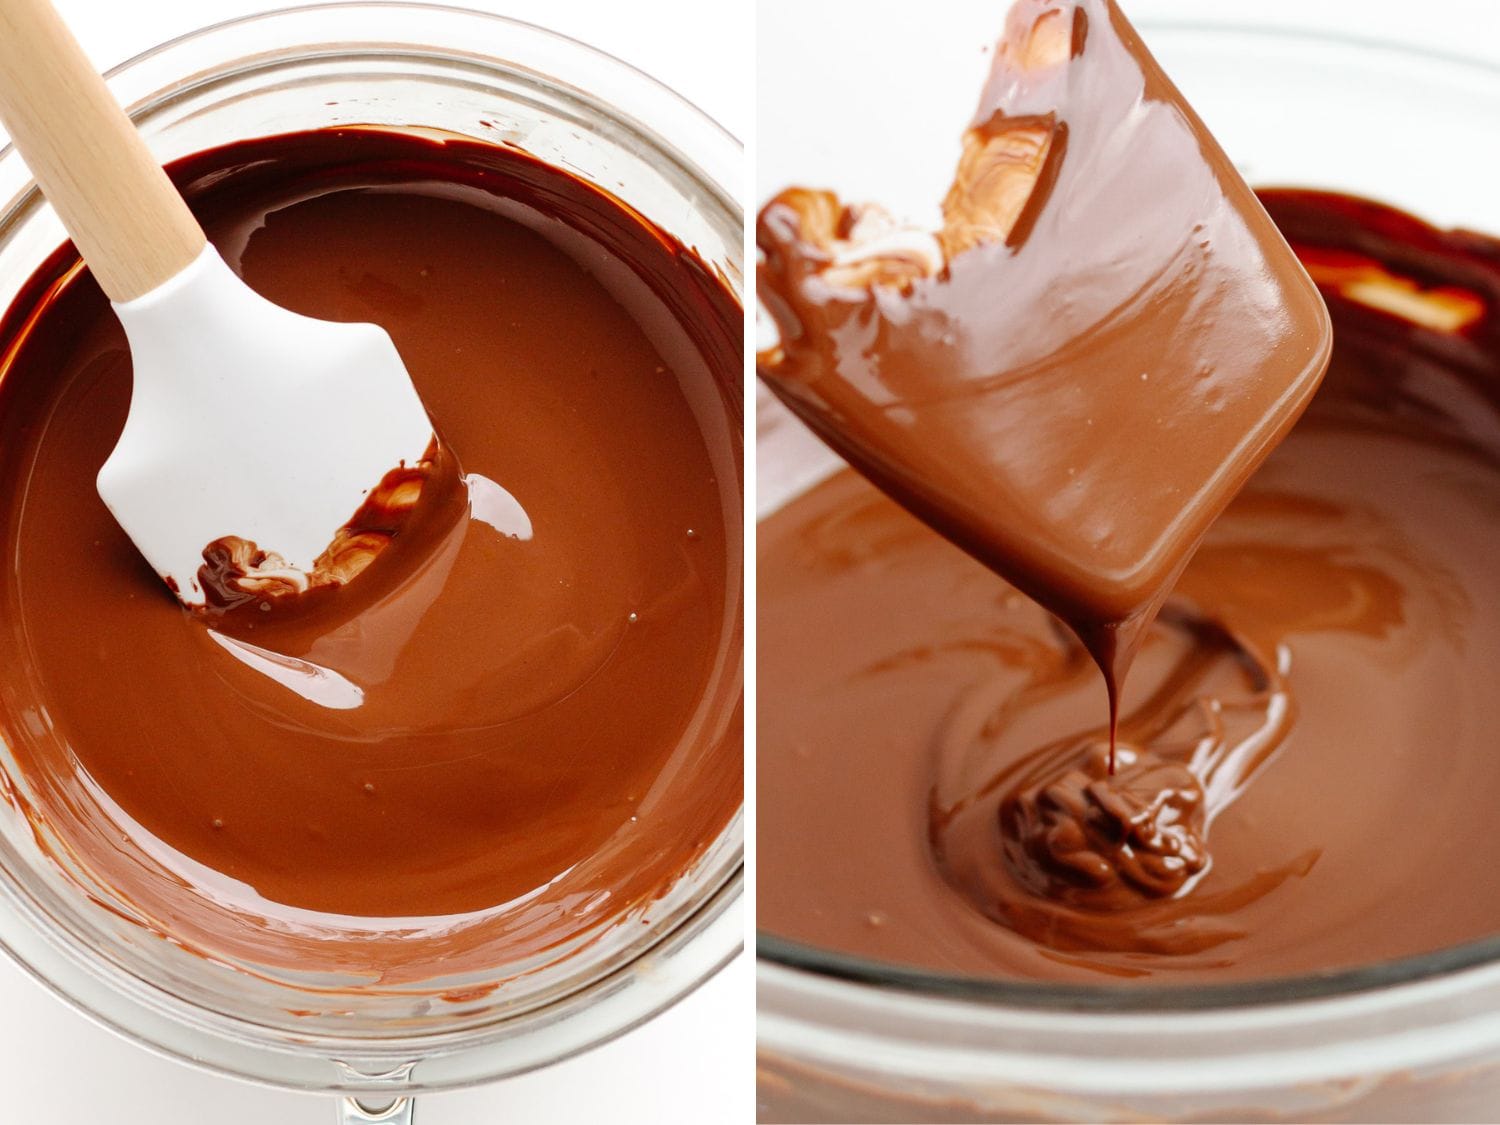
Can I use the microwave? I prefer the stovetop method for melting chocolate but you can also use the microwave if you prefer. Place the chocolate into a large heat-safe bowl and microwave in 15-30 second intervals, stirring between each interval, until the chocolate is melted and smooth. Be careful not to overheat!
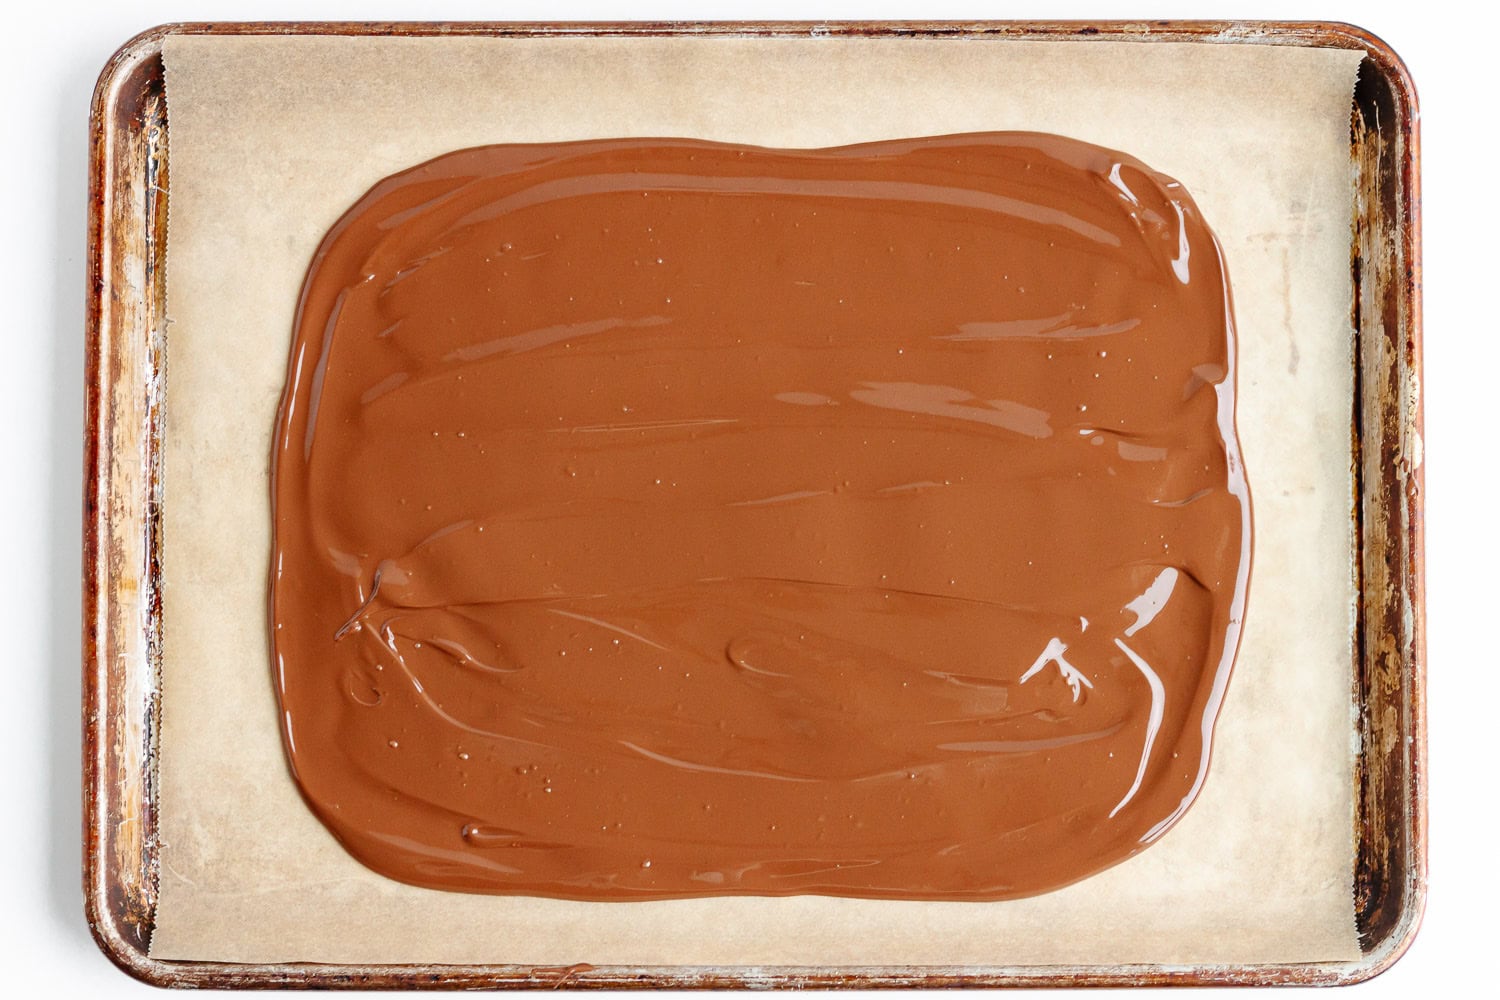
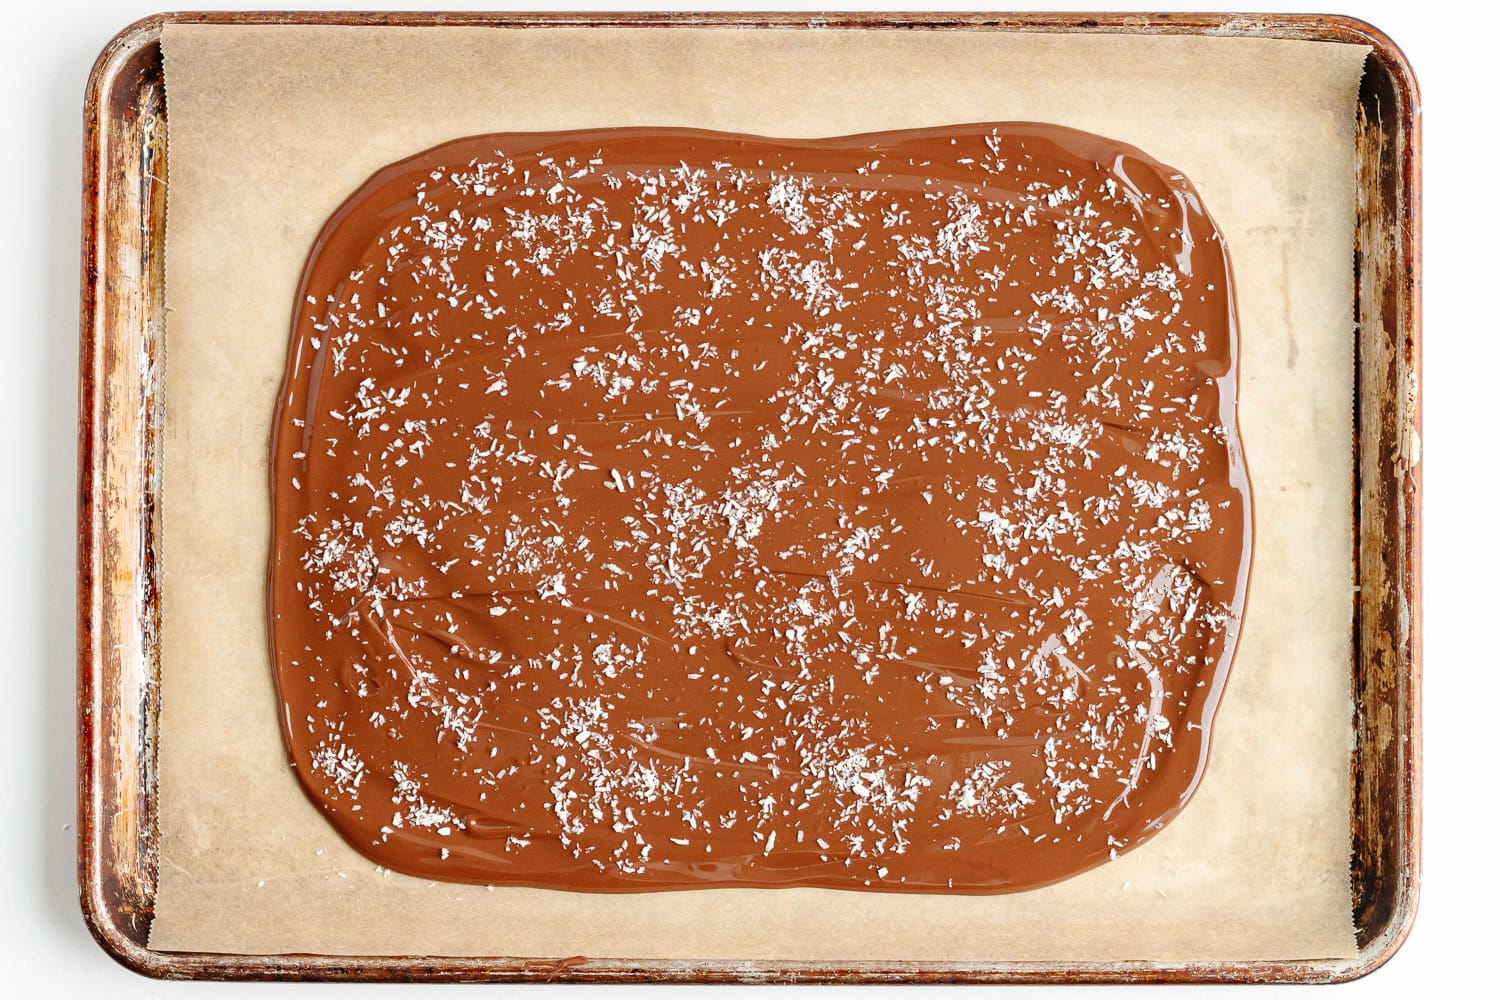
Step 2: Pour and spread the chocolate
Make sure to wipe off any condensation from the bottom of the bowl first (water in the chocolate can make it seize up and nobody wants that!). Then pour the melted chocolate onto a parchment-lined baking sheet and spread out into a rectangular shape about ¼ inch thick using a rubber spatula or offset spatula. It won’t fill out the whole sheet.
Step 3: Sprinkle on the “snow”
Sprinkle over 1 tablespoon of dried coconut to give the bark that snowy look.
Step 4: Assemble the snowmen
Start building the snowmen right away by placing groups of three white chocolate wafers on the chocolate to form each snowman’s body. I usually end up making 12 snowmen. Make sure to leave some space between each one. Next, break pretzel sticks to the right length for the arms and press them into the chocolate on each side of the middle part of each snowman.
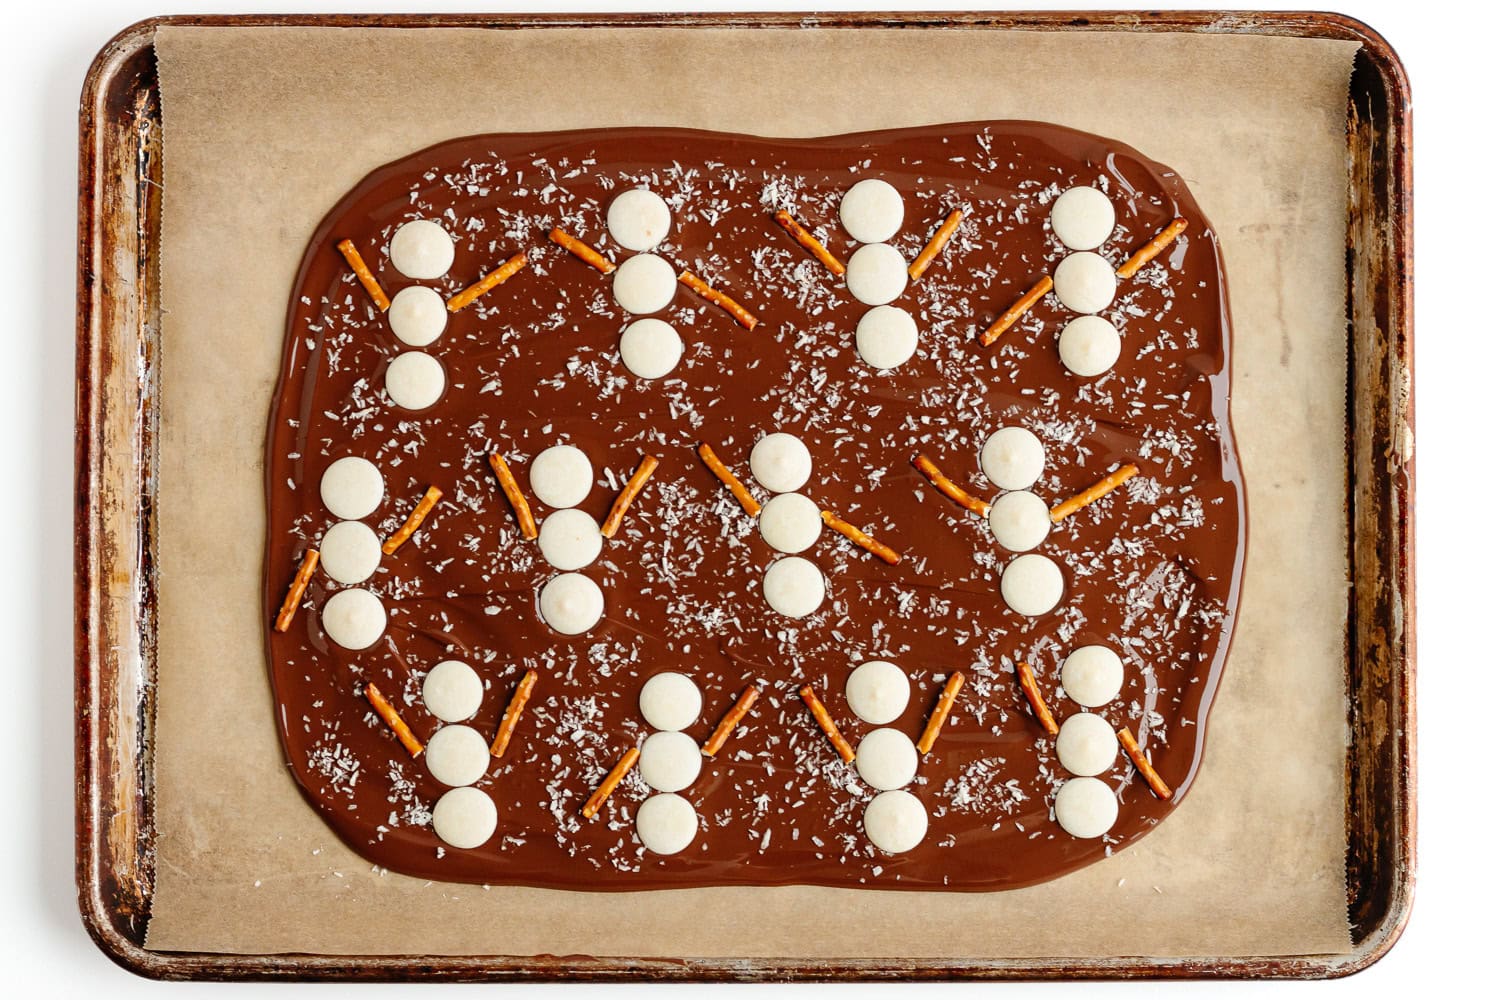
Step 5: Add the finishing touches
Stick on two mini candy eyeballs and a “carrot nose” (cut from dried mango) for each snowman’s face using a little melted white chocolate or icing. I just used a toothpick to dab on some melted white chocolate and popped the eyes and nose in place. If you would like to add some buttons, dip a toothpick into the melted chocolate and dot on three little buttons down the front. Cute and easy!

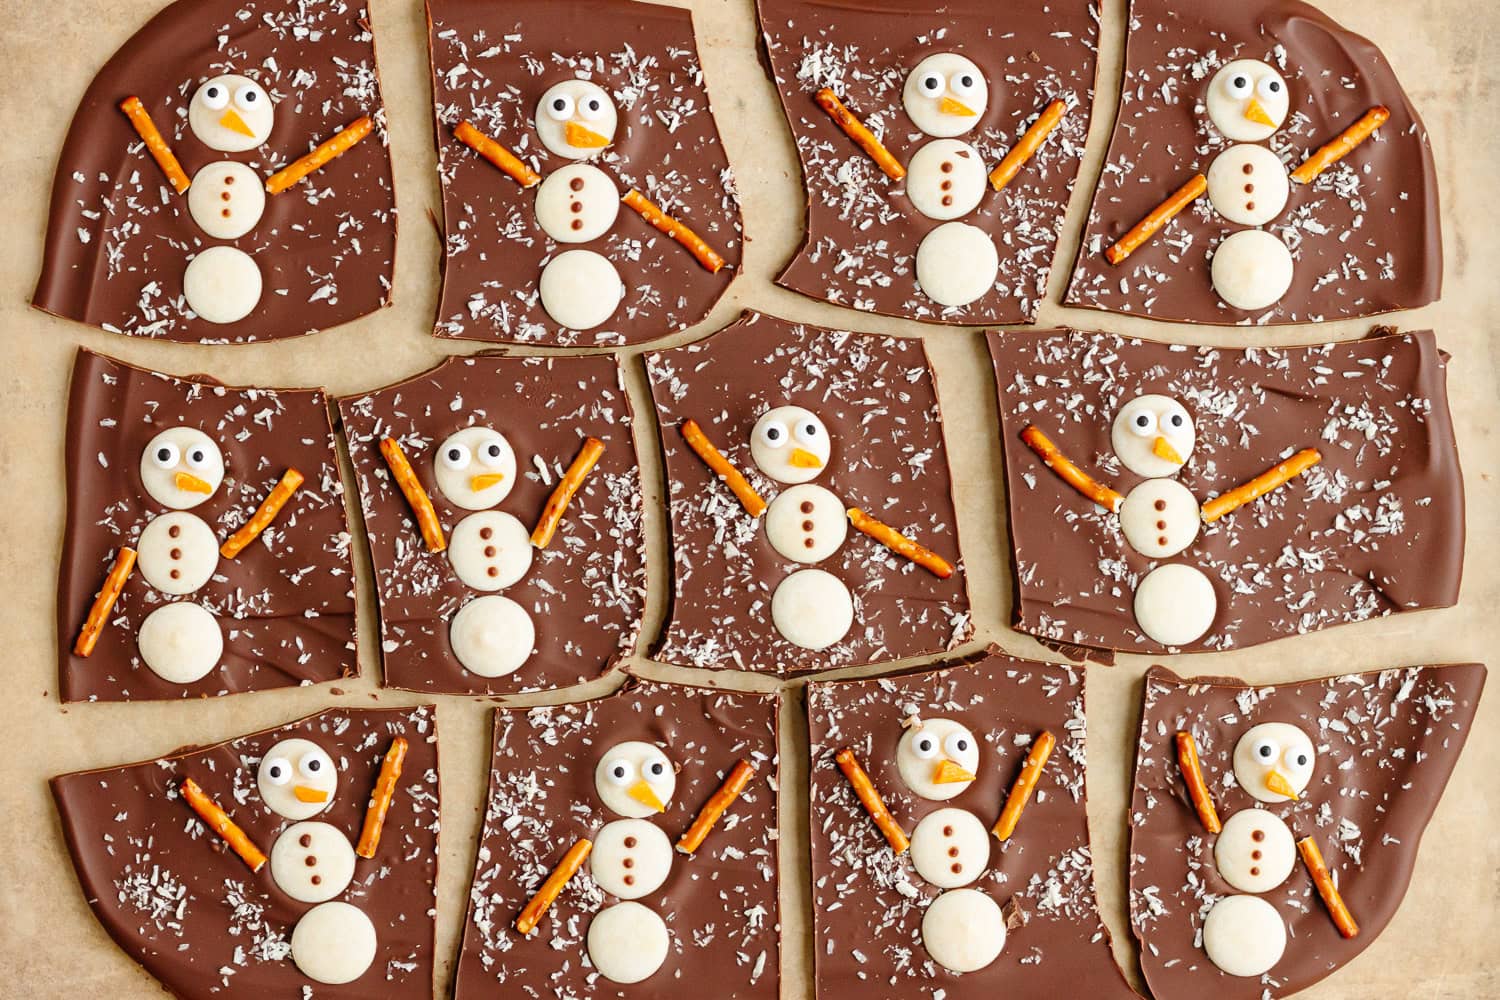
Step 6: Set and cut it up
Place in the fridge for 15-30 minutes or until the bark has firmly set up. If you prefer, you can let it set at room temperature for 2-3 hours instead.
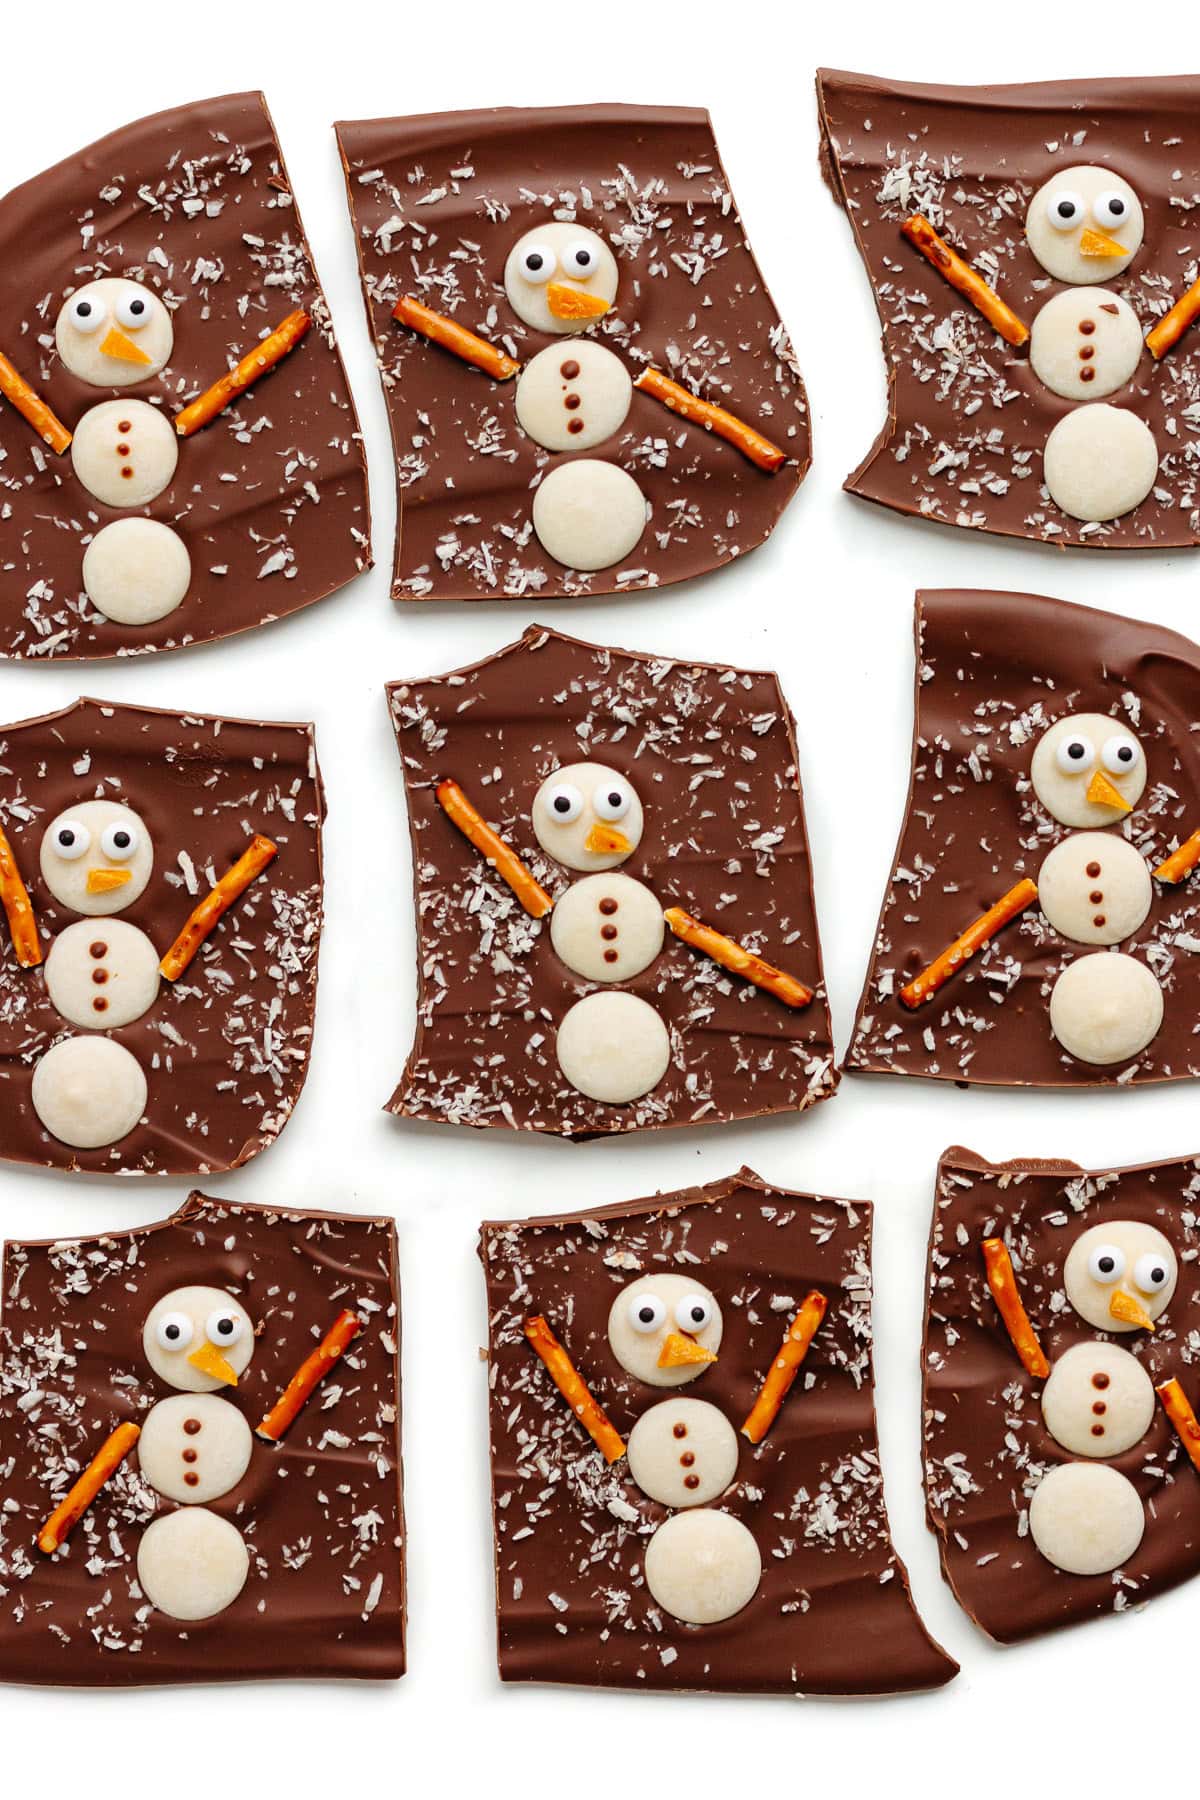
Time to cut it up! I normally break bark up into rustic pieces, but for this Christmas bark, it’s nice to keep the snowmen intact. So grab a sharp knife and cut the bark into pieces around each snowman.
Helpful tips
A Few Tips For The Best Snowman Bark
- Use good quality real chocolate! Since chocolate is the star of the show in bark, it really makes a difference. The better the chocolate, the better your bark will taste! Callebaut, Lindt chocolate bars, Ghriadelli baking bars, Guittard and Baker’s are all nice options.
- Get everything ready before you start! This easy Christmas bark recipe comes together fast, so it’s a good idea to have everything prepped and ready to go before starting.
- Keep water out of the chocolate! Water and chocolate don’t get along—it can make the chocolate seize up. So make sure everything you’re using (bowls, utensils, you name it) is completely dry. If you’re melting chocolate on the stovetop, a rimmed mixing bowl works great to keep steam out. And before you pour the melted chocolate onto the baking sheet, wipe off any condensation from the bottom of the bowl so no water drips down!
- Make the faces ahead of time. I sometimes like to attach the eyes and nose to the white chocolate wafers for the snowman faces before placing them on the melted chocolate. It’s easier to fix or redo if I mess up.
Storage
- To store: Keep your bark in an airtight container with parchment or wax paper between the layers. It’ll last for up to 2 weeks in the fridge.
- To freeze: Freeze bark in single layers separated with parchment or wax paper in an airtight container for up to 2 months.
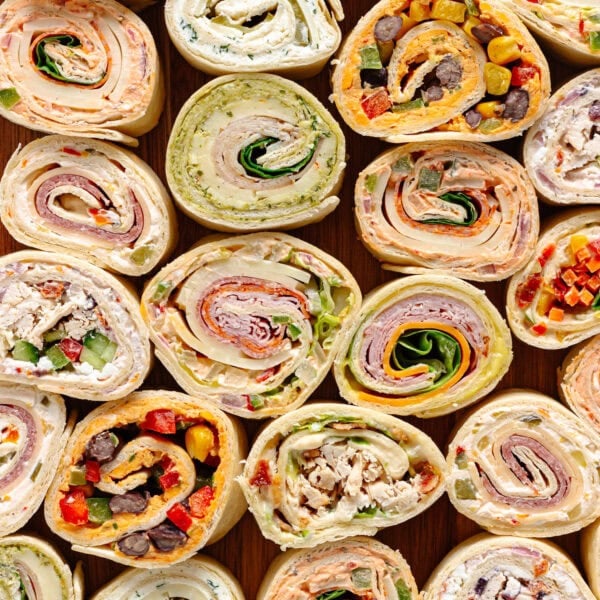
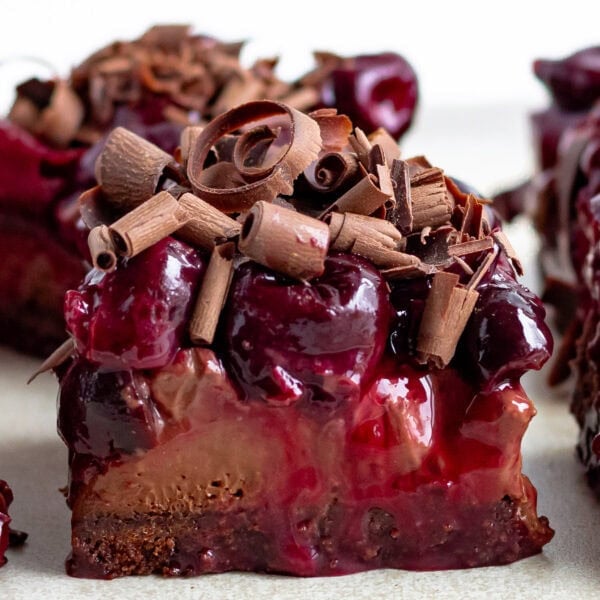
More Christmas Treats
Did you make this Christmas Snowman Bark? I would love to hear about it! Please leave me a comment below.
Christmas Bark (Snowman Chocolate Bark)
- Prep Time: 15 min
- Total Time: 15 min (plus set time)
- Yield: 12 pieces
- Category: Dessert
- Method: No Bake
- Cuisine: American
- Diet: Vegetarian
Description
This Snowman Chocolate Bark is almost too cute to eat…almost! If you’re all about simple, no-bake holiday treats, this Christmas bark recipe is for you! Fun, easy and perfect for snacking or gifting.
Ingredients
- 1 pound (454 grams) milk, semi-sweet or dark chocolate
- 1 tablespoon dessicated or fine shredded dried coconut
- 36 round white chocolate wafers
- 12 pretzel sticks
- 24 mini candy eyeballs
- 1 dried mango slice (cut 12 little “carrot” noses out of it)
- a little bit of melted white chocolate or icing (to stick faces on)
Instructions
- Prep: Gather all the ingredients and line a large baking sheet with parchment or wax paper.
- Melt chocolate: If needed, chop the chocolate first into small pieces (if in bar form). Place chocolate in a heat-proof bowl set over a saucepan filled with 1-inch of gently simmering water (make sure water doesn’t touch the bottom of the bowl). Or use a real double boiler if you have one. Stir chocolate until almost fully melted (about 90% melted). Remove from heat and continue to stir until chocolate is fully melted and smooth.
- Pour and spread the chocolate: Make sure to wipe off any condensation from the bottom of the bowl first (water in the chocolate can make it seize up and nobody wants that!). Then pour the melted chocolate onto the lined baking sheet and spread out into a rectangular shape about ¼ inch thick using a rubber spatula or offset spatula. It won’t fill out the whole sheet.
- Sprinkle on the “snow”: Sprinkle over the dried coconut to give it that snowy look.
- Assemble the snowmen: Start building the snowmen right away by placing groups of three white chocolate wafers on the chocolate to form each snowman’s body. I usually end up making 12 snowmen. Make sure to leave some space between each one. Next, break pretzel sticks to the right length for the arms and press them into the chocolate on each side of the middle part of each snowman.
- Add the finishing touches: Use a bit of melted white chocolate or icing to stick on two mini candy eyeballs and a “carrot nose” (cut from dried mango) for each snowman’s face. If you would like to add some buttons, dip a toothpick into the melted chocolate and dot on three little buttons down the front. Cute and easy!
- Set the bark: Place in the fridge for 15-30 minutes or until the bark has firmly set up.
- Cut into pieces: Use a sharp knife to cut the bark into pieces around each snowman.
Notes
- Use good quality real chocolate! Since chocolate is the star of the show in bark, it really makes a difference. The better the chocolate, the better your bark will taste! Callebaut, Lindt chocolate bars, Ghriadelli baking bars, Guittard and Baker’s are all nice options. I don’t recommend melting chocolate chips for bark – they tend to contain stabilizers that help them hold their shape and make it difficult to get a silky smooth consistency.
- Microwave: I prefer the stovetop method for melting chocolate but you can also use the microwave if you prefer. Place the chocolate into a large heat-safe bowl and microwave in 15-30 second intervals, stirring between each interval, until the chocolate is melted and smooth. Be careful not to overheat!
- Make your own white chocolate round wafers: If you don’t have white chocolate wafers, no problem! Just melt some white chocolate, drop spoonfuls onto a parchment lined baking sheet, and shape them into small circles. Pop them in the fridge or freezer to set, and you’re good to go!
- Storage: Store in an airtight container with parchment or wax paper between the layers. It’ll last for up to 2 weeks in the fridge or up to 2 months in the freezer.