This post may contain affiliate links. See my disclosure policy.
Learn how to use and better understand your Instant Pot with these 10 Instant Pot tips for beginners.
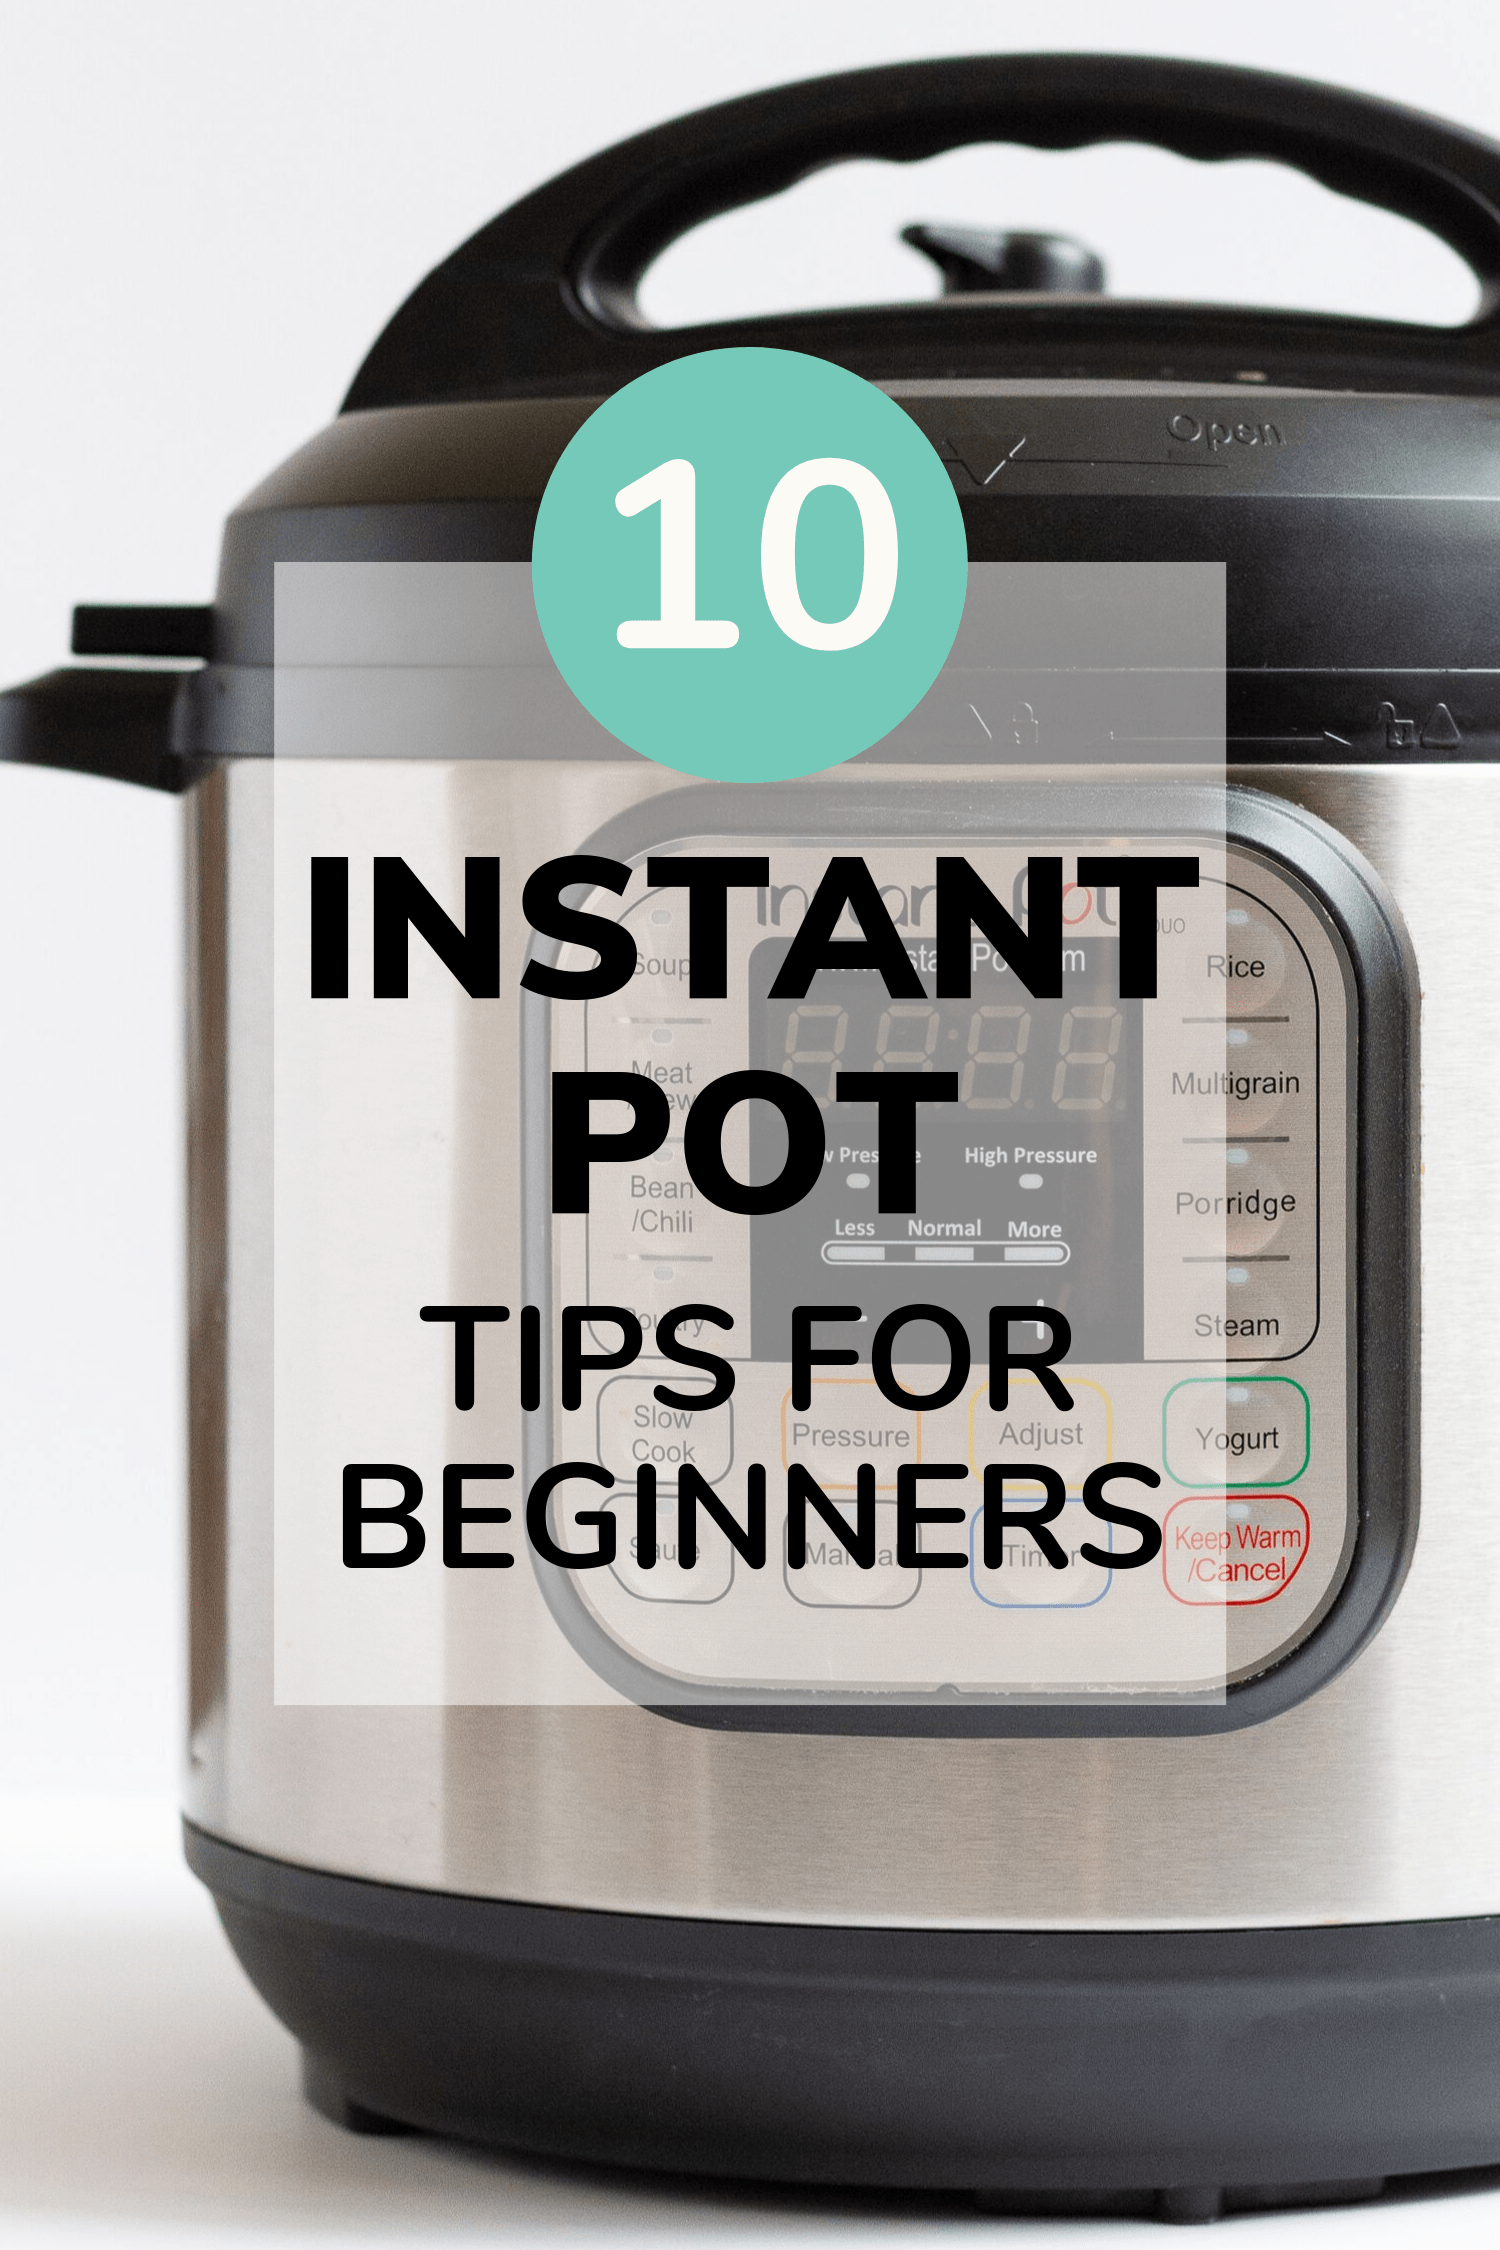
Are you new to the Instant Pot or perhaps have been too intimidated to even open the box? Get started! Believe me…you are going to love it. ♡ It has become a vital tool in my kitchen. I want to share 10 Instant Pot tips with you to help you gain your confidence and better understand your Instant Pot.
I bought my Instant Pot a number of years ago before it gained its current popularity. We had moved back to Canada from Australia and I needed to repurchase my small kitchen appliances. I had a slow cooker on my list and somebody mentioned that I should get an Instant Pot instead. Initially, I was a little hesitant and freaked out since when I heard the term “pressure cooker”, I had memories of a traditional version we had received as a wedding gift that I found absolutely terrifying to use.
I am so happy that I took the plunge and bought it. I don’t have too many kitchen gadgets but the Instant Pot has become one of my “must-haves”. My Instant Pot gets used multiple times a week and sometimes daily for either a component of a meal or to make the main course itself.
Ready to dive in and learn more about your Instant Pot? First things first – READ the manual that came with your Instant Pot to understand the different parts, basics and safety instructions. Now let’s move on to some helpful info and my 10 Instant Pot tips!
What Is An Instant Pot?
The Instant Pot is an electric pressure cooker. However, it can also sauté, slow cook, steam, cook rice, keep foods warm and more. Basically, it works by allowing steam pressure to build up inside the pot, creating a high temperature environment that cooks foods faster. The Instant Pot has many features that make it safer and easier to use than a traditional stove top pressure cooker (you can’t just set those and walk away!).
I have the popular 6-Quart Instant Pot Duo but they also make a mini 3-Quart version and a large 8-Quart version. There are also a number of different models available within each sizing. I recommend comparing the differences to find the best Instant Pot model for you.
Instant Pot Accessories
These are a few additional Instant Pot accessories that I have found useful.
- Extra Silicone Sealing Ring: The Instant Pot comes with one silicone sealing ring but I like to have a second one. The reason is that the silicone ring tends to absorb food odour. Therefore, I like to designate one for sweet and one for savoury recipes (I keep them in labelled Ziploc bags).
- Glass Lid: This lid is intended for use with the Slow Cook and Keep Warm functions. I love to switch over to this lid after cooking if people will be serving themselves from the Instant Pot – so much easier!
- 7-inch Springform Pan: If you want to make a cheesecake in your Instant Pot (which I highly recommend) then you will need one of these.
3 Most Important Instant Pot Buttons
There are a lot of buttons which can be intimidating. Most of these are just presets though with suggested cooking times set for that type of food (i.e. Poultry button). I rarely use these presets since I prefer to set times myself as specified in recipes. The 3 buttons that I use most are:
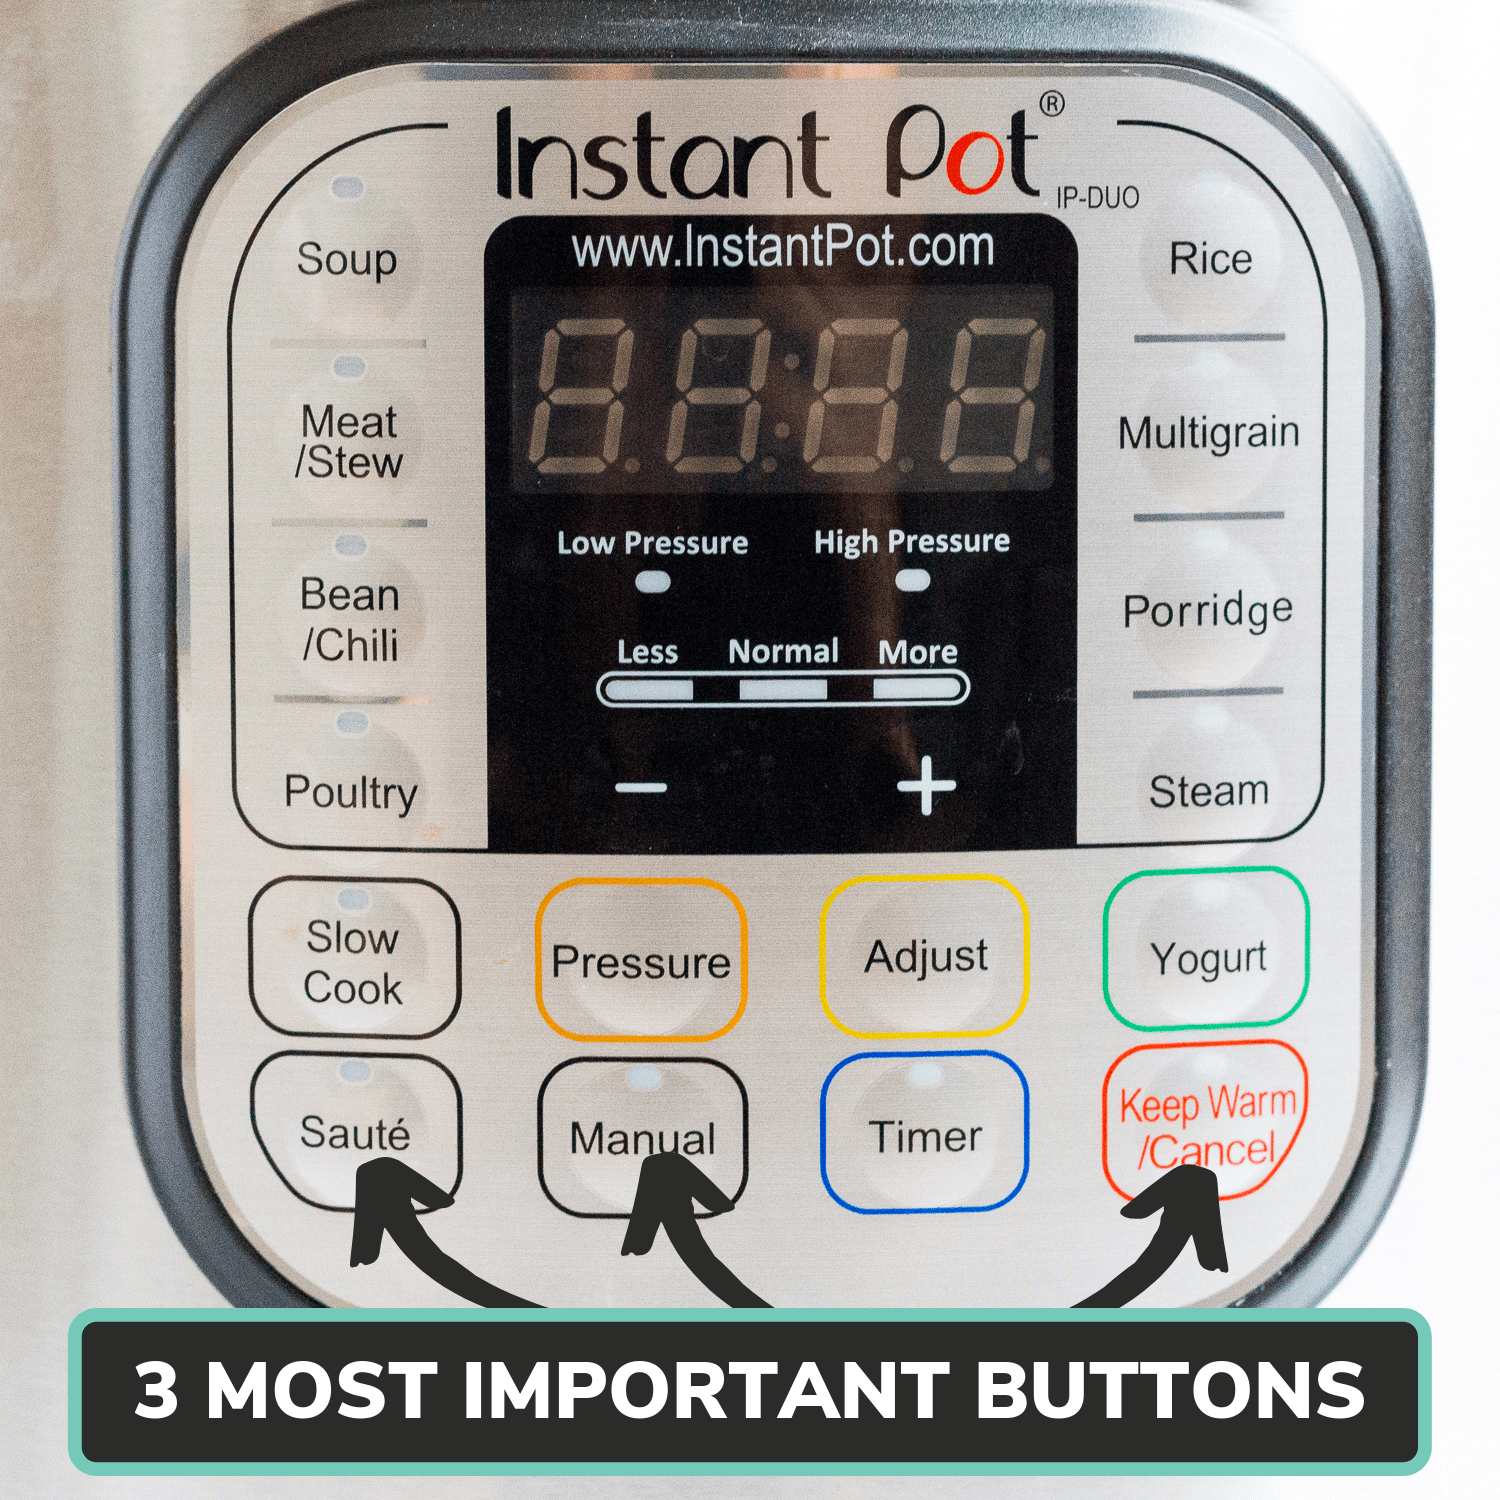
- Manual (Pressure Cook on newer models): This is the most important button. This button allows you to set your own pressure cooking time. Example: Recipe says to pressure cook for 10 minutes: After locking the lid in place and setting the steam release valve to “Sealing”, just press the Manual (or Pressure Cook) button and use the [+] and [-] buttons to change the cook time to “10”. After a few seconds, you will hear a series of beeps and the display will show “On” to indicate the start of the pressure cooking process.
- Sauté: This button basically turns your Instant Pot into a regular pot which means that you can do it all without dirtying a second pot. This function is used with the lid off and allows you to sear/brown meats and sauté vegetables at the beginning of a recipe. You can also use this function to simmer and thicken sauces at the end of a recipe.
- Keep Warm/Cancel: Use this button to cancel any function. If it is pressed while the Instant Pot is in standby mode, it will activate the Keep Warm mode. (Note: The Instant Pot will automatically go into Keep Warm mode after it finishes the cooking cycle.)
- Although I rarely touch any of the preset buttons, there is one exception…the “Soup” function. I tend to use this when making broth since this setting also controls the pressure and temperature to ensure that the liquid never goes into a heavy boiling state.
10 Instant Pot Tips
Now let’s move on to the Instant Pot tips…
#1: Make Sure The Inner Pot Is In The Instant Pot
Don’t laugh! I have seen many panicked comments after people have accidentally put their ingredients directly into the housing unit and onto the heating element. To avoid this, always place your inner pot back into the housing unit after washing
#2: Make Sure The Silicone Sealing Ring Is In The Lid
You want to make sure that the sealing ring is properly placed in the lid before cooking. It is responsible for sealing the lid to lock in the steam pressure. I store mine in labelled Ziploc bags right next to my Instant Pot so that I see them. I purchased a second Instant Pot sealing ring so that I could designate one for savory and one for sweet recipes.
#3: Do Not Fill Your Pot More Than 2/3 Full
It is important not to fill your Instant Pot more than 2/3 full since pressure needs room to build up and some ingredients may also expand.
#4: The Instant Pot Needs Liquid
Make sure to have at least 1/2 – 1 cup of liquid in the Instant Pot. The liquid could be water, broth, etc. Pressure cooking needs liquid to build steam in order to cook.
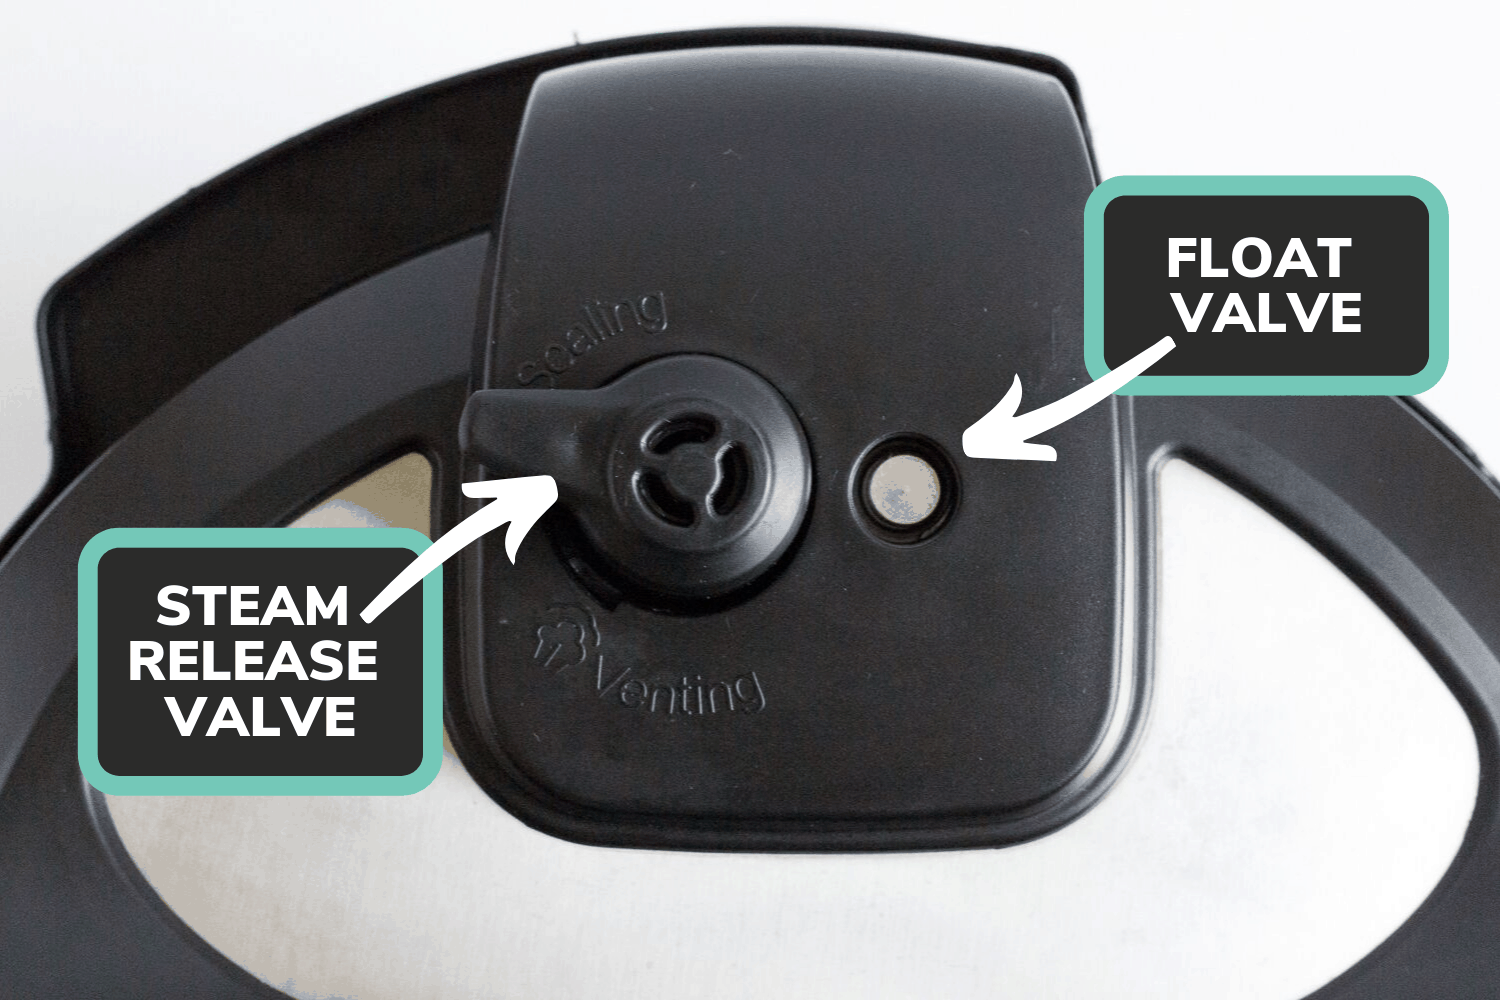
#5: Don’t Forget To Move Steam Release Valve To “Sealing” Position
The steam release valve has 2 positions: “Sealing” and “Venting”. Remember to move it to the “Sealing” position before cooking. This is the closed position so that the Instant Pot can build pressure to cook your food.
#6: Understand The Difference Between Natural Release And Quick Release
There are a few different methods to release pressure in your Instant Pot that you will see recipes refer to: Natural Release, Quick Release and a Hybrid Release
How to do a Natural Release?
Natural Release is when you wait for the pressure to drop down naturally. After the cooking cycle finishes, wait for the float valve (metal pin) to drop down on its own. This may take 10-20 minutes. Once the float valve drops, turn the steam release valve to the “Venting” position and open the lid.
How to do a Quick Release?
Quick Release is when you manually force the pressure to release. After the cooking cycle finishes, move the steam release valve to the “Venting” position. Steam will start shooting out and pressure will quickly release. Once the floating valve (metal pin) drops down, you can open the lid. Make sure to keep your hand and face away from the top while steam comes out (use an oven mitt or the handle of a wooden spoon to move the valve). Personally, I prefer to move the valve slightly over a little at a time to slowly release the steam instead of one big gush.
Note: Quick Release is not suitable for food with large liquid volume or high starch content (i.e. oatmeal) since food content might splatter out with the steam. What a mess!
How to do a Hybrid Release?
You may see recipes that call for something like a 10 minute Natural Release. This is basically a hybrid approach and means that after the cooking cycle finishes, you should first wait for 10 minutes of natural release. Then move the steam release valve to the “Venting” position to release any remaining pressure. Once the float valve drops, you can open the lid.
#7: Cook Times Are Not Complete Times
The cook time listed on a recipe is not the total amount of time it will take. Before the cook time starts, the Instant Pot first needs to come to pressure (approx. 10 min but varies based on amount and starting temperature of food). Time is also needed to release pressure after the cooking cycle ends (unless quick release is called for). To gain a better idea of total time needed for a recipe, add about 10-20 minutes to the cook time.
#8: Understand The Instant Pot Time Display
This can be a little confusing so let’s walk through it. After you set your cook time, you will hear a series of beeps and the display will show the word “On”, indicating that it is starting to build pressure. Once pressure is reached, the float valve pops up and the display changes from “On” to the programmed cook time. You will see this time count down to indicate the remaining time in minutes. Once it reaches zero, you will hear a beep and the Instant Pot will go into the “Keep Warm” cycle. During this cycle, the display shows an “L” in front and the time will count up to indicate how long it has been on “Keep Warm”. This is helpful when you are doing a “10 minute natural release” since you can just wait until the Keep Warm display shows “L0:10”.
Note: So remember that if your time display shows the letter “L” in front that it has finished cooking and is in Keep Warm mode.
#9: Doubling a Recipe Does Not Double The Cook Time
Do not double the cook time if you double a recipe. If you want to double an Instant Pot recipe, you can double the ingredients (as long as it doesn’t fill the pot more than 2/3). However, the cook time you set remains the same. It will just take longer to come to pressure.
Note: Cook time may need to be adjusted though based on the size of the chunk of food (i.e. small chicken breasts will cook faster than larger pieces).
#10: Learn The Instant Pot Acronyms
You will notice a variety of acronyms being used in recipes or in groups and forums online. To help you make sense of it all, here are a few common acronyms and their meanings.
- IP = Instant Pot
- NR (or NPR) = Natural Release or Natural Pressure Release
- QR (or QPR) = Quick Release or Quick Pressure Release
- 5-5-5 (or some other number combo) = common instructions for cooking hard boiled eggs (i.e. Set cook time to 5 min, allow 5 min natural release and then place in an ice bath for 5 min).
- HP = High Pressure
- LP = Low Pressure
- Pothead = In this setting, the term refers to an Instant Pot user:)
Some Instant Pot Recipes
Here are a few staples to get you started…
⬇ PIN it for later! ⬇


I needed a review of how to use my instant pot and since having it for almost a year, I only used it 4 times. Your step by step guide is great Vanessa. I thank you so much for this and I plan to instant cook more often now that I found your site. Keep up the good work!!
I’m so happy that you found the guide helpful! The Instant Pot definitely can be a little intimidating at first but once you get the hang of it, it will become a regularly used appliance in your kitchen. Happy cooking!
Vanessa, I am grateful I found you at the right moment. If I had not my dinner would
have been ruined. What I needed to know was right there on your website. So, thank you for sharing your knowledge. I love my Insta Pot…now that I know what I am doing!
This makes me so happy to hear! I am so glad that you found this helpful and that your dinner was saved:)
I hate the Instant Pot. I borrowed a friend’s to make a meat sauce for lasagne and it didn’t even cook the first time I set it. Had to start over. The manual really is worthless.
Oh no! Did it not come to pressure? That happened to me once when I didn’t have the sealing ring pushed into the lid properly.
Thank you so much! I needed this information more than ca n be expressed. These instructions should be included in every package!
Thanks for taking time to leave me a comment! I am so happy to hear that these Instant Pot tips were helpful!
These tips were a lifesaver today, thanks a bunch!
I’m so happy to hear that! 😁
New to IP cooking. After using 8 to10 times reading this again , I feel I have a better understanding of terminology and procedures of the pot cooknng and feel more confident abd eager to try more recipies. Love all the suggestions and recipies offered. Thanks
You’re welcome! I am so happy that you found this post helpful! The Instant Pot definitely has a bit of a learning curve and can seem intimidating. Not to mention, the lingo used can feel like a foreign language lol. However, once you get used to it, you will wonder where it was all your life!
So helpful; lots of pearls w/o the fluff. Thank you!
I’m so happy to hear that you found these tips helpful!
This post is the best post ever I had read and give complete acknowledge of Instant pot users.
Thank you so much for the writer .
I am so happy to hear that you found all the Instant Pot tips helpful!