This post may contain affiliate links. See my disclosure policy.
Learn how to make perfect poached eggs! Tender firm whites wrapped around a soft, runny yolk that is just waiting to be released. Feeling intimidated to try? Don’t be! With the tips in this recipe, you’ll be poaching eggs like a pro in no time!
Pin this now to find it later
Pin ItWhat Are Poached Eggs
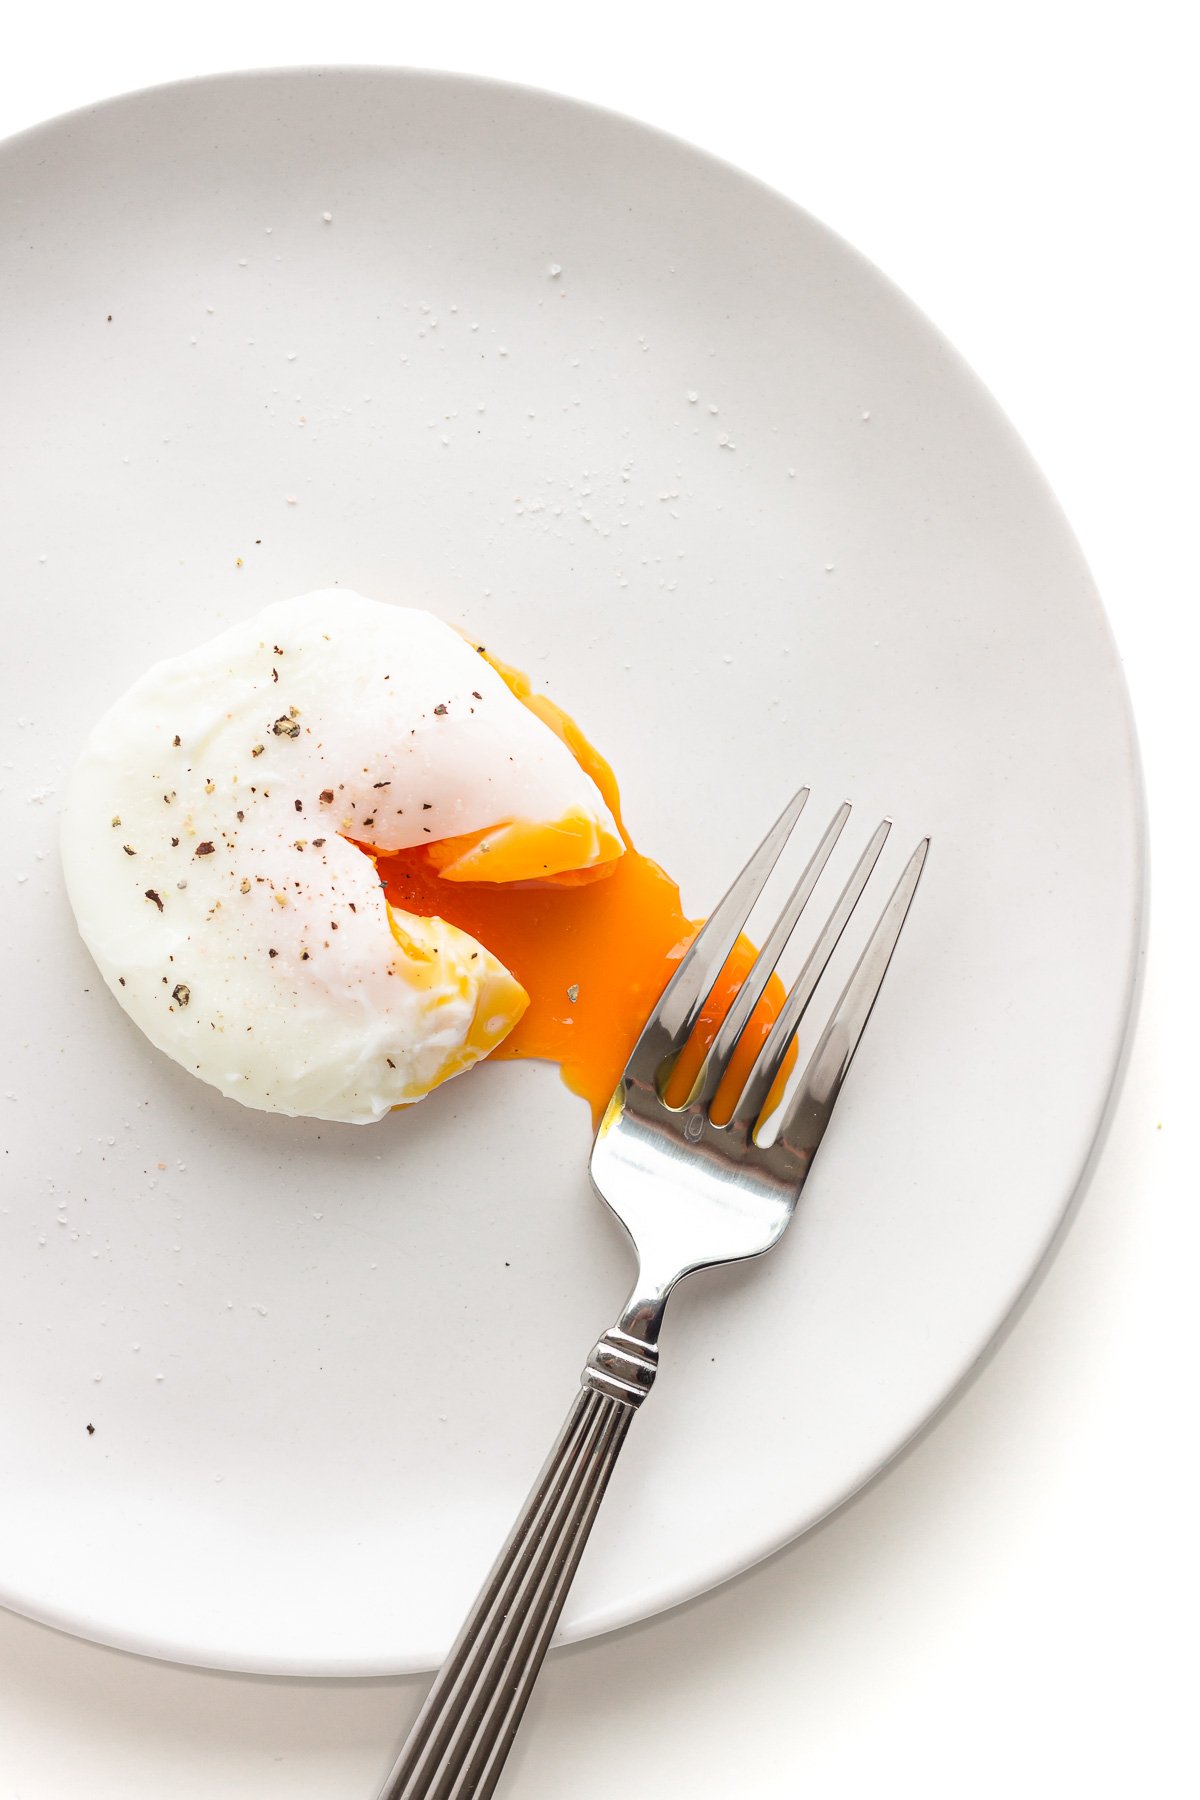
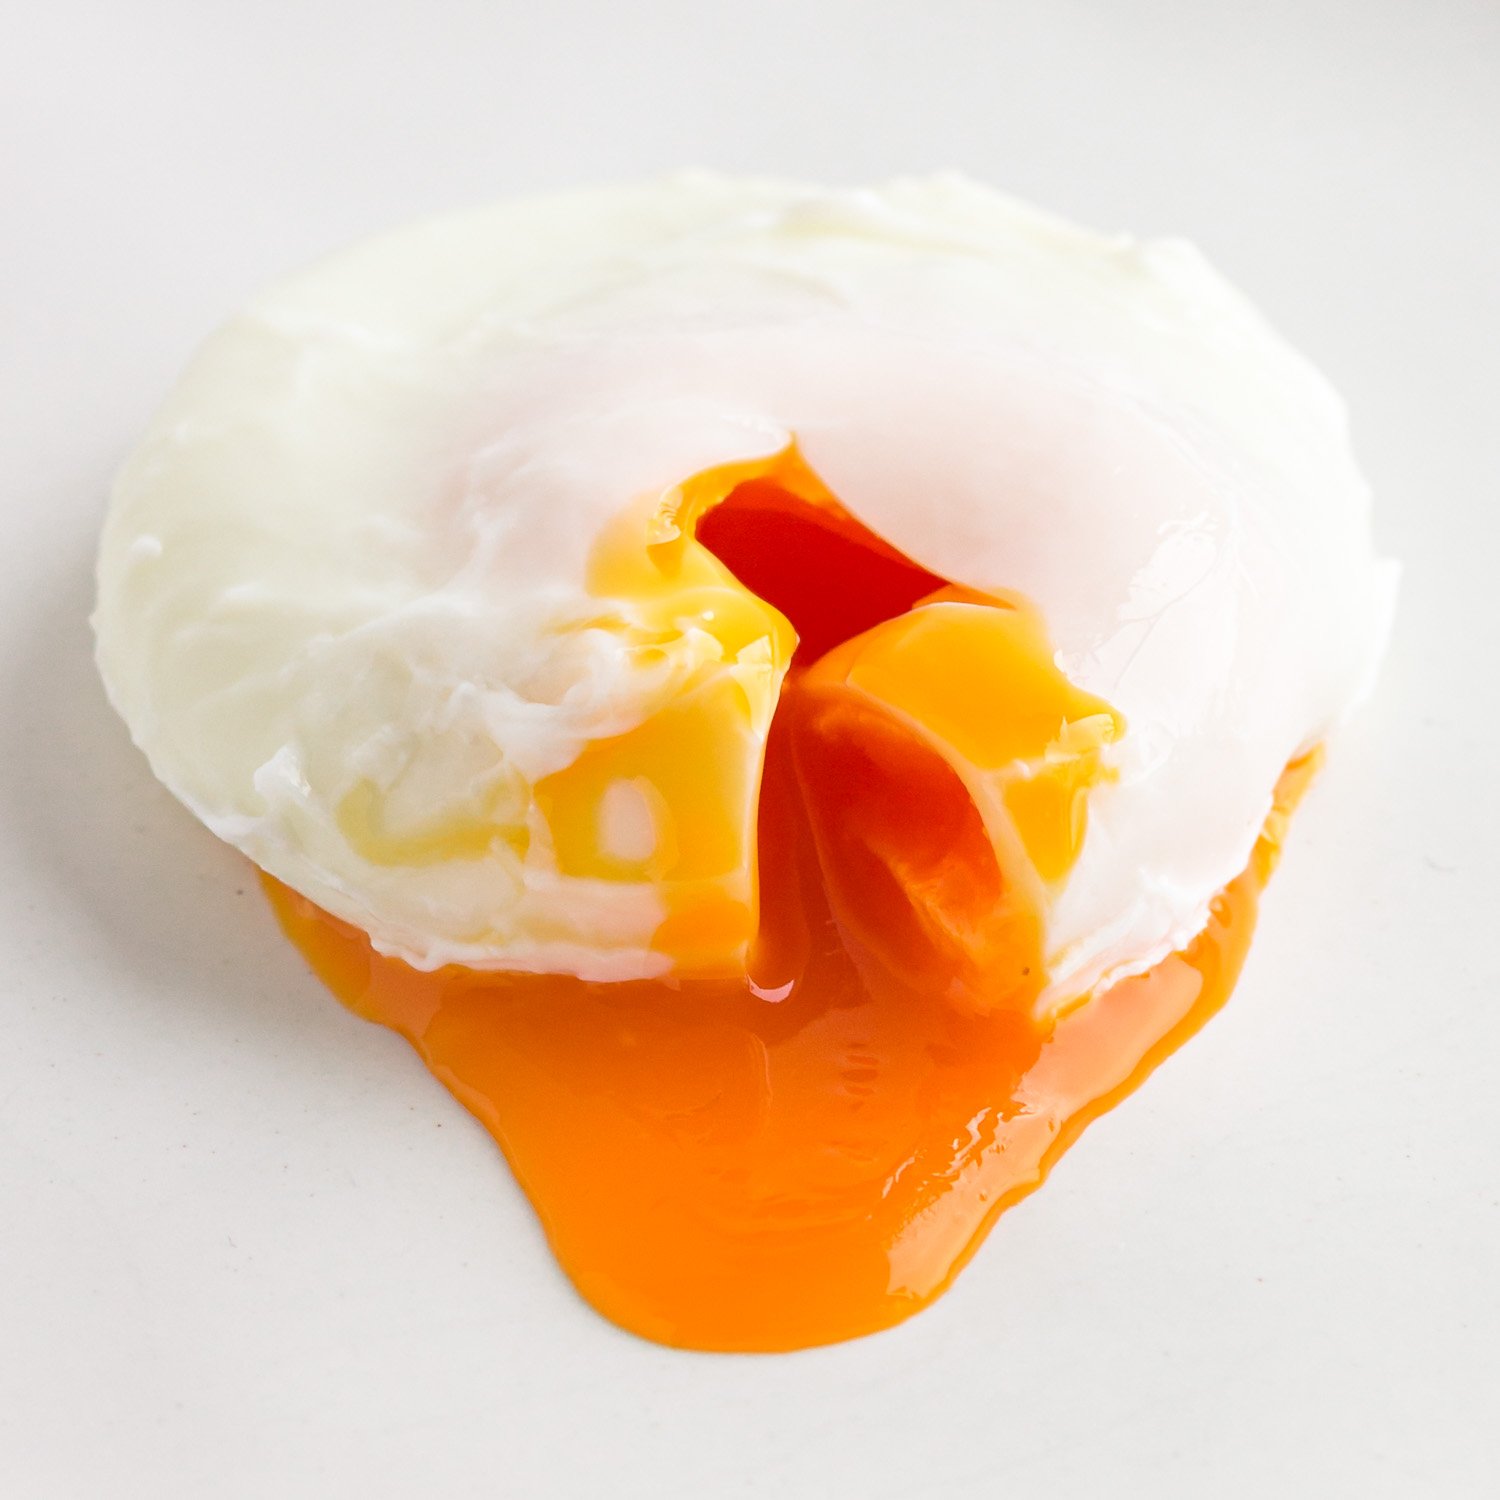
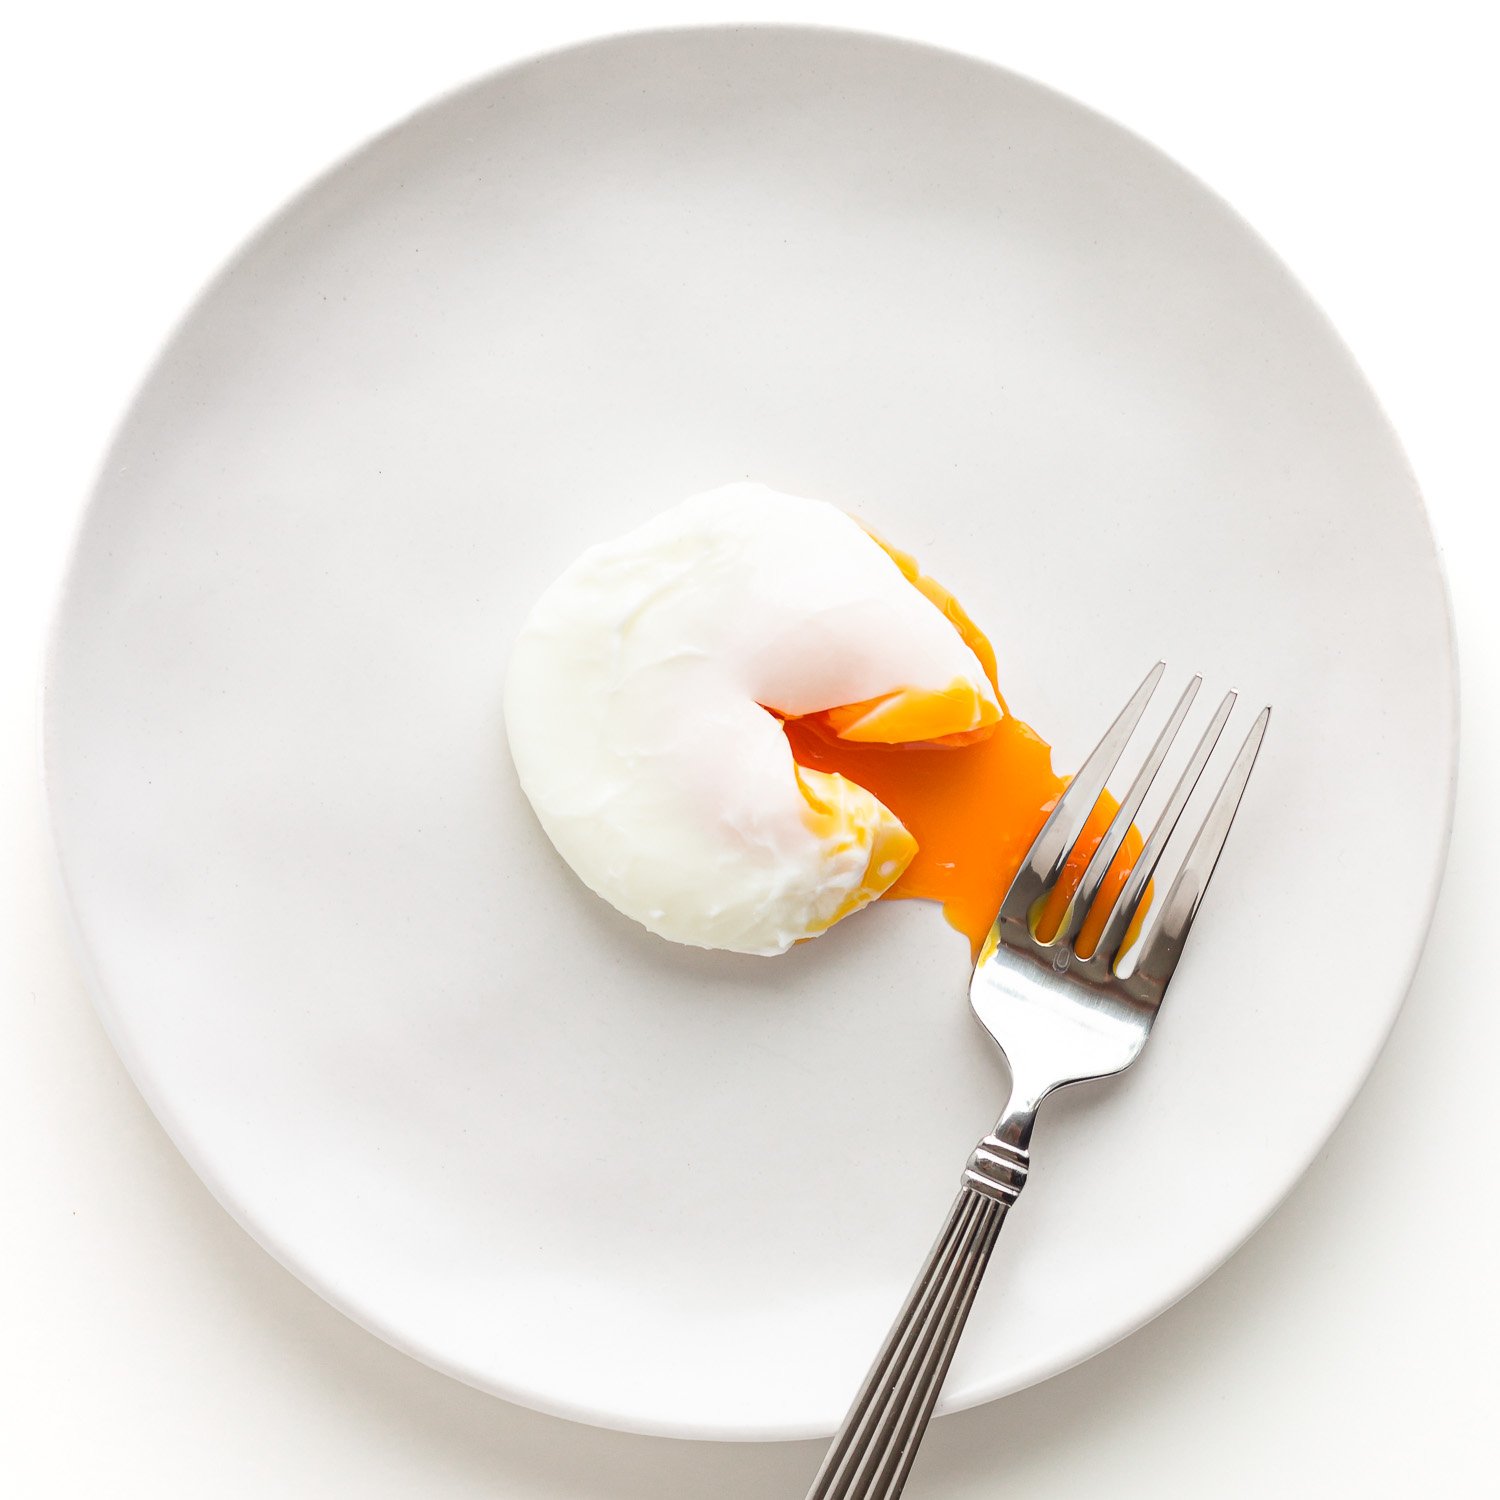
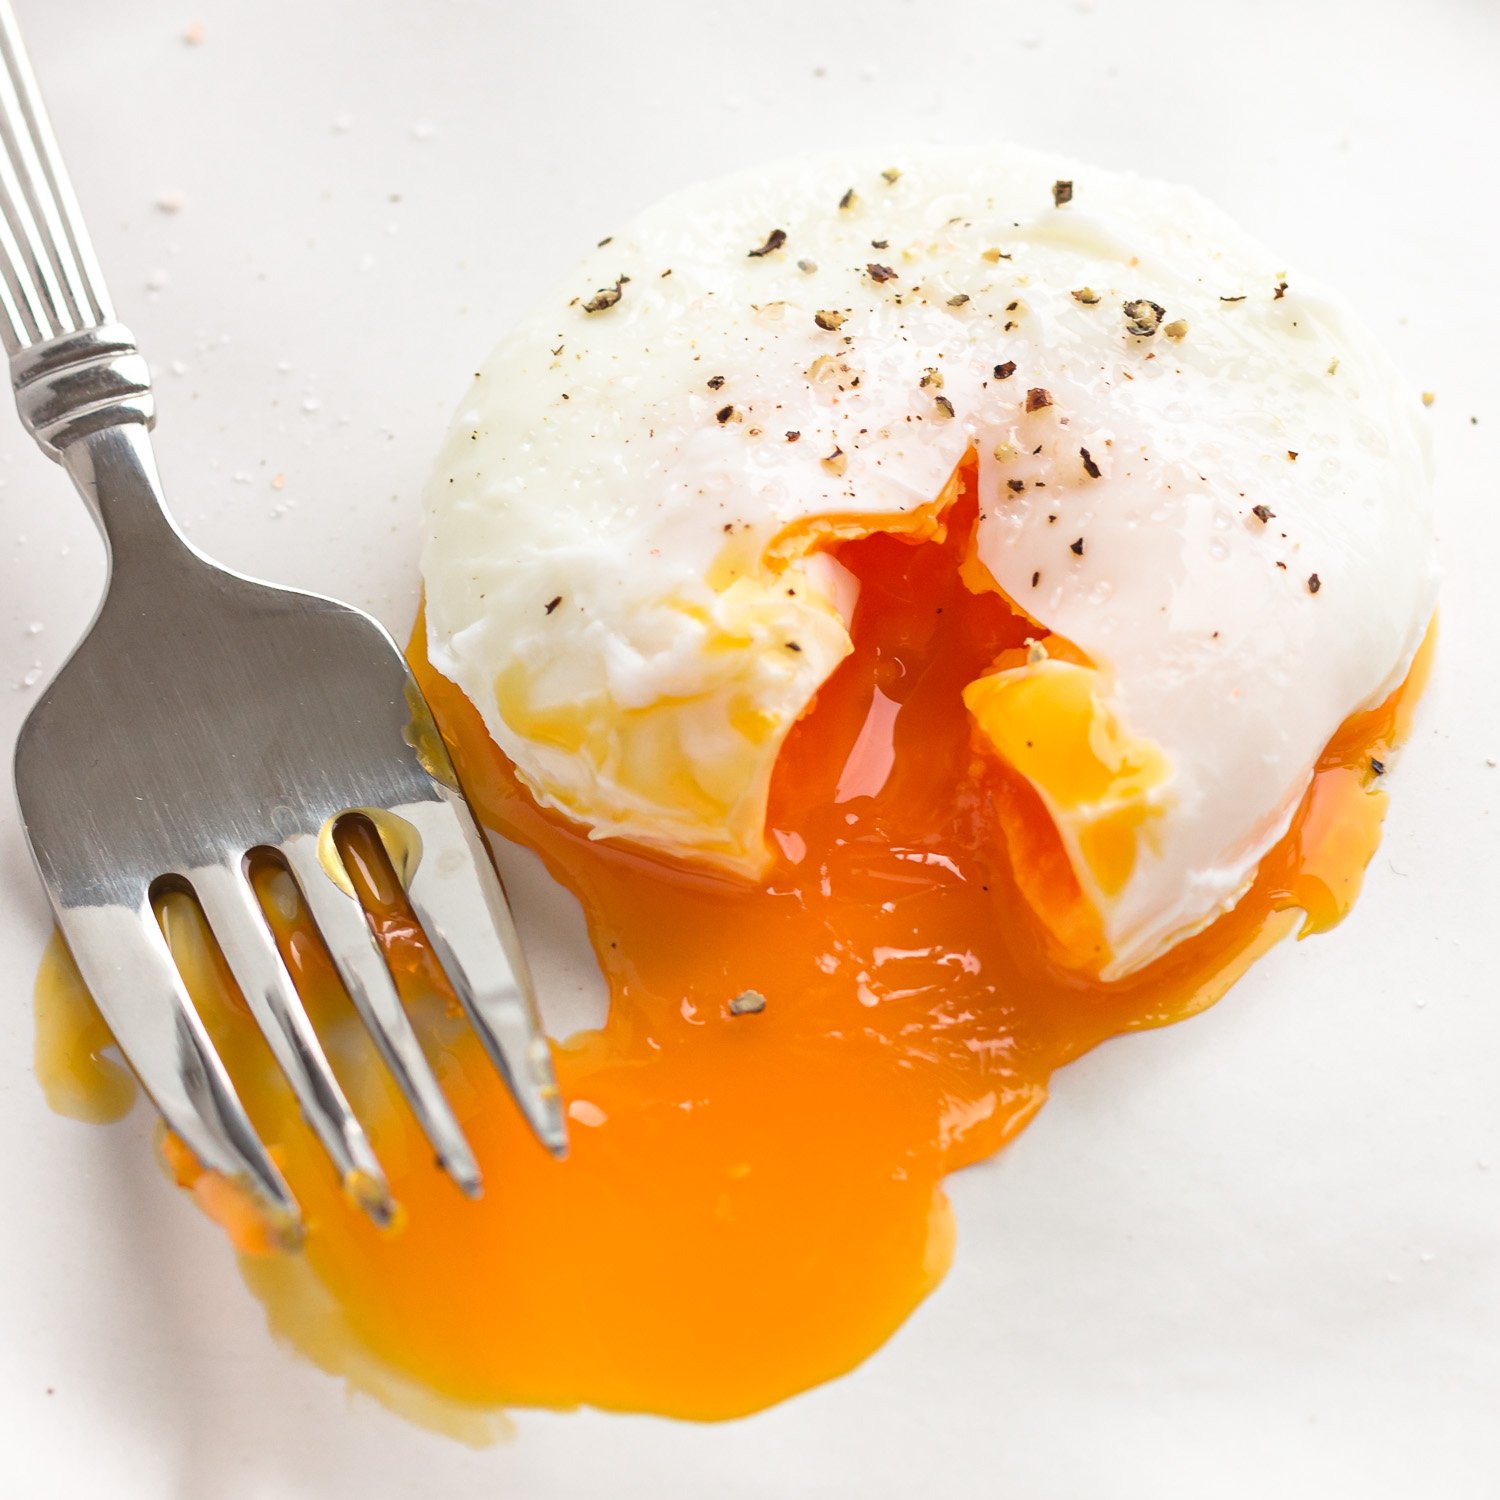
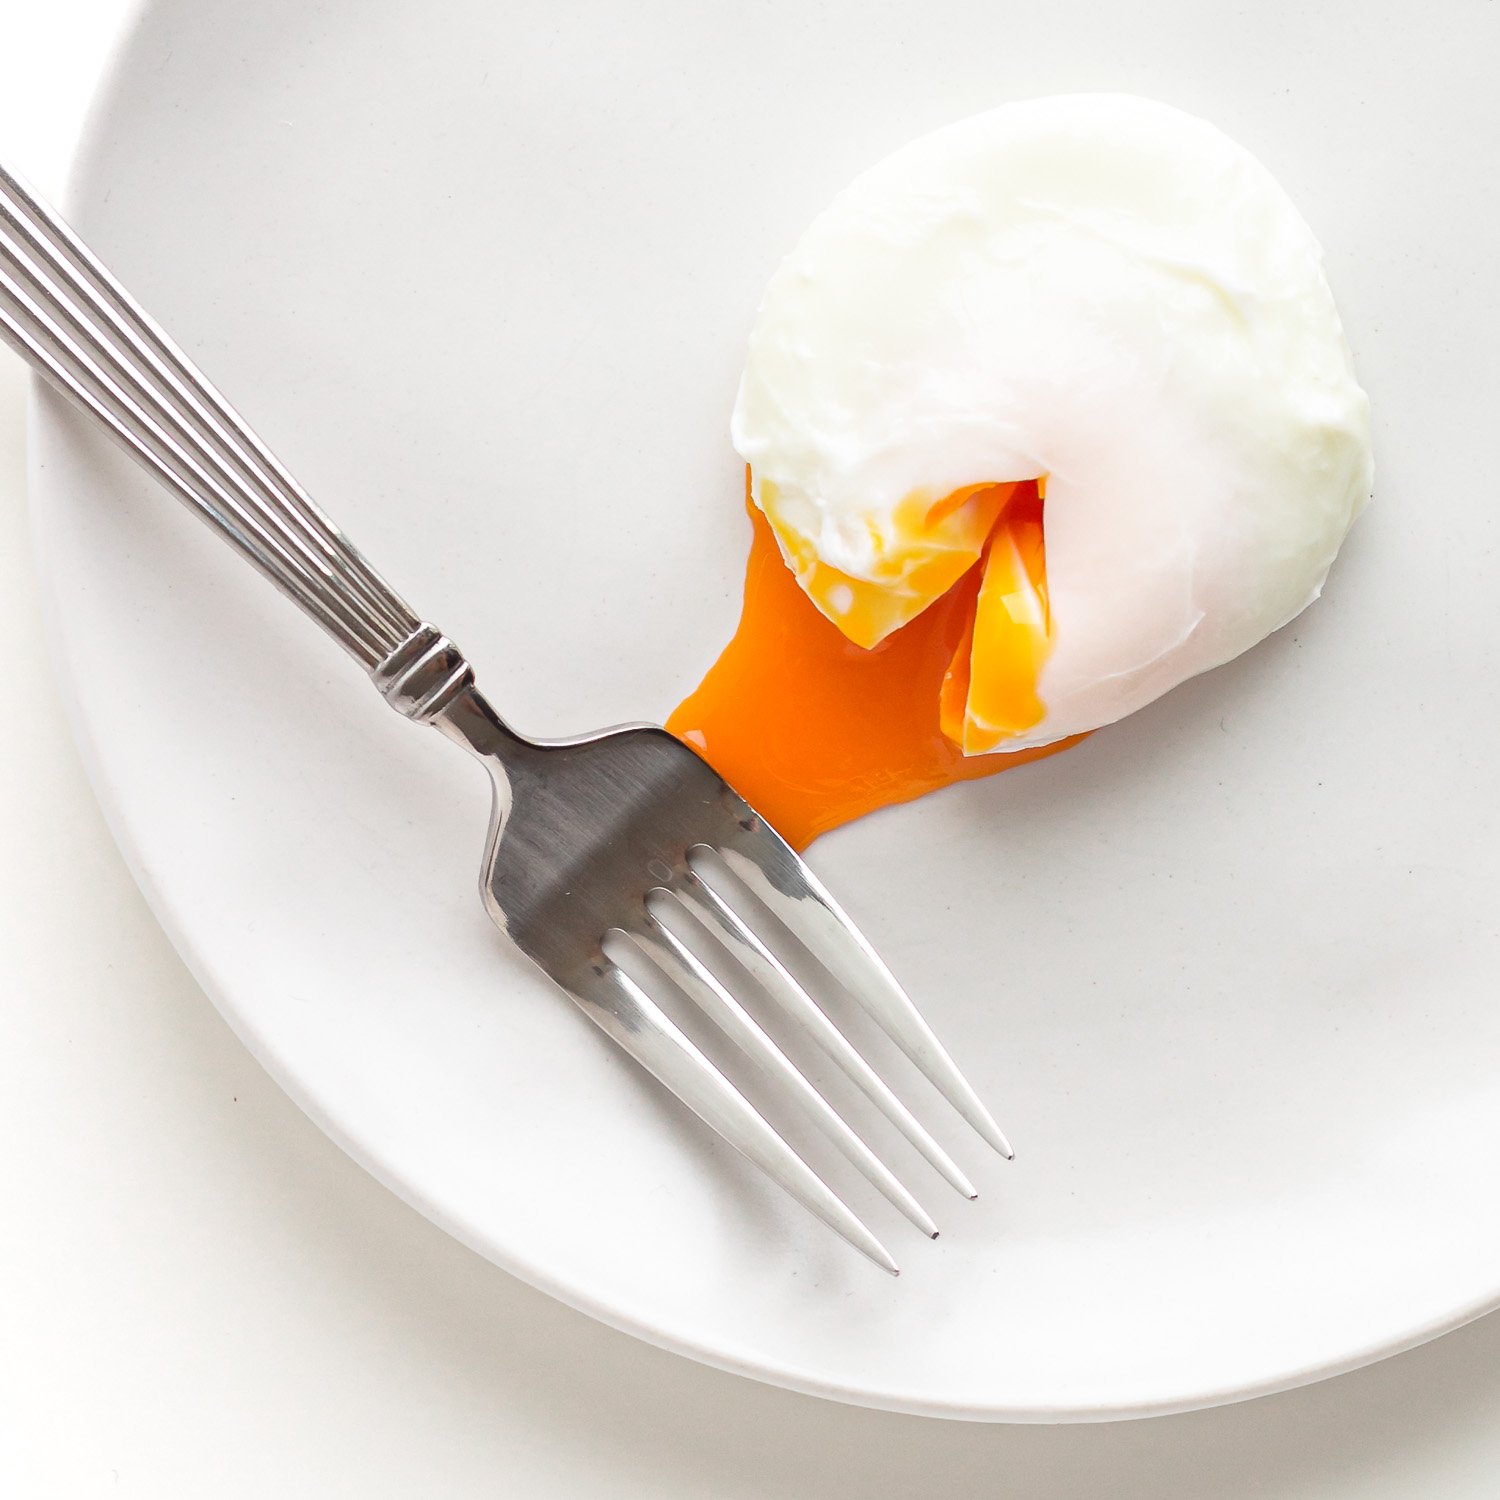
A poached egg is an egg that is cooked without its shell in barely simmering water. It has firm whites on the outside and a runny, oozy yolk on the inside.
Poached eggs truly are something special! The best part is cutting into them and watching that beautiful golden yolk ooze out! It’s a thing of beauty and provides an instant sauce to whatever you eat them with.
For years, I found them super intimidating after one horribly failed attempt and would only order them in restaurants. I leaned towards soft boiled eggs for my oozy yolk fix at home. However, with a little practice and following the tips laid out below, I now find them easy to make and enjoy them frequently at home. Woohoo!
Let’s get cracking and make some perfectly poached eggs (without vinegar)!
How To Make Poached Eggs
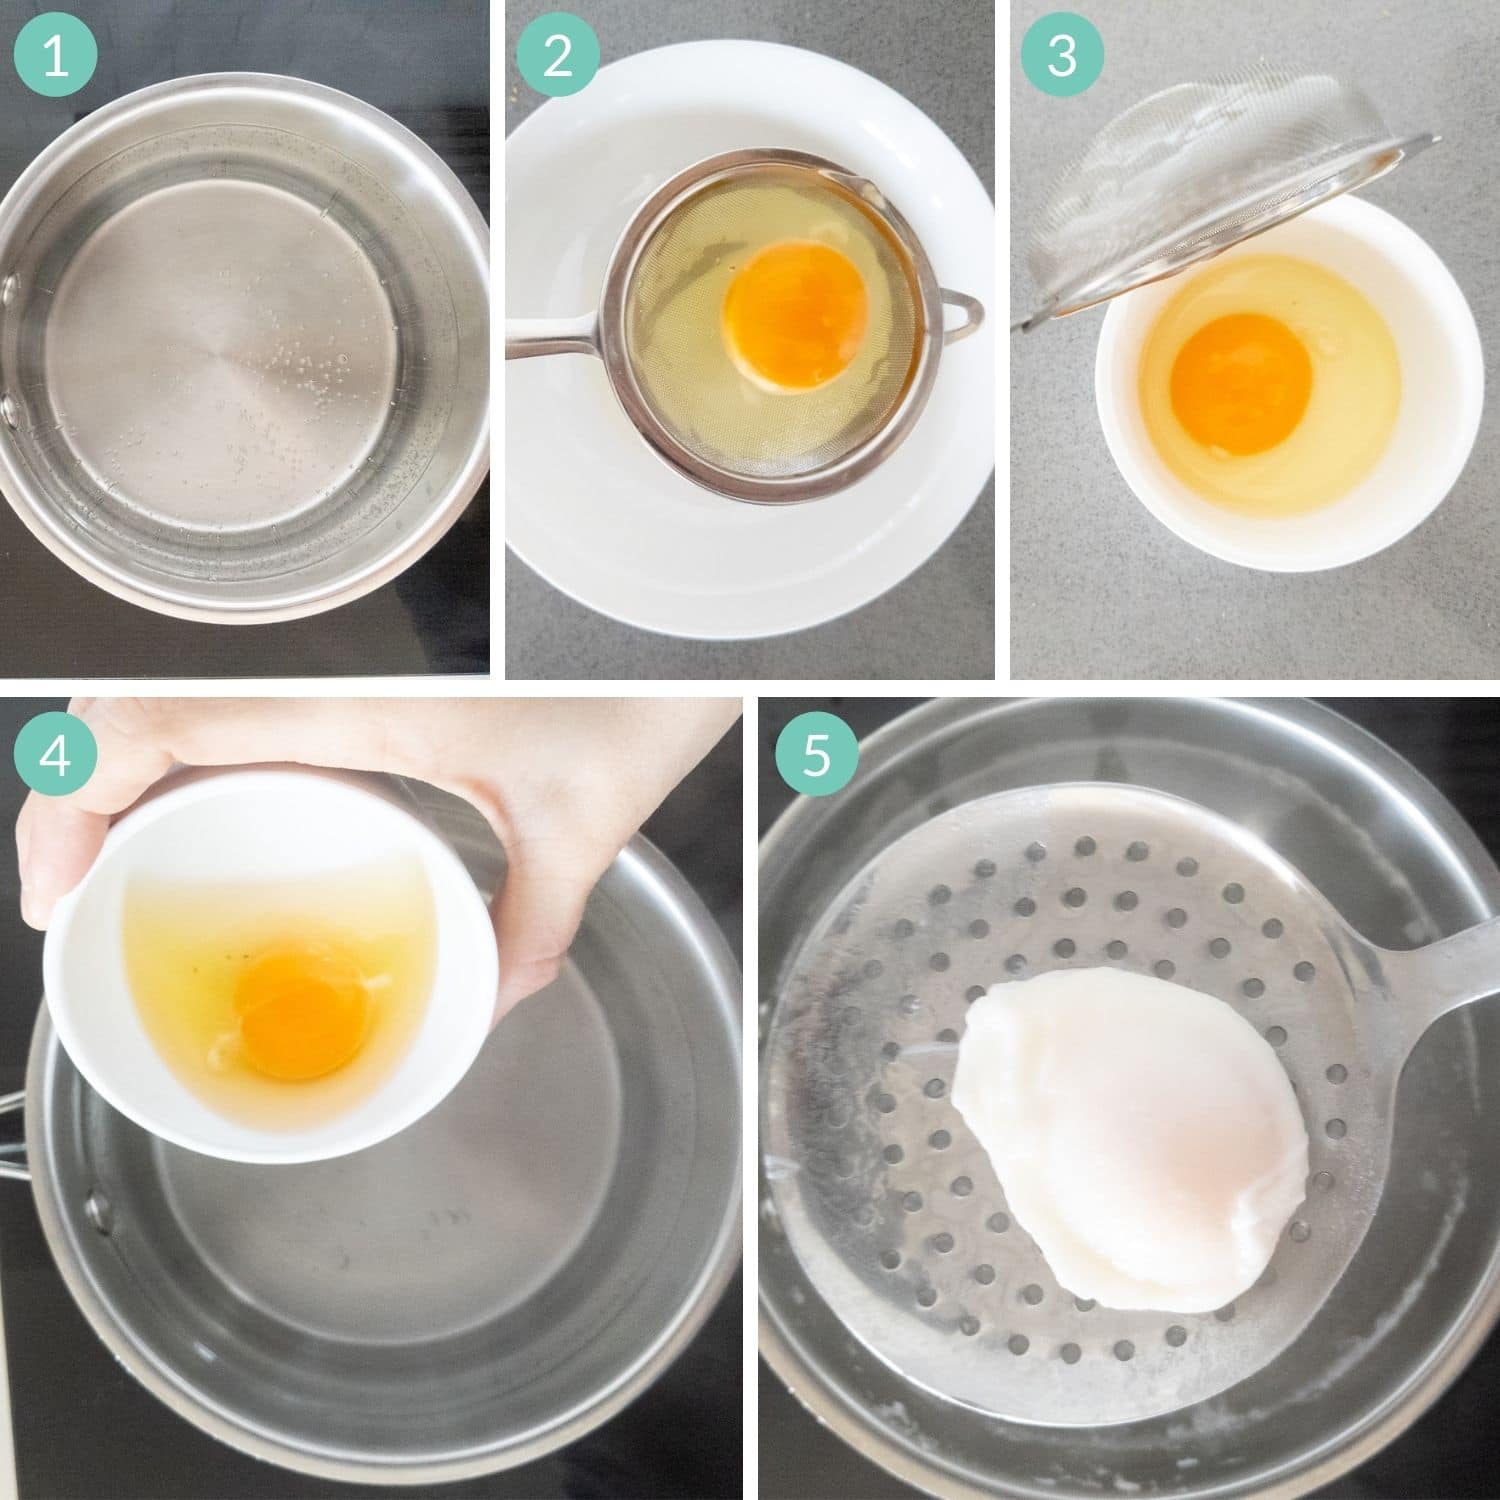
All you need is an egg (of course!) and a few pieces of equipment: a saucepan, a small fine mesh strainer, some ramekins and a slotted spoon. In a few easy steps, you will be enjoying a perfectly poached egg!
- Simmer water: Fill a medium saucepan with about 3 inches (8 cm) of water (about 2/3 full). Bring the water to a boil and then reduce heat until barely simmering (between 180-190F or 82-88C on an instant read thermometer – I like to use a Thermapen).
- Strain the egg: Crack the egg into a small fine mesh sieve set over a bowl. Carefully swirl the egg in the sieve, letting any loose watery egg whites strain through (this reduces the wispy pieces when cooking).
- Transfer to ramekin: Transfer the strained egg into a ramekin. If making more than one egg, continue the process using a separate ramekin for each egg. If you are only poaching one egg, you can also choose to skip this step and simply tip the egg into the water from the strainer.
- Poach the egg: Gently slip the egg into the water by positioning the edge of the ramekin into the water. Slowly and gently stir the water along the pot’s edge in a clockwise motion for 10 seconds with a wooden spoon (this helps to shape the egg more perfectly as it starts to set). Cook for 3-4 minutes. You can poach up to 4 eggs at a time (gently slip them one after another into the water, leaving some space between each one).
- Remove poached egg: Scoop out the egg with a slotted spoon and transfer to a plate lined with paper towel to remove any excess water before serving.
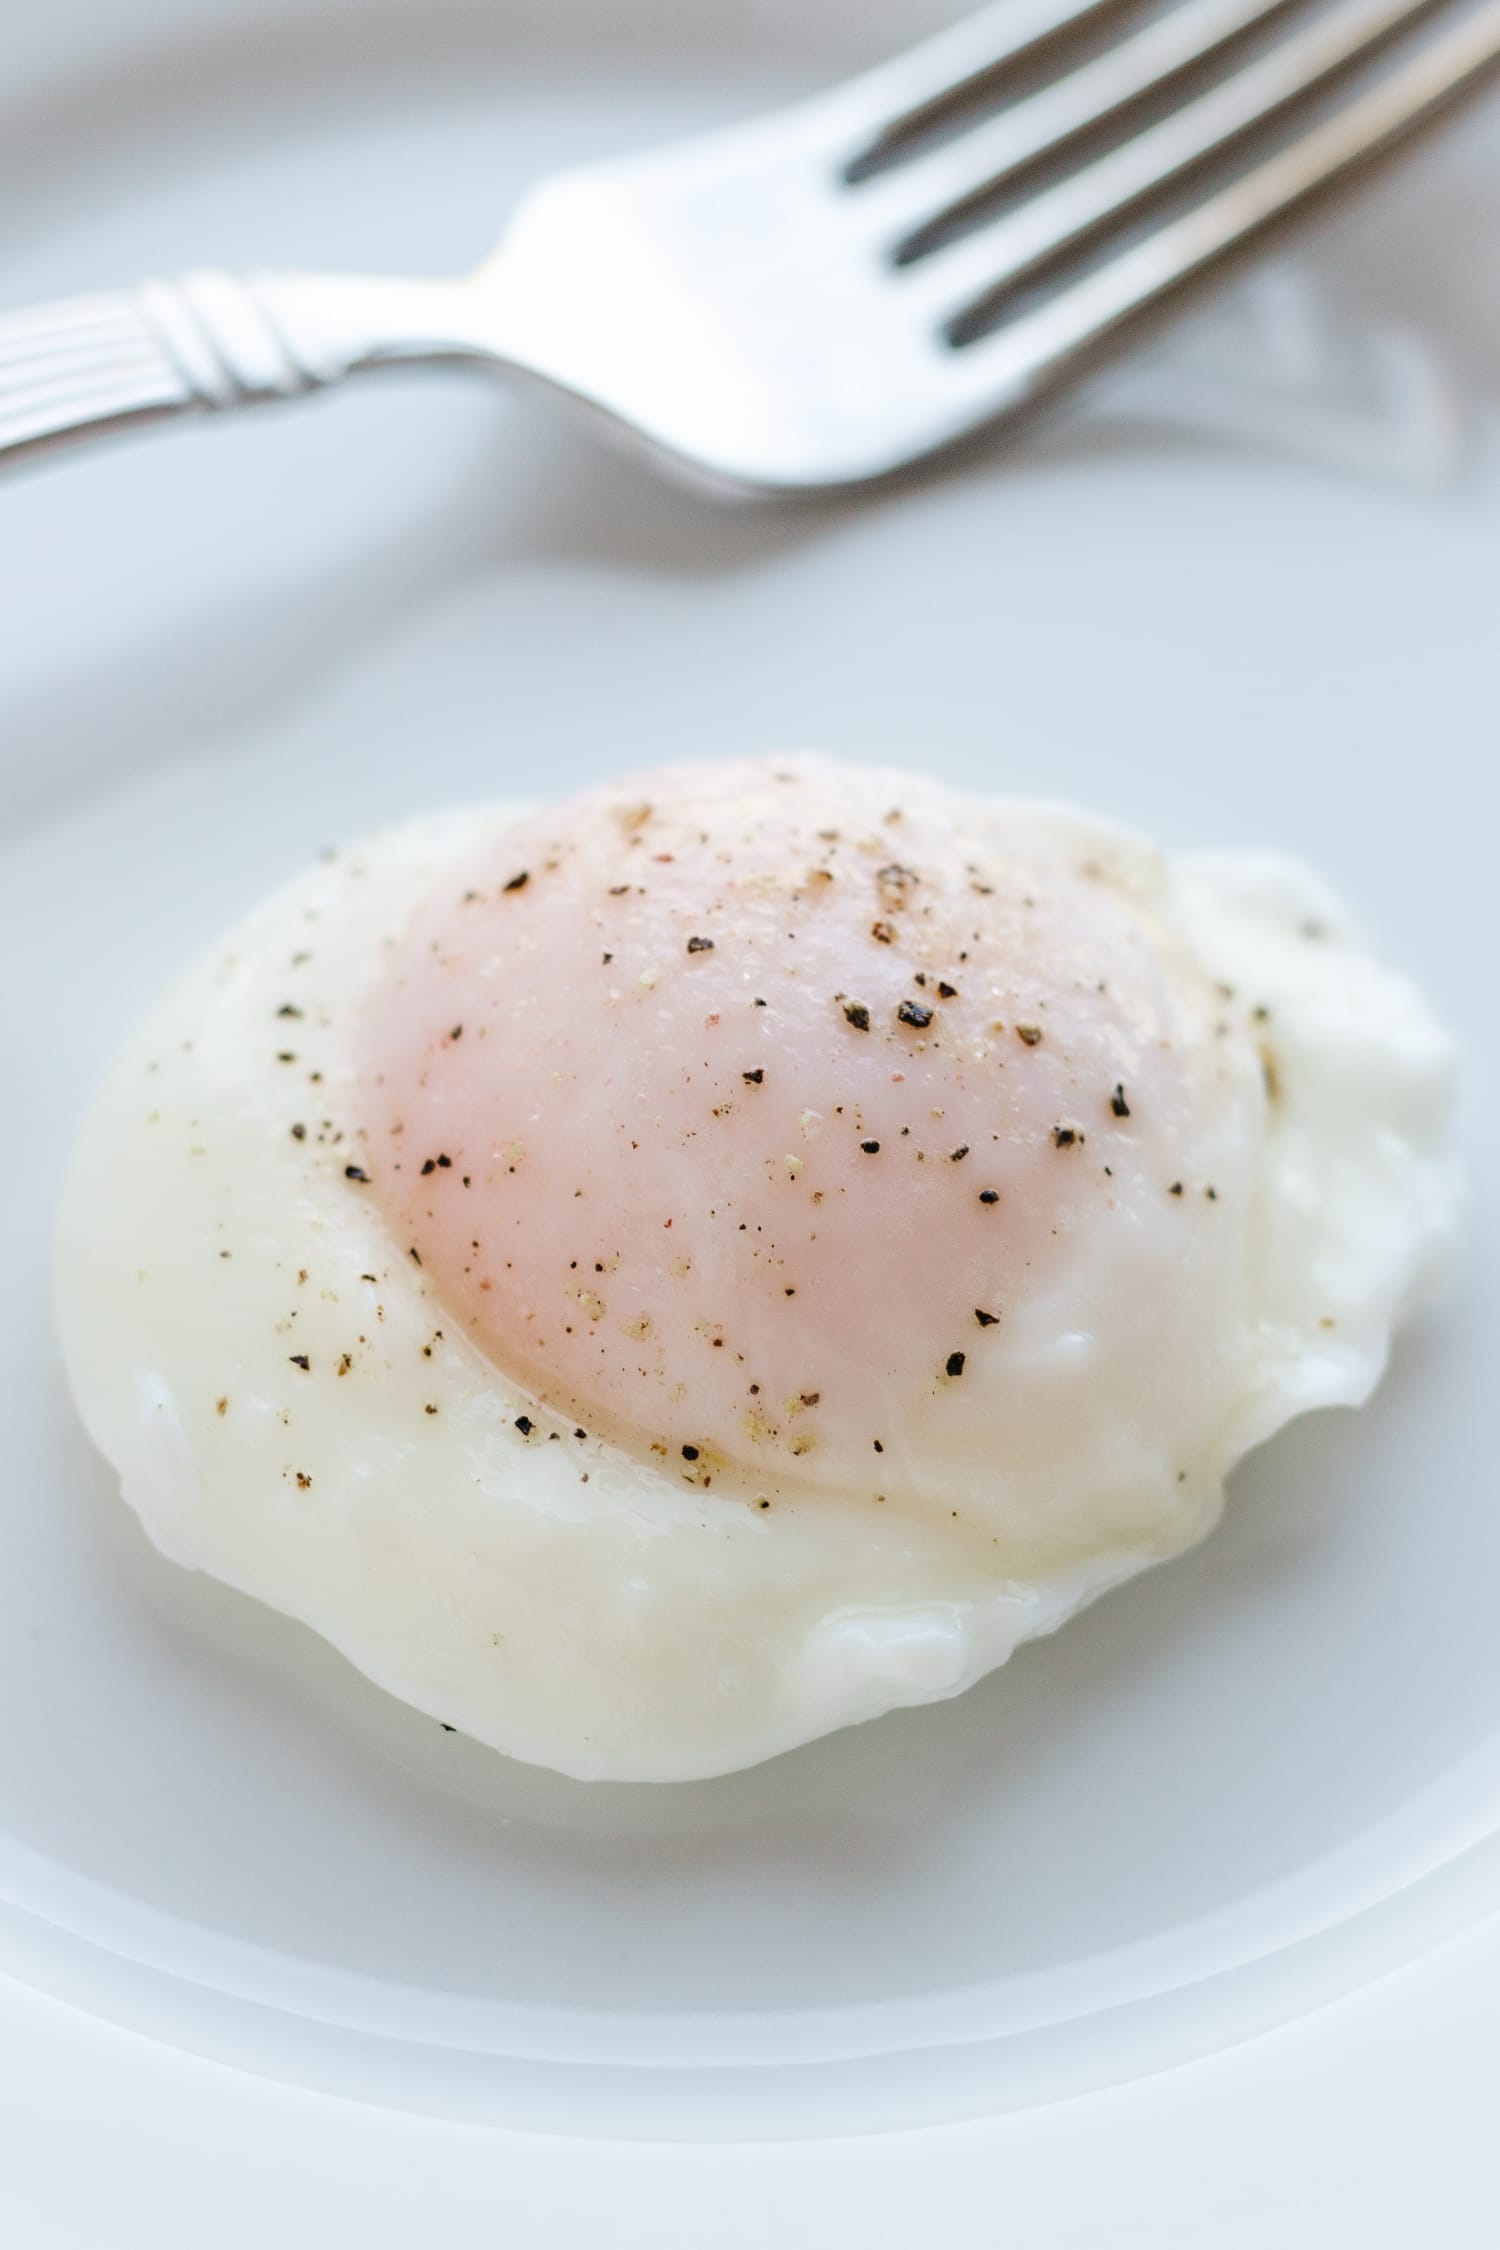
- Serve and enjoy: Serve immediately while still warm. Sprinkle over some salt and pepper and dig in!
Helpful Tips For Success
Here are a few tips to help you achieve perfectly poached eggs!
Barely Simmering Water!
Make sure that your water is barely simmering before adding the egg! Wondering what that looks like? You want to see small bubbles coming up off the bottom of the pot but no bubbles breaking the surface of the water (between 180-190F or 82-88C on an instant read thermometer). This is super important for poaching eggs!
Rapid boiling will break up the egg and create a mess. But you also still need the water to be hot enough to set the eggs quickly which is why the water is brought to a boil first before lowering the heat to ensure it is heated through. The small bubbles at the bottom of the pot also help to prevent the egg from sticking to the bottom.
Use A Fine Mesh Sieve
Straining the egg first gives you a more tightly shaped poached egg and reduces the wispy pieces that create a mess in the pot. The egg will have a firmer white and a more watery white. This watery white causes the white wispy bits when cooking. When you use a fine mesh sieve, the watery part will pass through and get strained out. Note: super fresh eggs will have less watery whites.
Use Fresh Cold Eggs
Fresher eggs will hold their shape better since the bonds weaken with age. The same goes for cold eggs! Fridge cold eggs have a tighter structure than room temperature eggs so they will form a neater shape. Therefore, for a perfectly shaped poached egg, it helps to use fresh eggs that are cold from the fridge.
Gently Stir Water
For a more perfectly shaped poached egg, slowly and gently stir the water along the pot’s edge for 10 seconds with a wooden spoon after adding the egg. This gentle motion in the water helps the egg form a beautiful compact shape as it begins to set.
Give Them A Trim
If you want your poached egg to look really perfect, you can cut off any ragged looking bits of whites with some kitchen scissors. Totally unnecessary though unless you want to get super fancy!
Make Ahead + Reheating Tips
Can you poach eggs ahead of time? You sure can! This can be super helpful if you need to make a lot of them or just want to make some for meal prep.
- To Make Ahead: Transfer the cooked poached eggs immediately to an ice water bath to stop the cooking process. Tip: I recommend undercooking them just slightly so the yolks remain runny when reheated.
- To Store: Transfer to a storage container filled with cold water and store in the fridge for 2-3 days.
- To Reheat: For a single poached egg, place some boiling water in a small bowl or cup and add the poached egg for about 30 seconds or until warmed through. To reheat a larger quantity, bring a pot of water to a bare simmer and lower each poached egg into the pot. Turn off the heat and leave them for 30-60 seconds or until warmed through. Remove with a slotted spoon, dab dry with paper towel and serve.
A Few Questions Answered
Poach for 3-4 minutes for firm whites and a runny yolk. You can test for doneness by lifting out the egg with a slotted spoon and gently pressing your finger on the yolk. Return to water if you prefer a firmer yolk.
Nope! Adding vinegar is a trick to set up the egg whites more quickly but if you follow the tips above, it is unnecessary. Feel free to add a bit if you like but I never do since I feel like it changes the texture of the egg whites and makes them more rubbery.
There will be lots of differing opinions on this but I like the water to be about 3 inches (8 cm) deep. If it is too shallow, the eggs will have a flatter shape.
Some people like to create a vortex to help the whites wrap around the yolk. This isn’t necessary and has a few downsides: you can only poach a single egg using this method and the aggressive vortex tends to create more ragged bits on the eggs surface. However, gently swirling the water along the pot’s edge for 10 seconds after the egg has been added can be very helpful to shape the egg as it begins to set.
Not only are poached eggs incredibly delicious but poaching is also one of the healthiest ways to cook eggs since shorter and lower heat cooking methods help retain most of the nutrients in the eggs. Eggs are one of the most nutritious foods, providing virtually all the vitamins and minerals you need (a true “superfood”). You can read this article if you want to learn more about the health benefits of eggs. Just remember that not all eggs are equal – try to buy the best you can (pastured eggs tend to be richer in nutrients).
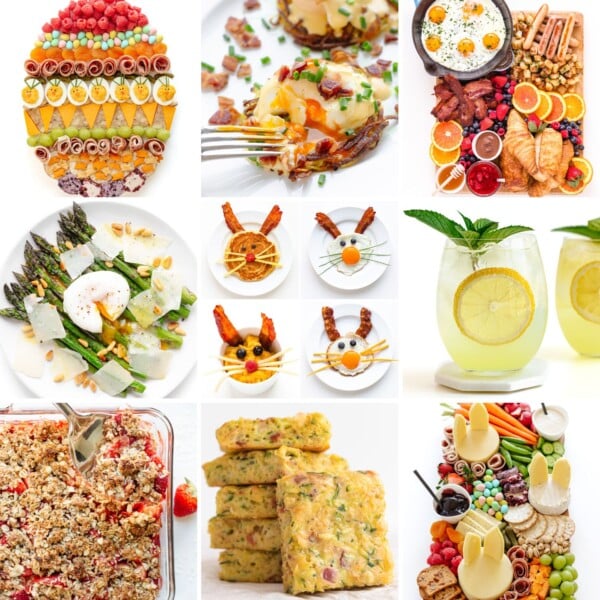
Ways To Serve Poached Eggs
- Serve With Toast: This is one of the simplest pairings but super delicious and satisfying. Or get fancy by popping a poached egg on top of avocado toast.
- Make Eggs Benedict: A classic option and one of my favorites. This delicious Hollandaise Sauce brings it all together. For a bit of a twist, try this Rosti Eggs Benedict recipe.
- Top a salad: They are amazing on top of hearty salads like this Roasted Asparagus with Egg and Parmesan Salad.
- Breakfast Sandwich or Hash: Poached eggs are a welcome addition to an epic breakfast sandwich or breakfast hash.
- Top A Rice Bowl: There is nothing better than watching that oozy golden yolk flow out and act as a sauce!
More Egg Tutorials
Looking to master some other egg cooking methods? Then check these out…
- Soft Boiled Eggs
- Hard Boiled Eggs (both stovetop and Instant Pot methods)
- Different Ways To Cook Eggs – 5 Basics!
- What To Do With Hard Boiled Eggs
Let me know in the comments below if you give this poached eggs recipe a try!

How To Make Perfect Poached Eggs
- Prep Time: 3 min
- Cook Time: 3 min
- Total Time: 6 min
- Yield: 1 egg 1x
- Category: Breakfast
- Method: Poach
- Cuisine: American
Description
Learn how to make perfect poached eggs with the tips in this recipe!
Ingredients
- 1 large egg
- For serving: Himalayan or sea salt and freshly ground pepper
Instructions
- Gently simmer water: Fill a medium saucepan with about 3 inches (8 cm) of water. Bring the water to a boil and then reduce heat until barely simmering (between 180-190F or 82-88C on an instant read thermometer).
- Strain the egg: Crack the egg into a small fine mesh sieve set over a small bowl. Carefully swirl the egg around the sieve, letting any loose watery egg whites strain through (this reduces the wispy pieces when cooking). Transfer the strained egg into a ramekin.
- Poach the egg: Tilt the edge of the ramekin into the water and gently slide the egg out. Slowly and gently stir the water along the pot’s edge in a clockwise motion for 10 seconds with a wooden spoon (this helps to shape the egg more perfectly while it begins to set). Cook for 3-4 minutes. You can test for doneness by lifting out the egg with a slotted spoon and gently pressing your finger on the yolk. Return to water if you prefer a firmer yolk.
- Remove poached egg: Scoop out the egg with a slotted spoon and transfer to a plate lined with paper towel to remove any excess water before serving.
- Serve and enjoy: Serve immediately while still warm. Season with a bit of salt and pepper and dig in!
Notes
- Tips For Success:
- Make sure that your water is barely simmering before adding the egg! You want to see small bubbles coming up off the bottom of the pot but no bubbles breaking the surface of the water (between 180-190F or 82-88C on an instant read thermometer like the Thermapen).
- Use a fine mesh sieve! Straining the egg first removes the watery whites to create a more tightly shaped poached egg and reduces the wispy pieces that create a mess in the pot.
- Use fresh cold eggs! Fresh eggs that are fridge cold hold their shape better
- Poach up to 4 eggs at a time: Make sure to place each egg into separate ramekins and gently slip them one after another into the water, leaving some space between each one.
- To Make Ahead: Transfer the cooked poached eggs immediately to an ice water bath to stop the cooking process.
- To Store: Transfer to a storage container filled with cold water and store in the fridge for 2-3 days.
- To Reheat: For a single poached egg, place some boiling water in a small bowl or cup and add the poached egg for about 30 seconds or until warmed through. To reheat a larger quantity, bring a pot of water to a bare simmer and lower each poached egg into the pot. Turn off the heat and leave them for 30-60 seconds or until warmed through. Remove with a slotted spoon, dab dry with paper towel and serve.


After reading this I feel confident enough to tackle the poached egg! I’ve only been successful a handful of times before. Thanks so much for the tips!
Hope these tips result in beautiful poached eggs for you every time!
Your photos!! Truly the best poached eggs, I can’t wait to try out your easy method and have the perfect avocado toast. Thanks for this!
Thank you for the kind words!
I poach eggs regularly, but never tried putting the egg in a sieve first! I have to say, it was the prettiest poached egg I’ve ever made! I learnt a lot from you – thanks!
Isn’t it amazing the difference it makes! Glad you found all the tips helpful!
I always use vinegar, as I thought you had to and I always crack the egg into the water, but we will try this method and see how it goes!
Let me know how it goes! I used to always think vinegar was needed as well but never really liked the texture it gave the whites. This method keeps the egg together for me and doesn’t require anything to be added to the cooking water.
I’m from south. Used chicken broth and cajun seasoning in water. Followed recipe after that these are delicious. Thank you
That sounds great! Thanks for sharing!
Great tips, I love that they can be made ahead! I love poached eggs on toast and in a quick bowl of ramen, yummy!
On toast and in ramen are two delicious ways to enjoy them!
Try Munster cheese melted on toast top with poached egg
That sounds delicious!
Toast! I love poached eggs on toast and only have them at restaurants. I never get it right at home. Thank you for the step by step
On toast is a true classic! Hope the step by step helps you to perfect them at home!
Do you know that I’ve never actually made poached eggs!? I know. Embarrassing as a food blogger to admit that out loud. I’m inspired by your post to try it now!!
Let me know how it goes! I used to be so intimidated after a failed attempt many many years ago. Glad to have found this method so that I can enjoy them at home!
Great tips, Vanessa! Using a fine-mesh sieve solves my problems!
Glad you found the tips helpful!
I have been intimidated by poached eggs, that’s why they are my husband’s domain 🙂 . But now I might have conquered my fear and will start making them. Thank you for the tips!!
Glad the tips were helpful!
Poaching eggs properly has been a skill that has been eluding me. Thanks for sharing…I’m going to give it another go!
I was always intimidated by them and had many failed attempts before taking this approach. I hope that it also gives you success!