This post may contain affiliate links. See my disclosure policy.
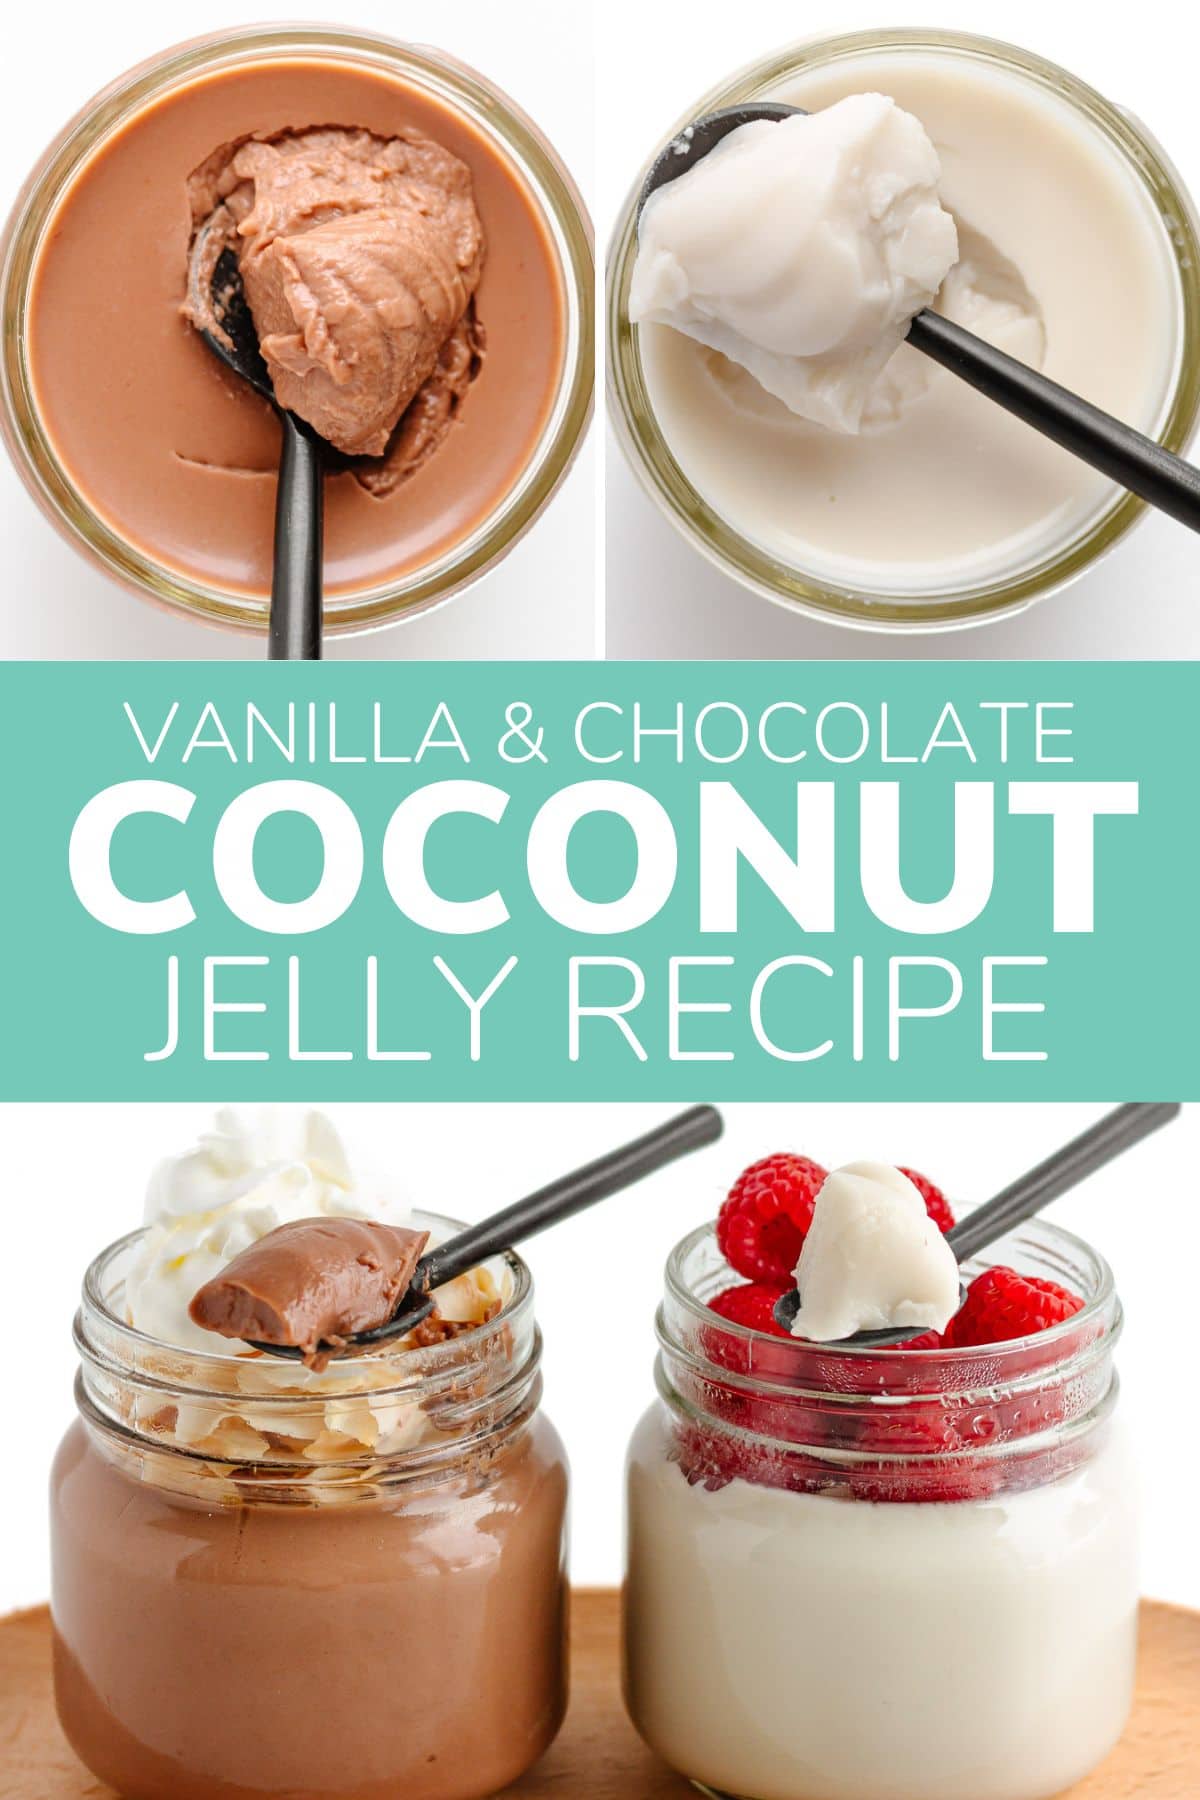
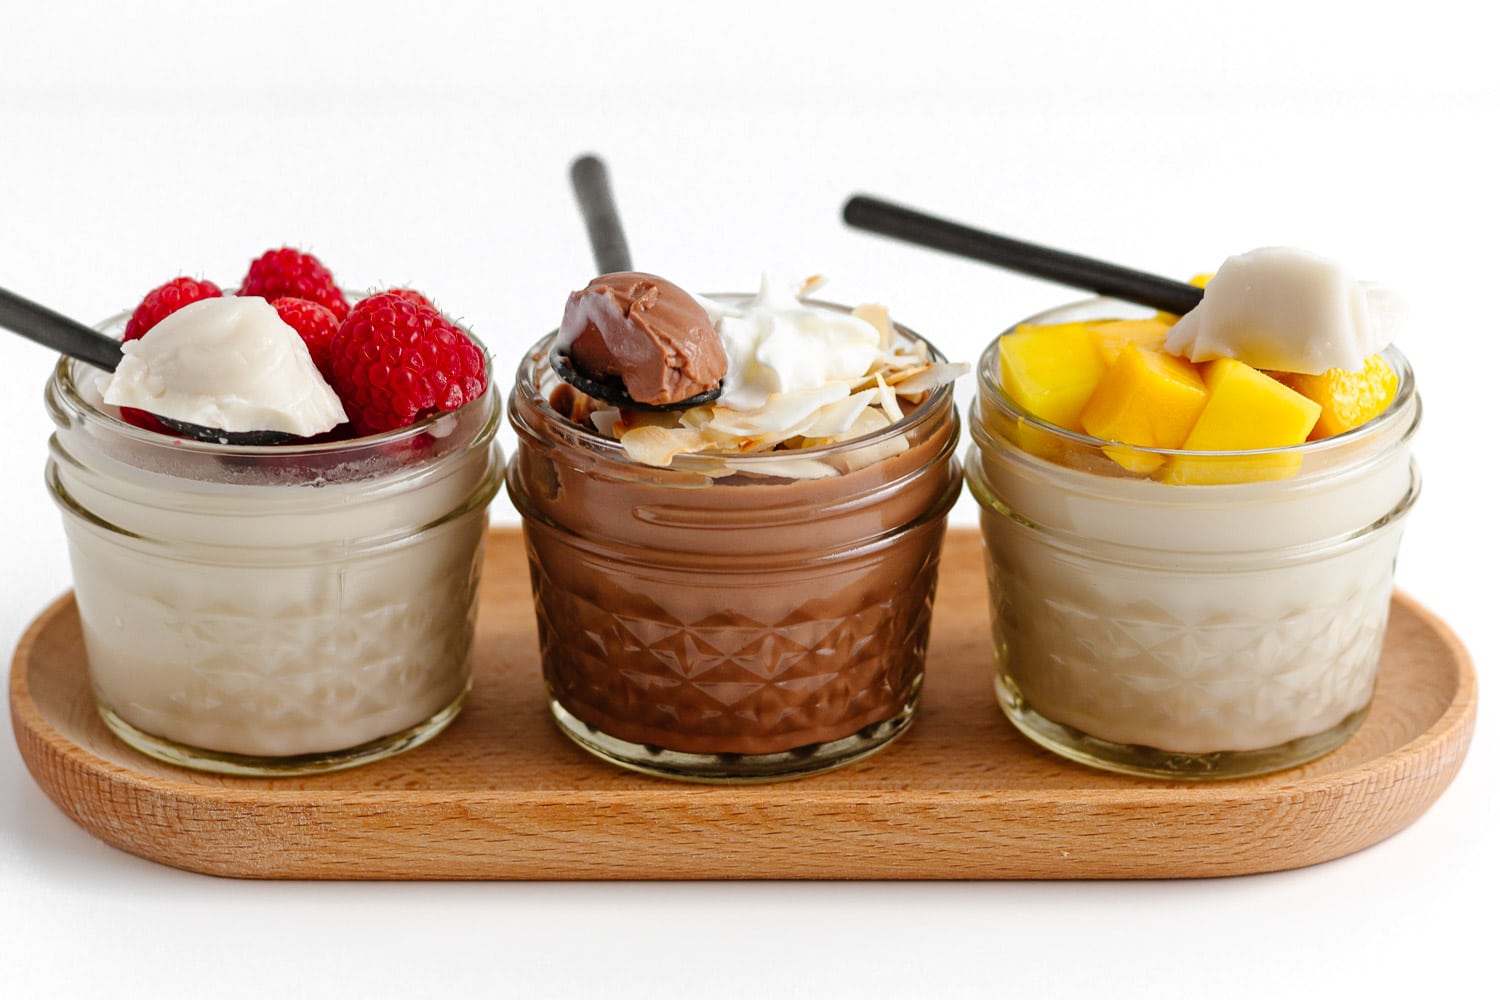
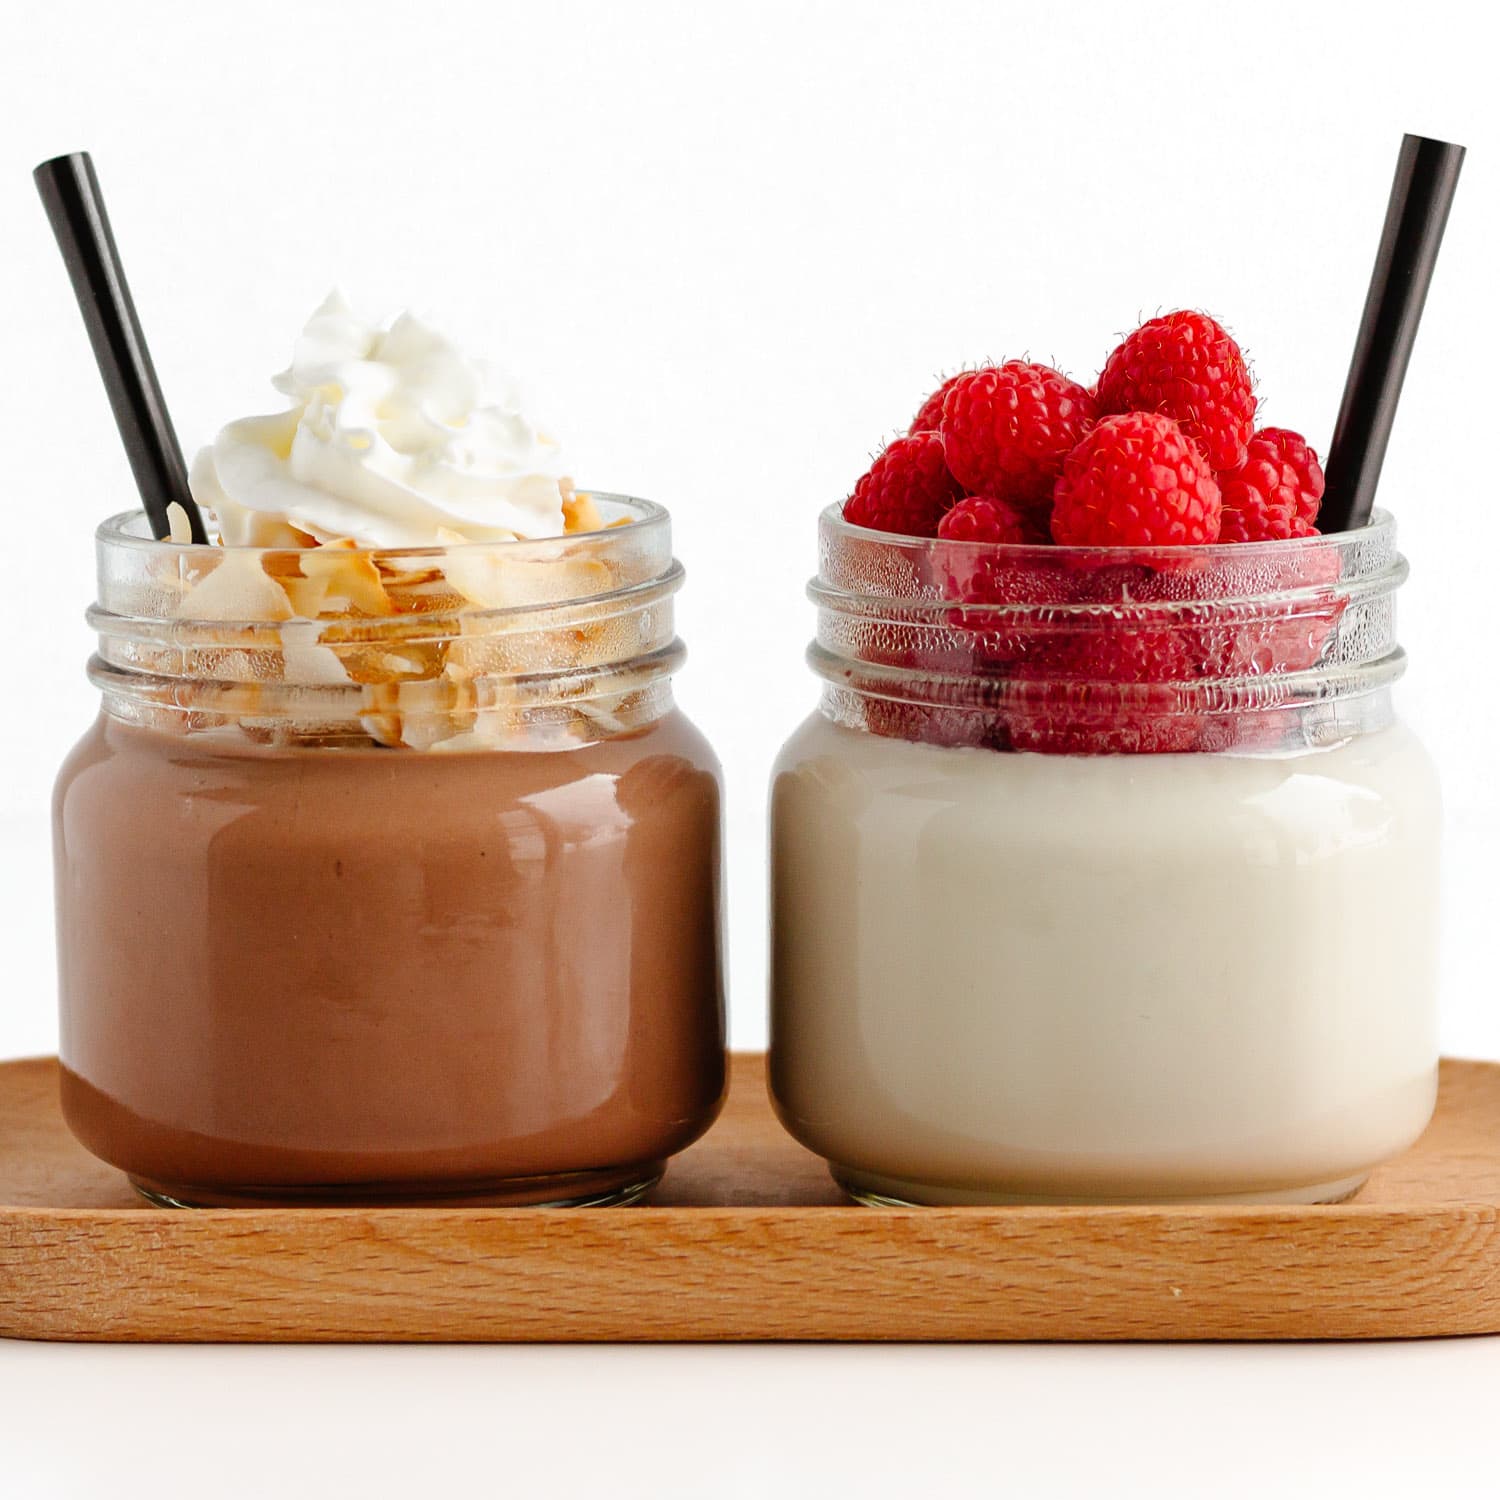
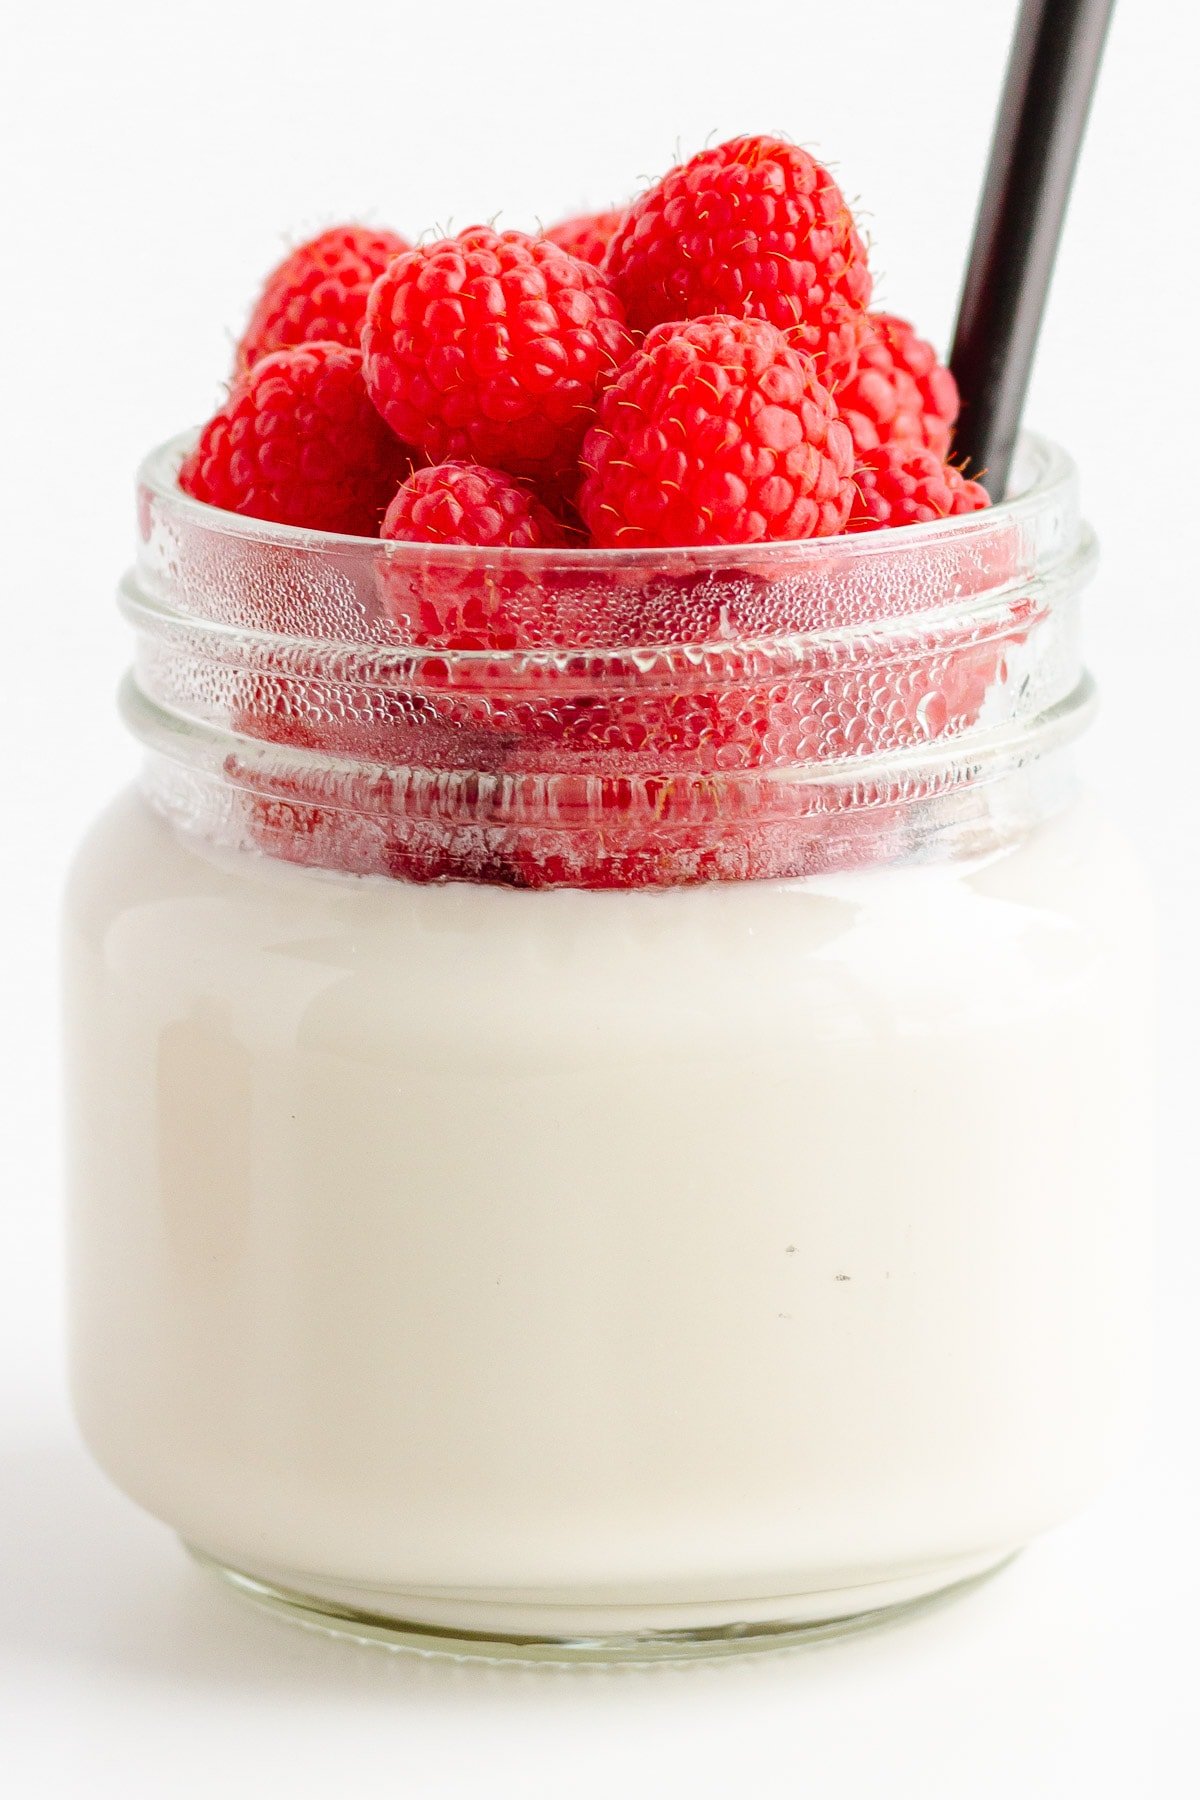
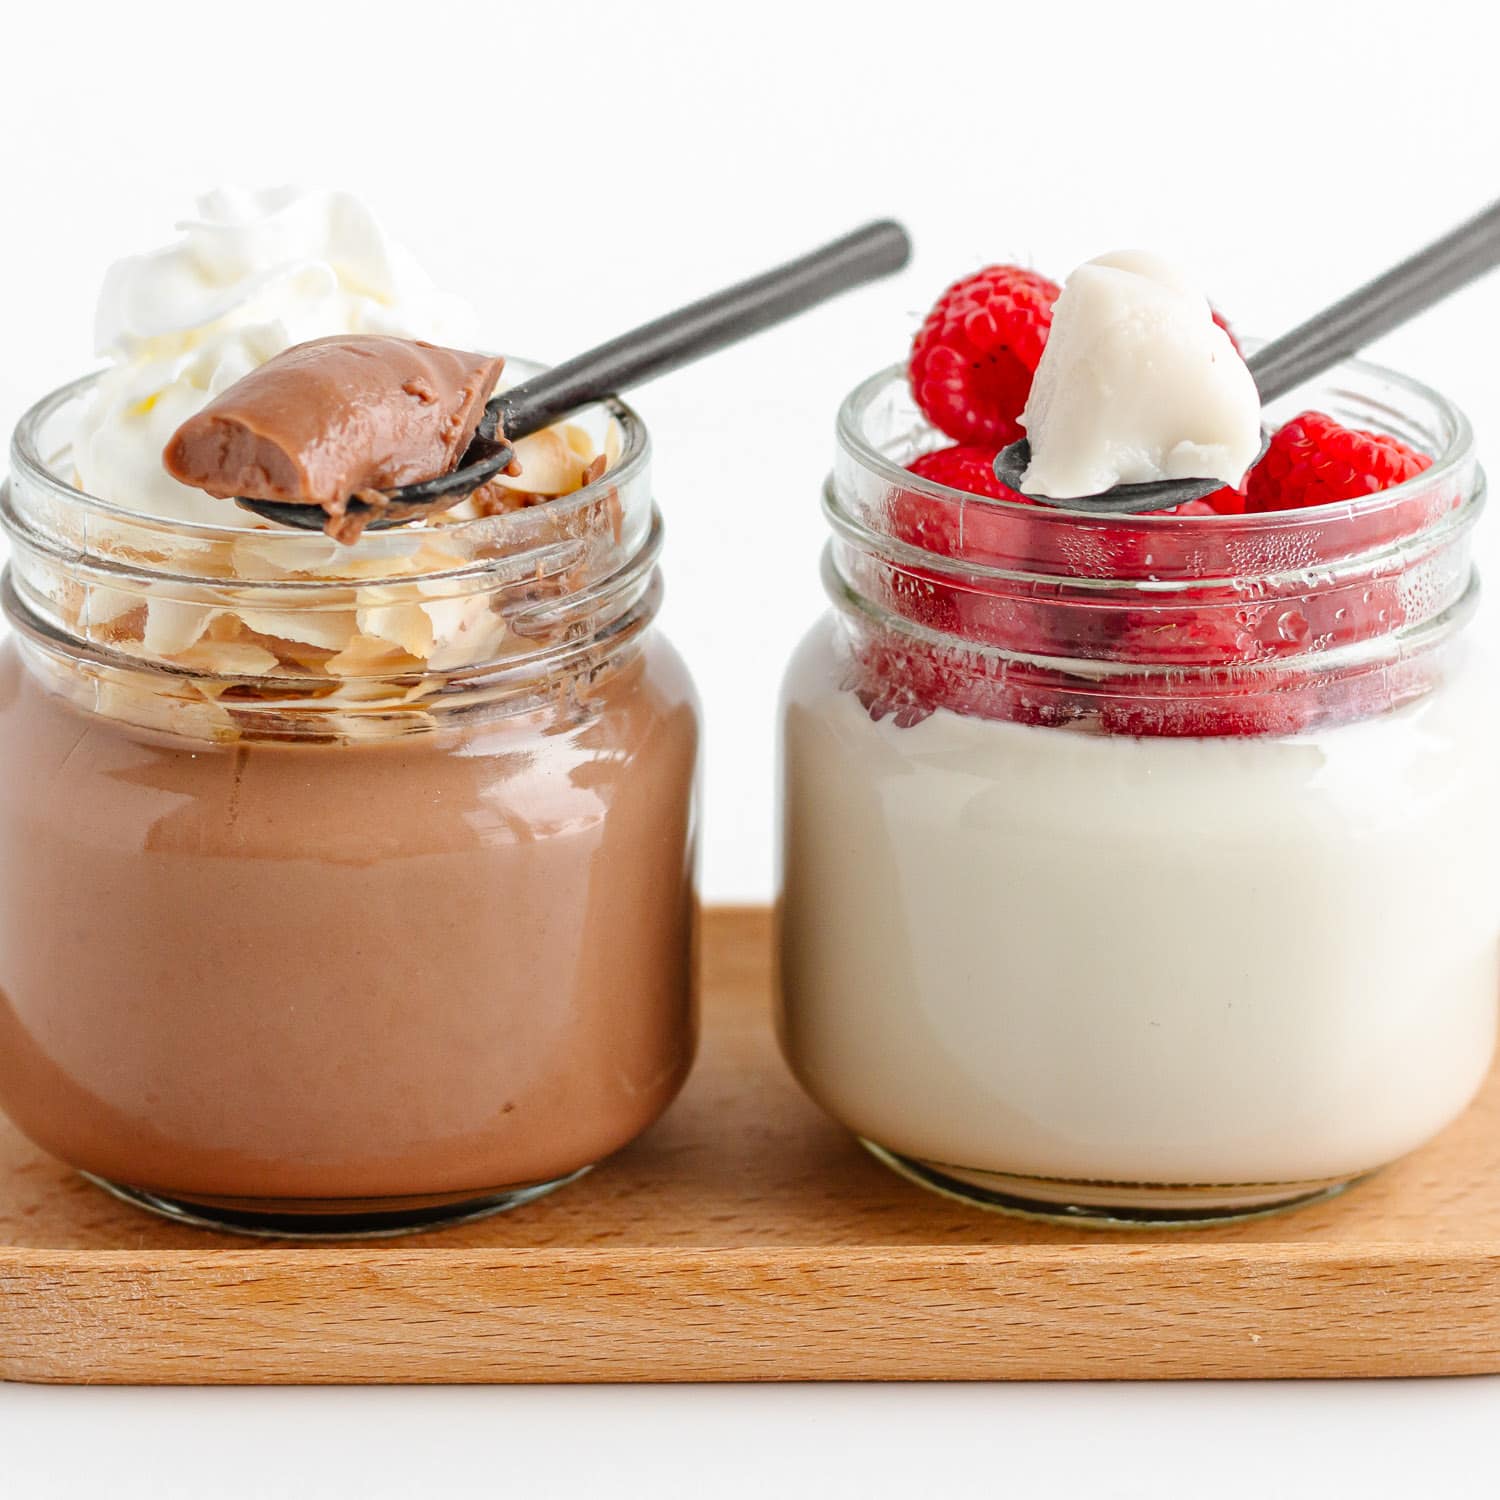
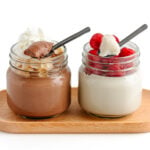
This easy Coconut Jelly recipe (aka coconut jello) can be prepped in just 15 minutes! It’s a fun and delicious coconut milk dessert or snack that the whole family will love. Comes in two flavor options (vanilla & chocolate) – which will you choose?
Reasons To Love This Recipe
This coconut milk jelly is such a fun recipe! It’s delicious with a fun jiggly texture and makes a great snack or dessert.
- Made with real food ingredients: Just 4 simple ingredients are needed.
- Easy to make: Can be prepped in just 15 minutes!
- Kid and adult friendly: The whole family will love this jiggly dessert! Also makes a great lunch box treat or after school snack for kids.
- Dairy & gluten free: This healthy coconut milk dessert also happens to be naturally gluten and dairy free which means that people with those allergies or restrictions can also enjoy it.
Ingredients You’ll Need
Only a few ingredients are needed to make these coconut jellies…
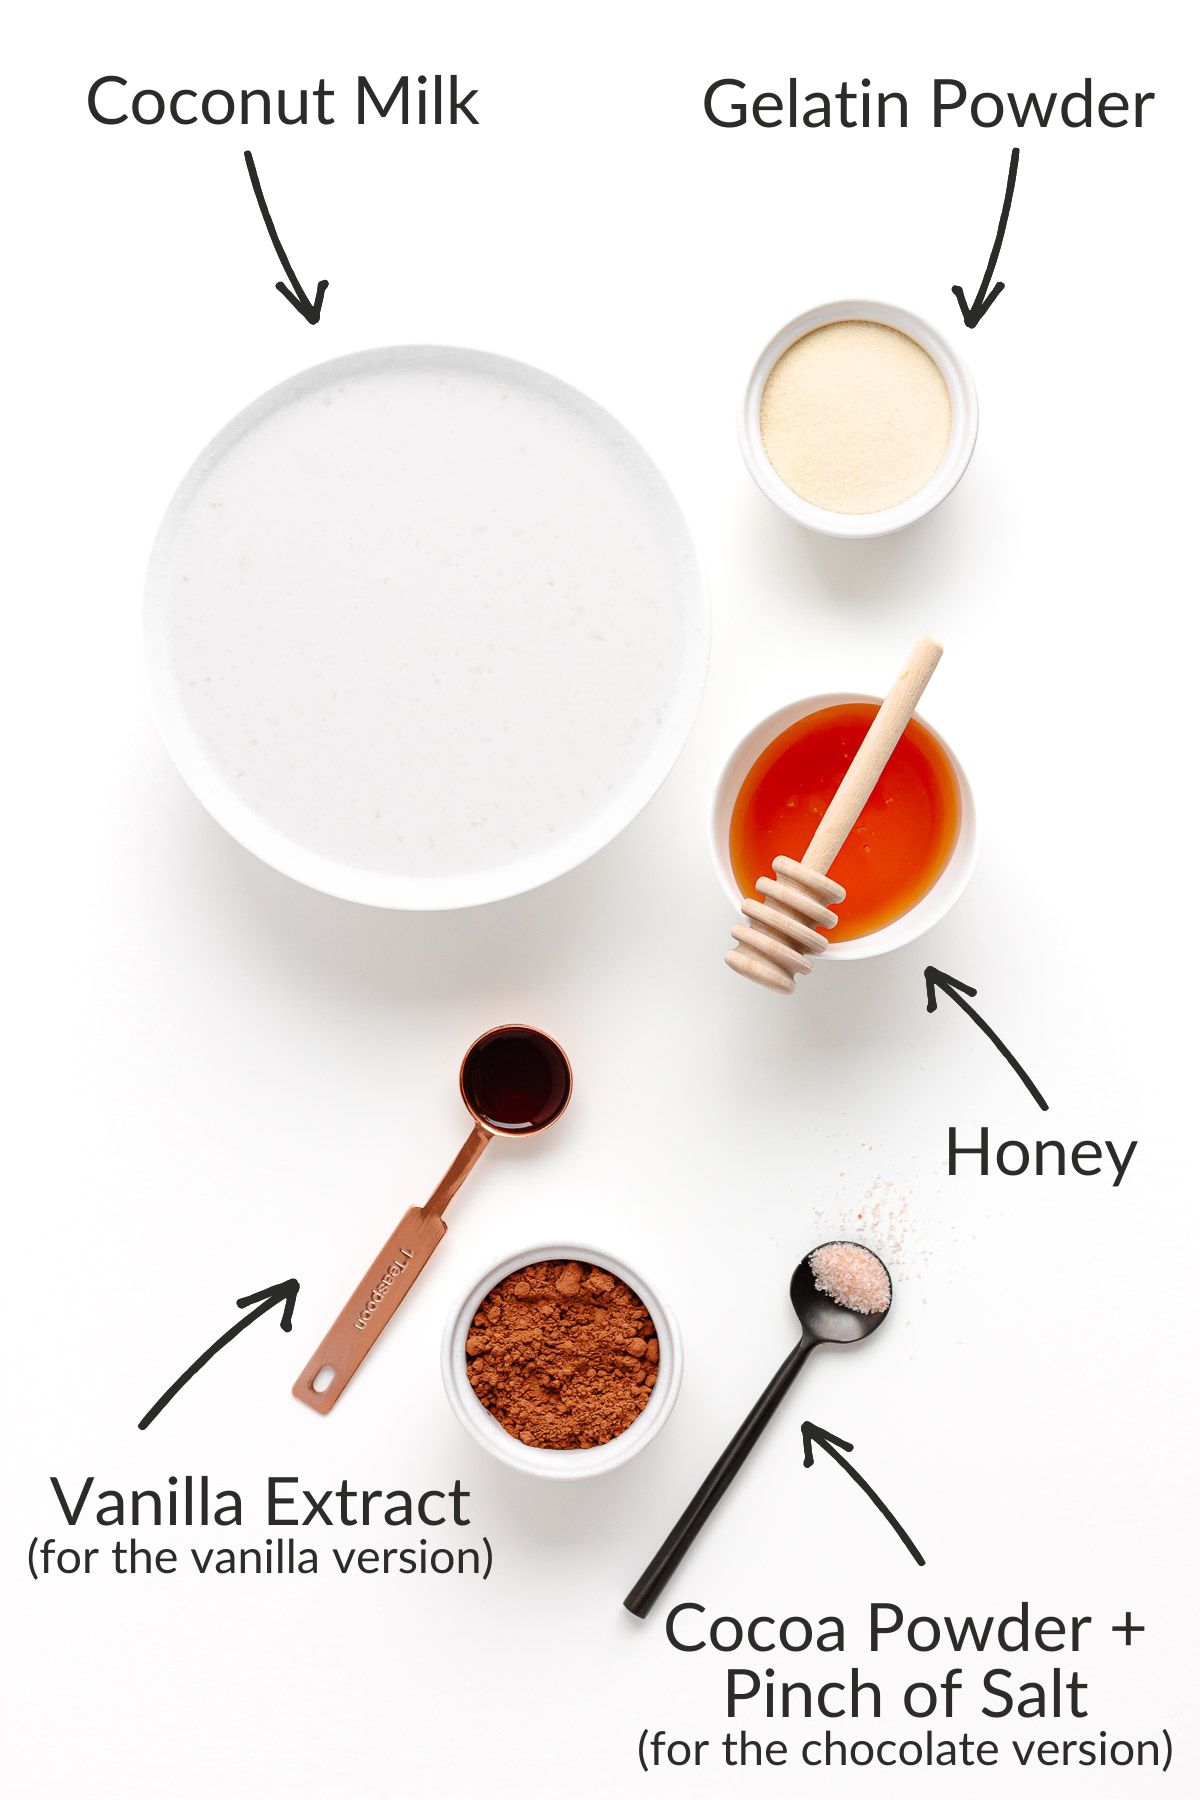
- Coconut milk: The recipe calls for 1 can of coconut milk (13.5-14 oz / 400 ml size). Use the full fat, unsweetened variety.
- Gelatin: I recommend using a good quality unflavored, grass-fed and pasture-raised powdered gelatin. I use this Great Lakes Gelatin for all my jellies and gummies. Vital Proteins Gelatin is another great option. Make sure you don’t accidentally use collagen peptides or your coconut jelly won’t gel.
- Honey: To sweeten the coconut jelly. Adjust to taste.
- Flavoring: Vanilla extract is added to the vanilla version. The chocolate version includes some cocoa powder and a pinch of salt. I like to use dutch processed cocoa powder.
Detailed ingredient list and directions located in the recipe card below.
How To Make Coconut Jelly
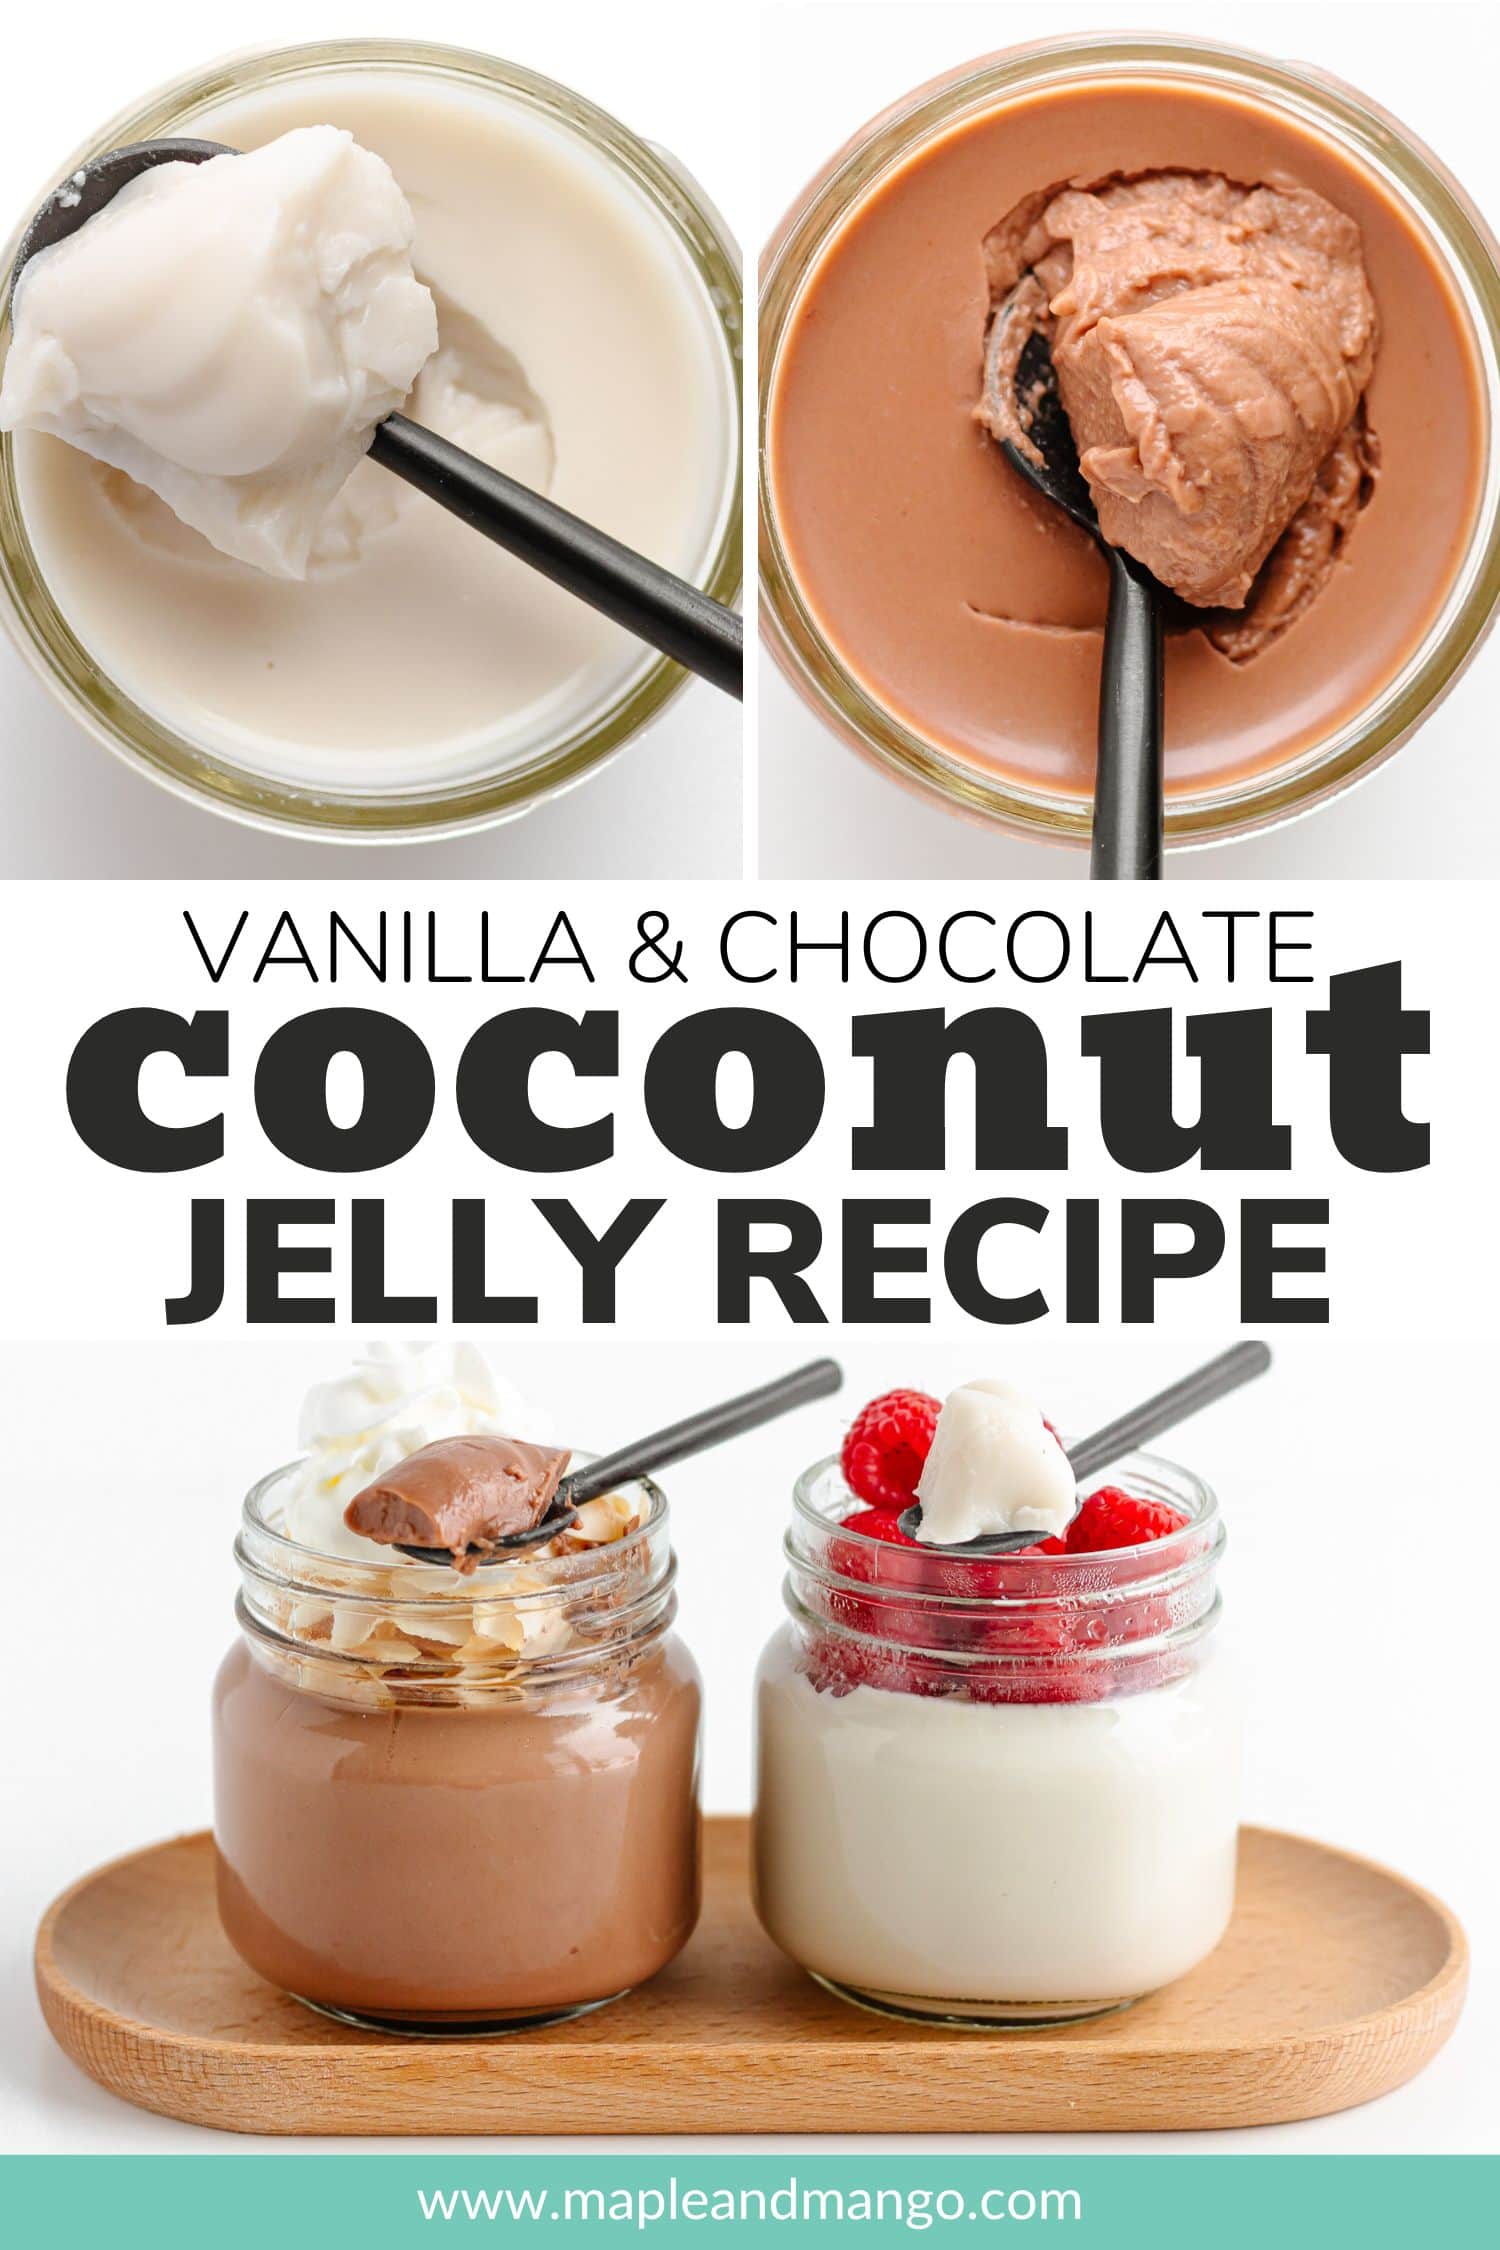
This coconut jelly recipe includes two flavor options – vanilla and chocolate. The photos in the steps below show the vanilla version.
STEP 1: Bloom the gelatin. Pour 1/4 cup of the coconut milk into a small bowl. Sprinkle the gelatin over the top and gently stir together. Set aside to let the gelatin “bloom” or rehydrate.
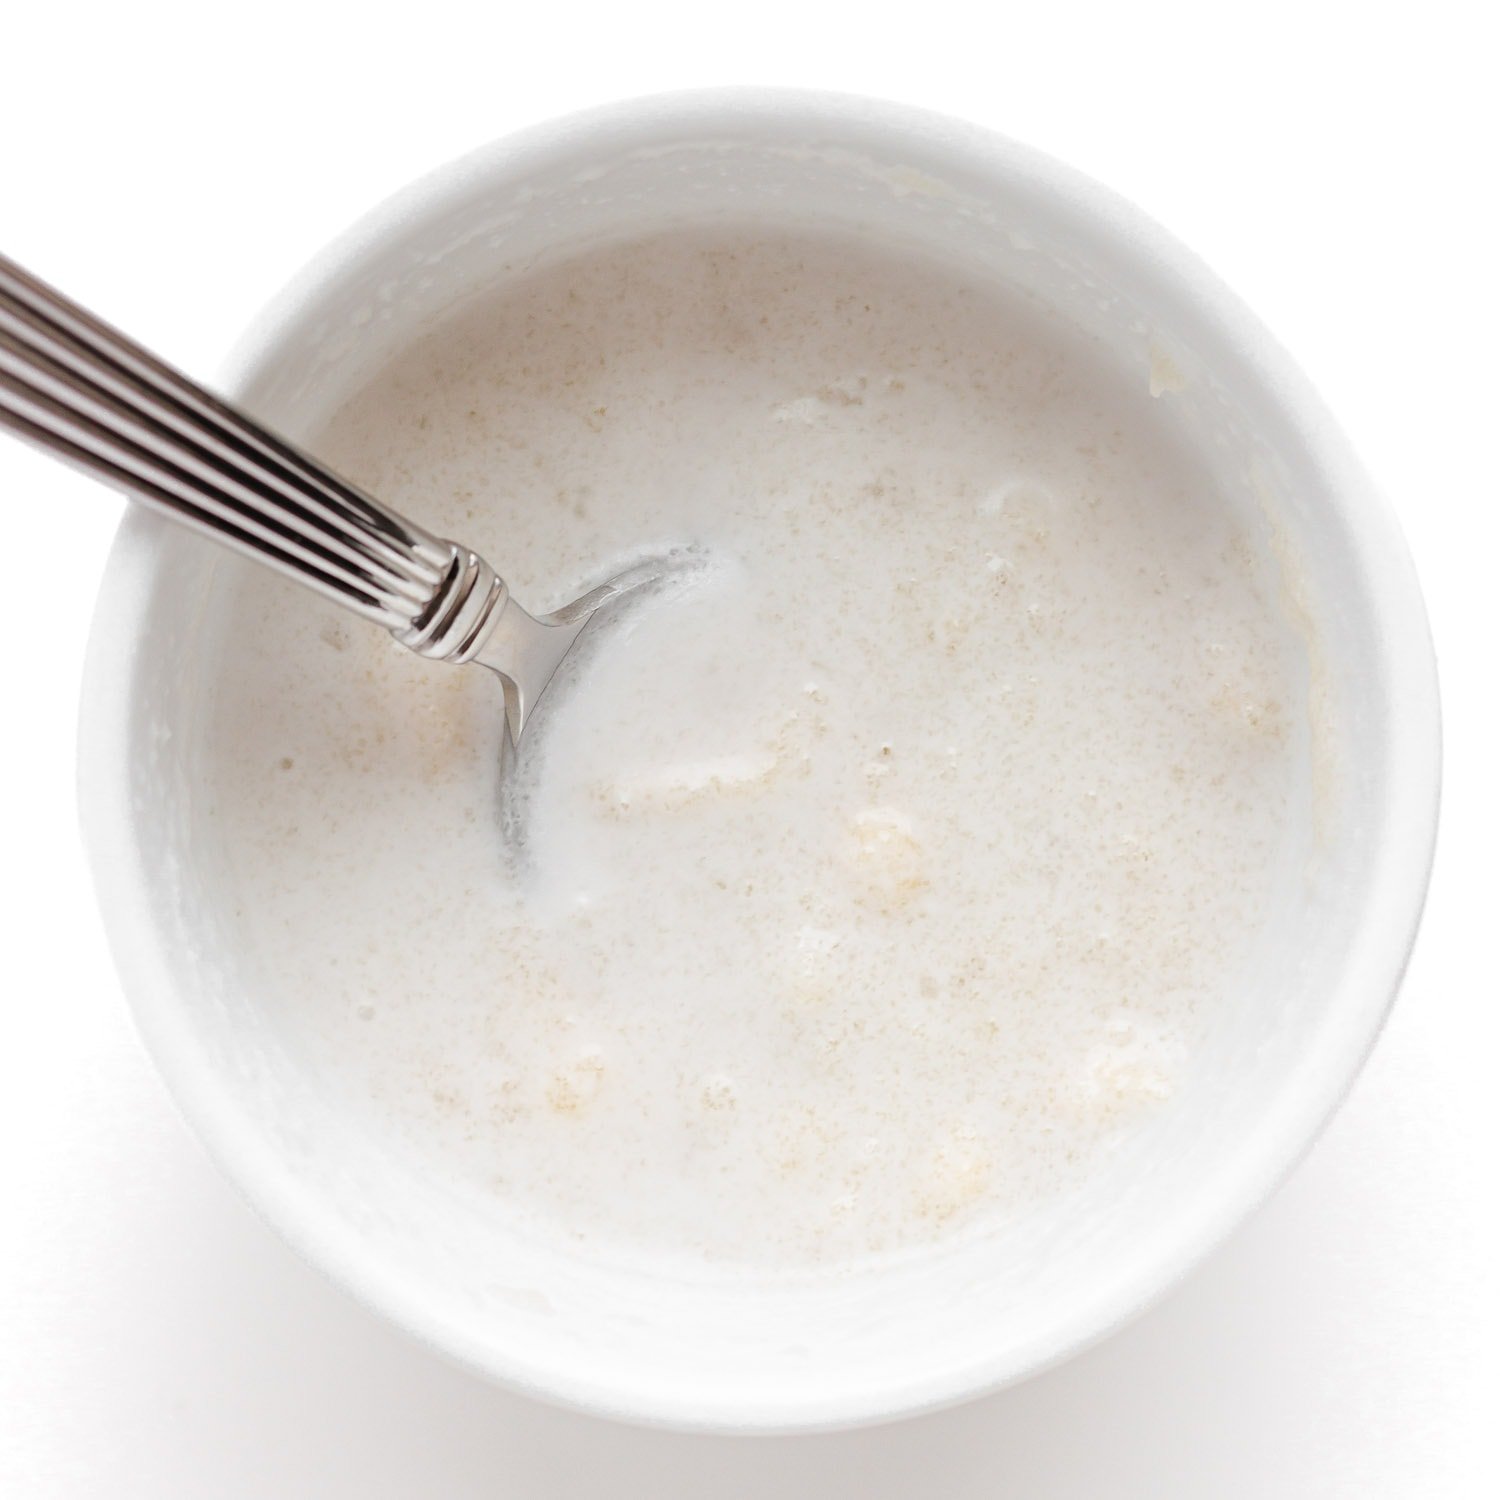
Tip: Make sure to shake the can of coconut milk really well before opening to combine. Otherwise you will have a layer of coconut cream sitting at the top.
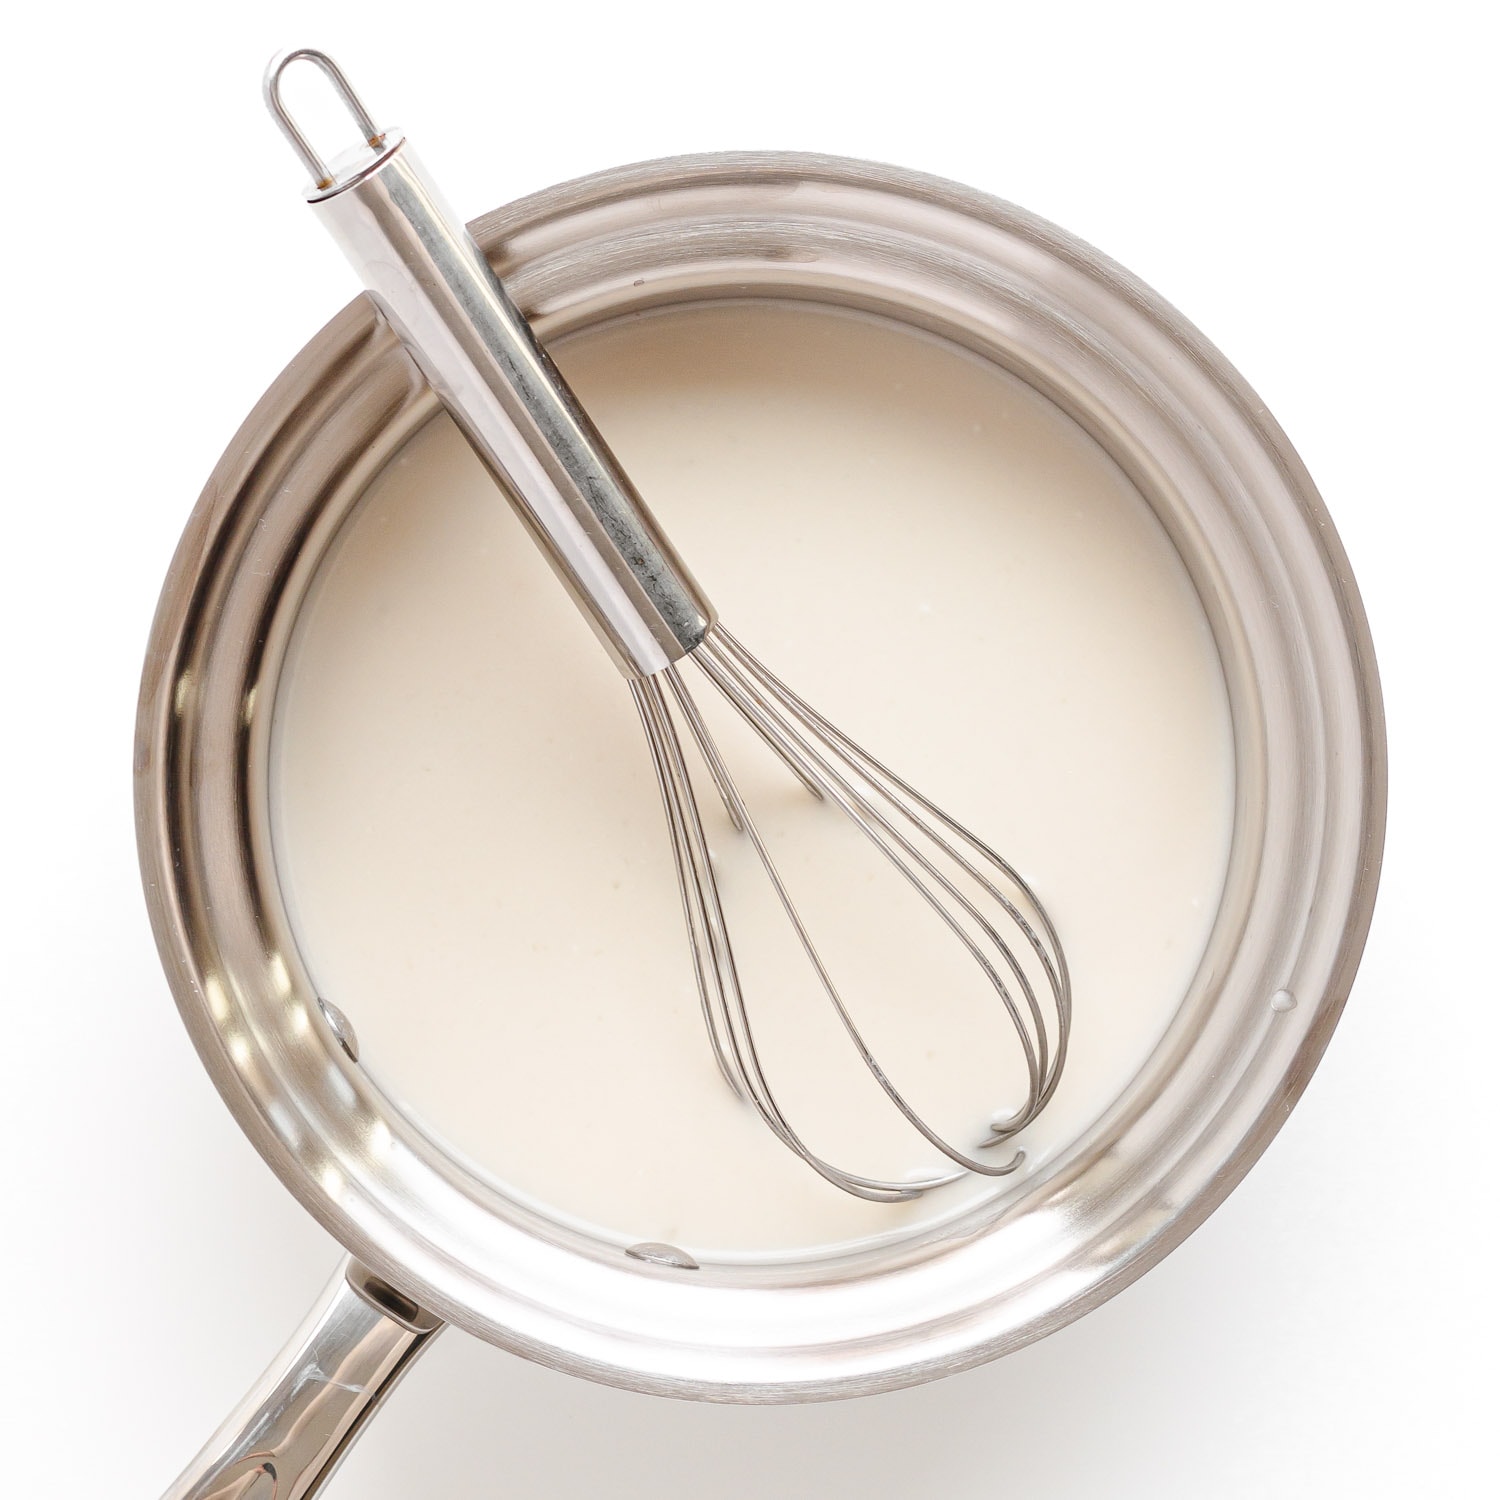
STEP 2: Heat up remaining ingredients. In a small saucepan, mix together the remaining coconut milk, honey and additional flavor ingredients (vanilla coconut jelly = vanilla extract, chocolate jelly = cocoa powder and a pinch of salt).
Heat the coconut milk mixture over medium heat, whisking frequently until the honey dissolves and the mixture is hot (but not boiling) or it may separate.
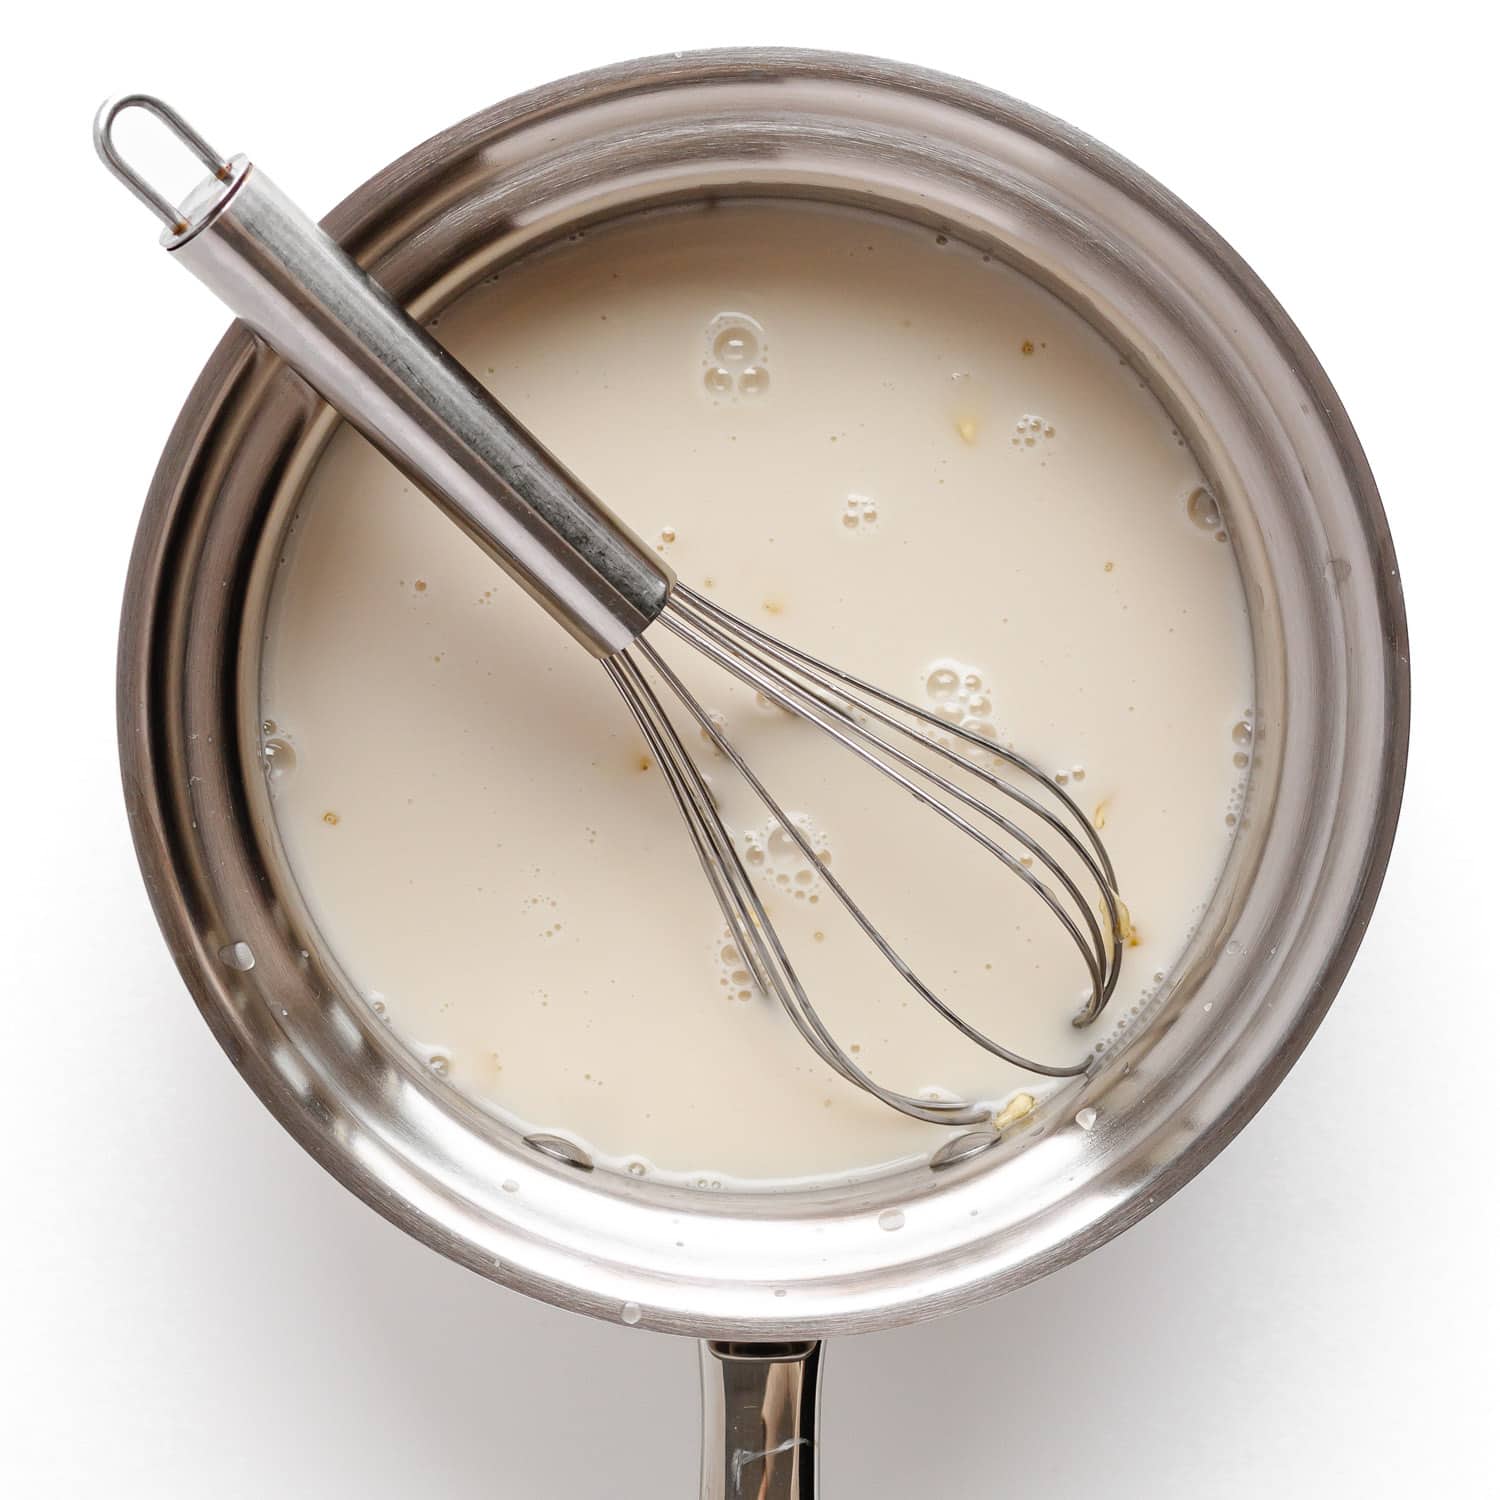
STEP 3: Add in gelatin mixture. Remove the saucepan from the heat and whisk in the softened gelatin mixture until the gelatin has dissolved. Place saucepan over low heat if needed but make sure the mixture is not boiling when you whisk in the gelatin or it could weaken the gelatin protein and your jelly may not set.
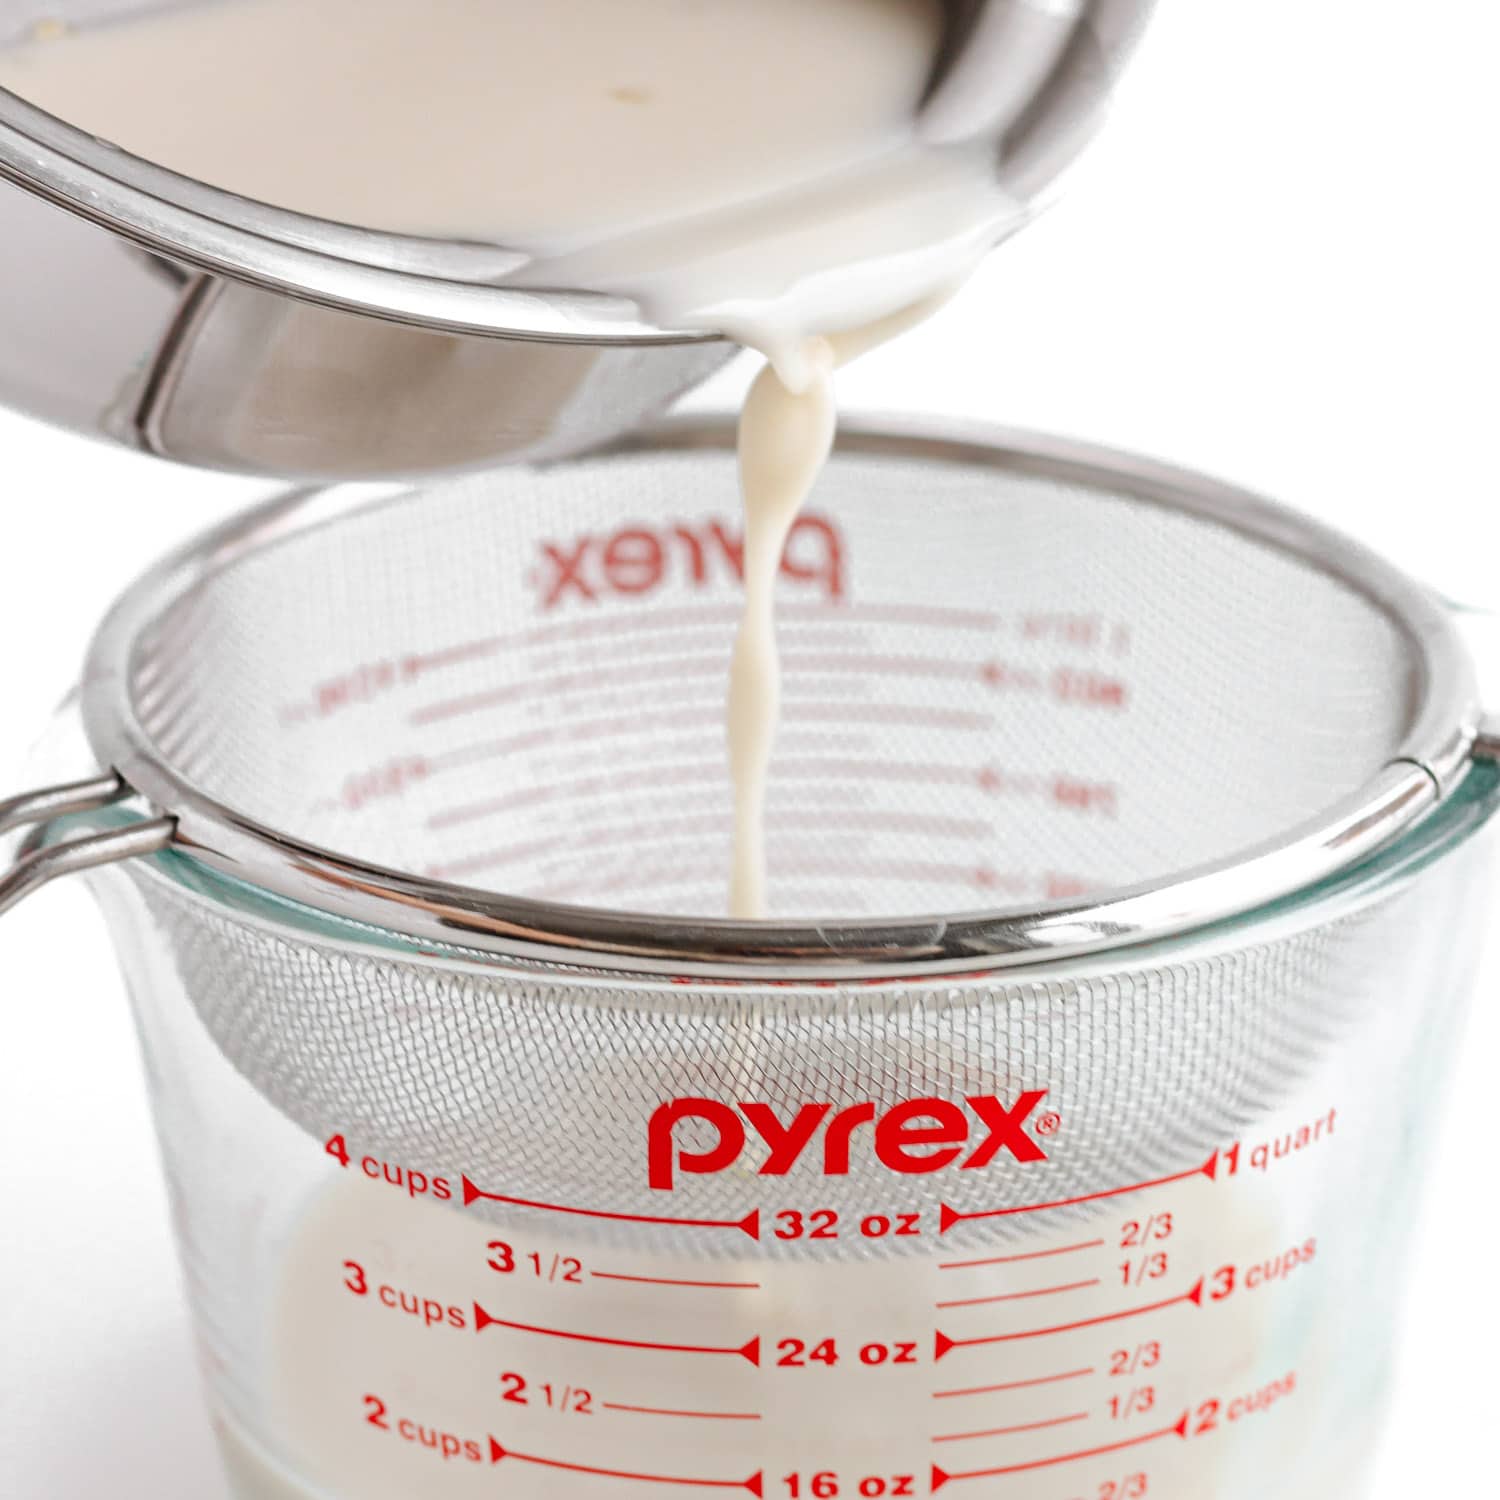
STEP 4: Strain mixture. Pour the mixture through a fine mesh sieve into a glass measuring cup to catch any small lumps of gelatin that didn’t dissolve.
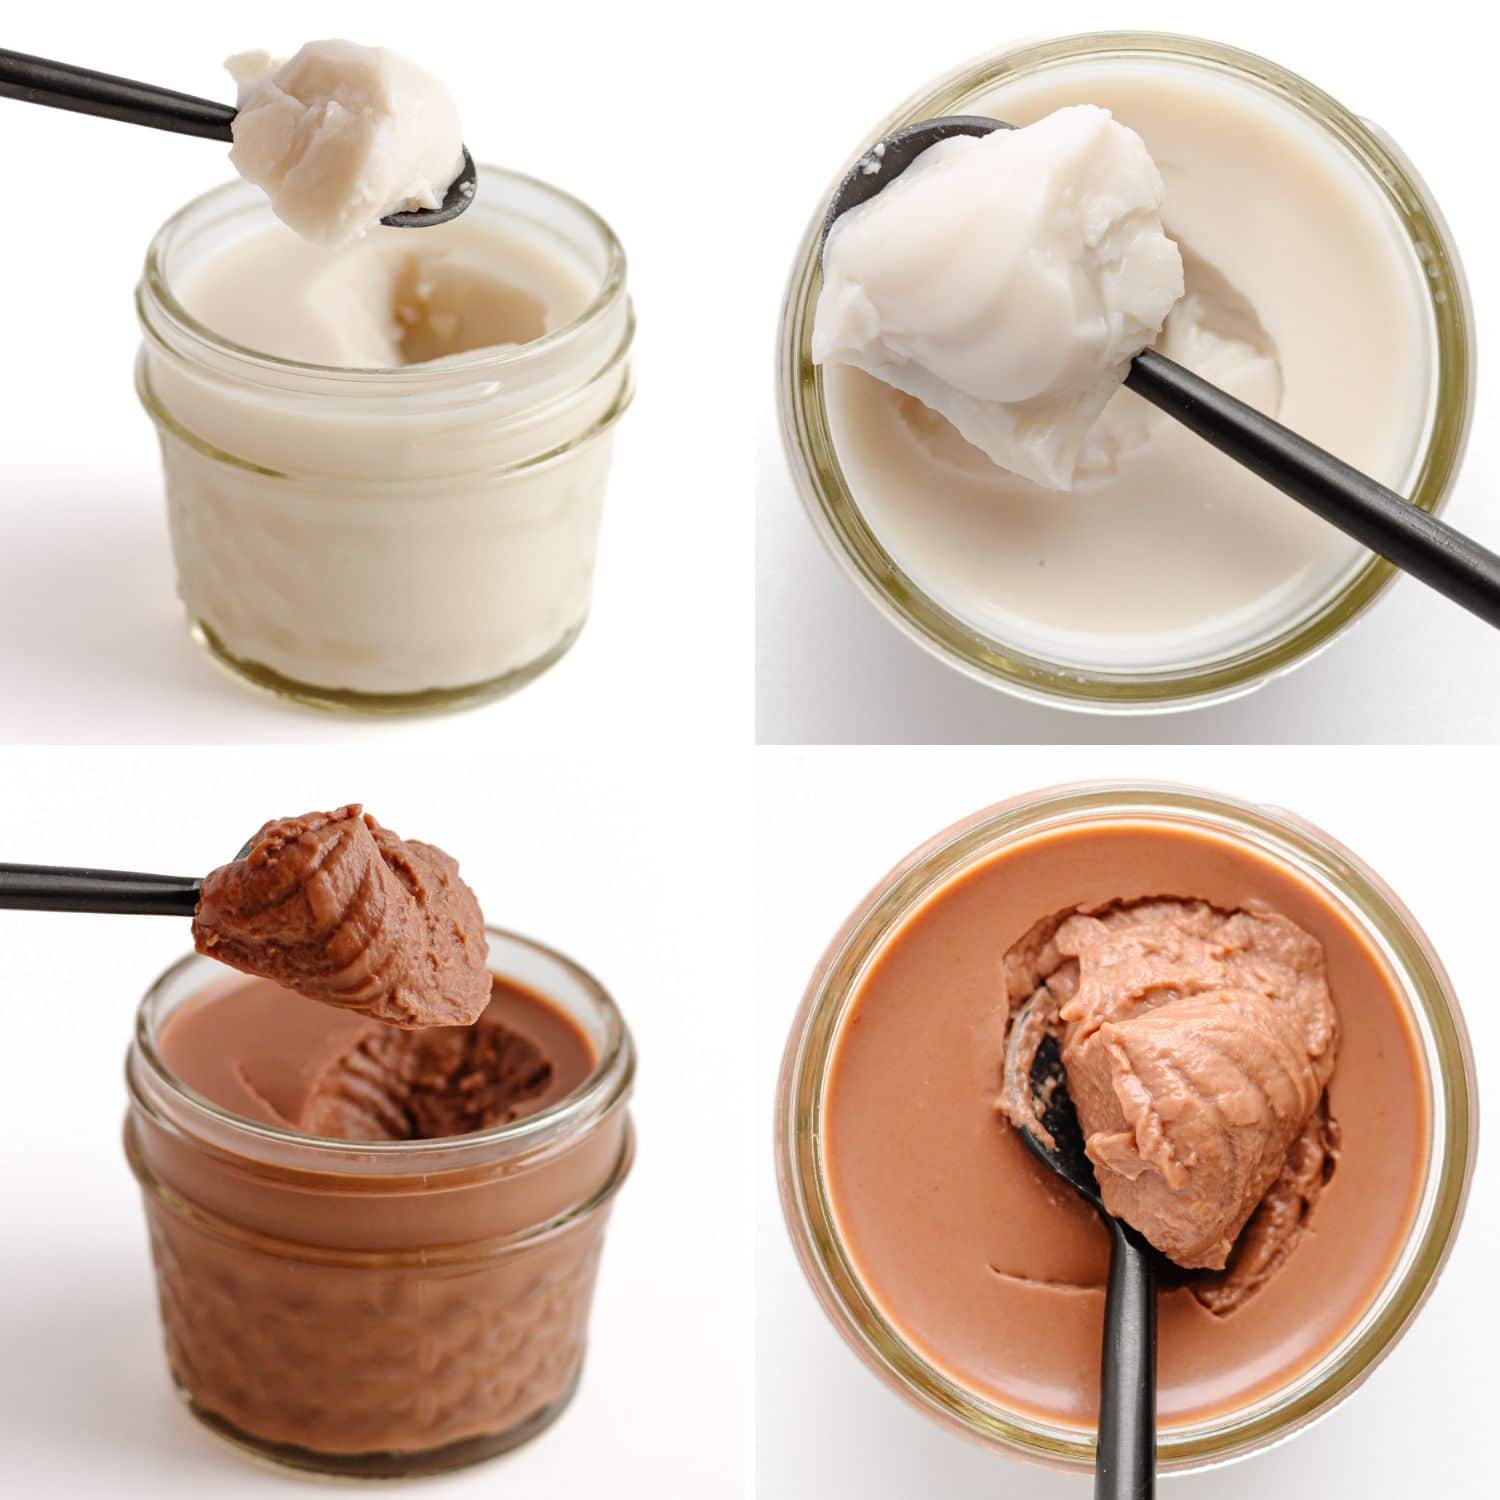
STEP 5: Pour into jars. Divide evenly between 4 small glass jars or serving glasses. I like to use 4-oz glass mason jars. You could also use something larger if you want to leave more room for toppings.

STEP 6: Refrigerate to set. Chill in the fridge until set (about 3-4 hours). Timing will depend on the temperature of your fridge and the depth of the jelly in the jar or glass.
Tip: I like to first chill the jars in the fridge for 1 hour uncovered and then add the lids for the remaining chill time to prevent a hard skin from forming on top. You could also just cover it immediately but you might end up with some watery condensation on top since they are still usually slightly warm when they go into the fridge.
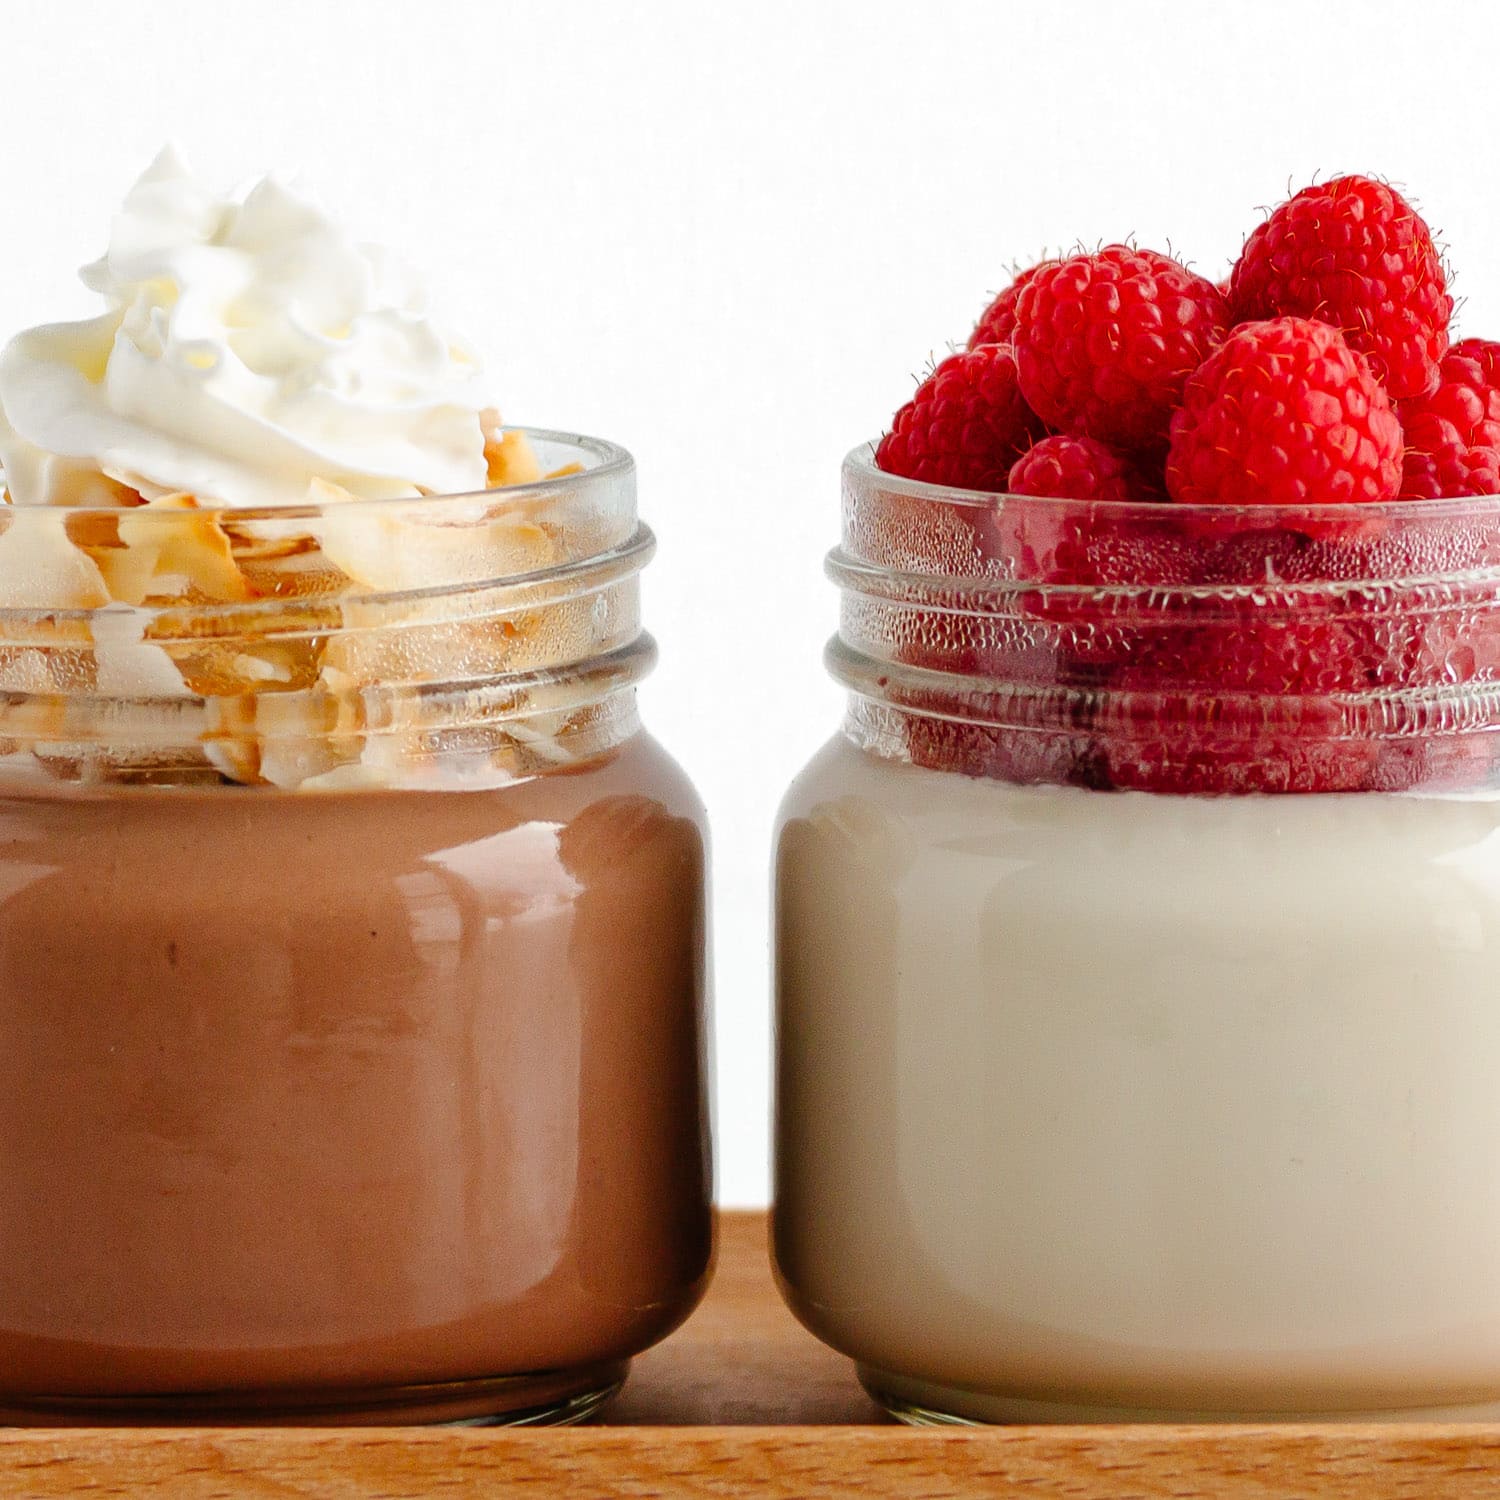
STEP 7: Top and enjoy. Eat as is or add some toppings and enjoy!
Topping Ideas
Serve as is or add your favorite toppings! Here are a few topping ideas:
- Fruit (berries, mango, passion fruit or banana are all delicious with this)
- Toasted coconut flakes
- Whipped cream or coconut whipped cream
- Lime zest
- Chocolate (grated, shavings, mini chocolate chips)
Storage + Meal Prep
Store covered in fridge for up to 5 days. This is a great make ahead treat for meal prep as well.
Helpful Tips
- Make sure you are using gelatin! Don’t accidentally grab powdered collagen – it doesn’t gel!
- Do NOT boil coconut mixture! This may cause it to separate or not set properly.
- Don’t skip the straining step! This will catch any lumps of gelatin that did not dissolve resulting in a smooth coconut jelly.
FAQ
You sure can! You would just need to increase the amount of gelatin since gummies are typically a lot firmer. Use 3 tablespoons of gelatin and pour the mixture into silicone gummy molds. If you like gummies, check out these Healthy Strawberry Gummies as well!
No need to worry – there will be no “beefy” taste in your coconut jelly! The reason the label says “beef gelatin” is because gelatin is a protein derived from the collagen in animal bones and connective tissues (in this case, it is sourced from cows). The gelatin itself is unflavored and tasteless and doesn’t actually contain any beef.
More Gelatin Recipes
Looking for more ways to use that gelatin powder? Here are a few more gelatin recipes to check out:
- Healthy Strawberry Gummies (fun homemade fruit snacks made with real strawberries)
- Mango Jelly (aka homemade mango jello)
- Homemade Bone Broth (this is naturally rich in gelatin but sometimes I like to give it an added boost by adding in a bit of gelatin powder too)
Let me know if you make this coconut jelly recipe and which flavor you choose! Leave me a comment below or tag me on Instagram.
Coconut Jelly (Vanilla & Chocolate)
- Prep Time: 10 min
- Cook Time: 5 min
- Total Time: 15 min (plus chill time)
- Yield: 4 servings 1x
- Category: Dessert, Snack
- Method: Refrigeration, Stovetop
- Cuisine: American, Asian-fusion
Description
This easy Coconut Jelly recipe (aka coconut jello) can be prepped in just 15 minutes! It’s a fun and delicious coconut milk dessert or snack that the whole family will love. The recipe below includes two flavor options (vanilla & chocolate) – which will you choose?
Ingredients
Vanilla Coconut Jelly
- 1 can (13.5-14 oz/ 400 ml) full fat coconut milk, divided
- 1 tablespoon gelatin powder, unflavored & grass-fed
- 2–3 tablespoons honey, to taste
- 1 teaspoon vanilla extract
Chocolate Coconut Jelly
- 1 can (13.5-14 oz / 400ml) full fat coconut milk, divided
- 1 tablespoon gelatin powder, unflavored & grass-fed
- 3–4 tablespoons honey, to taste
- 2 tablespoon cocoa powder (I like to use dutch processed cocoa powder)
- pinch of salt
Instructions
- Bloom gelatin: Pour 1/4 cup of the coconut milk into a small bowl and sprinkle the gelatin over the top. Gently stir together and set aside to let the gelatin “bloom” or rehydrate.
- Heat up remaining ingredients: In a small saucepan, mix together the remaining coconut milk, honey and additional flavor ingredients depending on the version you are making (vanilla coconut jelly = vanilla extract, chocolate coconut jelly = cocoa powder and a pinch of salt). Heat the coconut milk mixture over medium heat, whisking frequently until the honey dissolves and the mixture is hot (but not boiling).
- Whisk in gelatin: Remove the saucepan from the heat and whisk in the softened gelatin mixture until the gelatin has dissolved. Place saucepan over low heat if needed but make sure the mixture is not boiling.
- Strain: Pour the mixture through a fine mesh sieve into a glass measuring cup or bowl to catch any small lumps of gelatin that didn’t dissolve.
- Assemble and chill: Divide evenly between 4 small glass jars or serving glasses. Chill in the fridge until set (about 3-4 hours). Timing will depend on the temperature of your fridge and the depth of the jelly in the jar or glass.
- Serve: Eat as is or add some toppings and enjoy! The coconut jellies can be stored covered in the fridge for up to 5 days.
Notes
- Gelatin Powder: I recommend using a good quality unflavored, grass-fed and pasture-raised powdered gelatin. I use this Great Lakes Gelatin. Vital Proteins Gelatin is another great option. Just make sure that you don’t accidently grab collagen peptides since collagen powder won’t gel.
- Do NOT boil the coconut milk mixture! This may cause it to separate or not set up and gel properly. It needs to be hot enough to dissolve the honey and gelatin but not boiling.
- Jars: I usually pour the jelly mixture into jars. I like to use 4-oz glass mason jars but you could also use larger ones if you want lots of extra room for toppings.
- Chilling Tip: I like to first chill the jars in the fridge for 1 hour uncovered and then add the lids for the remaining chill time to prevent a hard skin from forming on top. If the jellies are covered immediately, you might end up with some watery condensation on top since they are still usually slightly warm when they go into the fridge.
⬇ PIN it for later! ⬇


we really enjoyed these Coconut Jelly recipes – especially the chocolate flavour was encored several times. It’s so easy to make and to keep in the fridge whenever we need a little sweet treat!
I’m so happy you enjoyed this recipe. The chocolate jelly is definitely a delicious one!
These little jellies are so cute. I love individually sized and well portioned desserts. It’s nice to have something sweet and know you’re not overdoing it. I’m making these again for my next large family gathering. We usually do mini cheesecakes but these are easier!
I’m so happy that you enjoyed them! They are fun to dress up with toppings to make them look special for gatherings.
This is great for the kids!! I’ve made the coconut ones with mango because and all eaten in 30 seconds. A keeper! Thanks for the lovely idea!
I’m happy that your kids enjoyed it! Mango definitely pairs really nicely with the vanilla coconut jelly.
I love how fun and delish this is!! A new favorite ay my house!
Yay! That makes me happy to hear!
Do you think this could be processed like regular jellies for long term? Maybe a 15 min water bath ?
Hi! This isn’t the type of jelly that is a preserve like a jam. This is a gelatin dessert like jello so I wouldn’t recommend trying to process it for canning.
I had a really hard time deciding if I liked the chocolate or vanilla more. Both were amazing, so I will go with both. 🙂 Thank you for such an awesome recipe!
You’re welcome! I have a hard time picking a favorite flavor too so I usually just make both.
My daughter and I made the vanilla version and it came out great! Love the level of sweetness and creamy texture.
I’m so happy that you and your daughter loved it!
So refreshing and creamy! Loved the chocolate one particularly. Yum!
You can never go wrong with chocolate! Glad you enjoyed it!
This was my first time making jelly and it was so much easier than anticipated! Absolutely delicious, too!
I’m glad you enjoyed it! Super easy right!
My kids loved this. So easy to make too.
I’m so happy that your kids enjoyed it!